发表于: 2019-10-02 23:51:11
1 864
今天完成的事:
进行任务6-10
明天计划的事:
继续任务6-10
遇到的问题:
暂无
收获:
路由跳转
path:"/home/reg",query: {
status: '1',
}
模板抽离
我们已经学习过了Vue模板的另外定义形式,使用<template></template>。
- <!-- 模板抽离出来 -->
- <template id="home">
- <div>首页</div>
- </template>
- <template id="news">
- <div>新闻</div>
- </template>
然后js里定义路由组件的时候:
- // 1. 定义(路由)组件。
- const Home = { template: '#home' };
- const News = { template: '#news' };
路由嵌套
实际应用界面,通常由多层嵌套的组件组合而成。
比如,我们 “首页”组件中,还嵌套着 “登录”和 “注册”组件,那么URL对应就是/home/login和/home/reg。
- <template id="home">
- <!-- 注意:组件只能有一个根元素,所以我们包装到这个div中 -->
- <div>
- <h2>首页</h2>
- <router-link to="/home/login">登录</router-link>
- <router-link to="/home/reg">注册</router-link>
- <!-- 路由匹配到的组件将渲染在这里 -->
- <router-view></router-view>
- </div>
- </template>
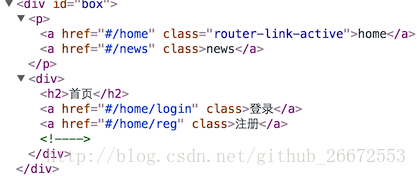
这是访问/home后的模板,其中我们需要把/home/login和/home/reg渲染进来。
完成上面代码后,HTML结构如下图:
- 登录和注册2个组件
- <template id="login">
- <div>登录界面</div>
- </template>
- <template id="reg">
- <div>注册界面</div>
- </template>
- //定义路由组件
- const Login = { template: '#login' };
- const Reg = { template: '#reg' };
3.定义路由
- // 2. 定义路由
- const routes = [
- { path: '/', redirect: '/home' },
- {
- path: '/home',
- component: Home,
- children:[
- { path: '/home/login', component: Login},
- { path: '/home/reg', component: Reg}
- ]
- },
- { path: '/news', component: News}
- ]
1. 父组件向子组件进行传值
父组件:
<template>
<div>
父组件:
<input type="text" v-model="name">
<br>
<br>
<!-- 引入子组件 -->
<child :inputName="name"></child>
</div>
</template>
<script>
import child from './child'
export default {
components: {
child
},
data () {
return {
name: ''
}
}
}
</script>
子组件:
<template>
<div>
子组件:
<span>{{inputName}}</span>
</div>
</template>
<script>
export default {
// 接受父组件的值
props: {
inputName: String,
required: true
}
}
</script>
2. 子组件向父组件传值
子组件:
<template>
<div>
子组件:
<span>{{childValue}}</span>
<!-- 定义一个子组件传值的方法 -->
<input type="button" value="点击触发" @click="childClick">
</div>
</template>
<script>
export default {
data () {
return {
childValue: '我是子组件的数据'
}
},
methods: {
childClick () {
// childByValue是在父组件on监听的方法
// 第二个参数this.childValue是需要传的值
this.$emit('childByValue', this.childValue)
}
}
}
</script>
父组件:
<template>
<div>
父组件:
<span>{{name}}</span>
<br>
<br>
<!-- 引入子组件 定义一个on的方法监听子组件的状态-->
<child v-on:childByValue="childByValue"></child>
</div>
</template>
<script>
import child from './child'
export default {
components: {
child
},
data () {
return {
name: ''
}
},
methods: {
childByValue: function (childValue) {
// childValue就是子组件传过来的值
this.name = childValue
}
}
}
</script>
3. 非父子组件进行传值
非父子组件之间传值,需要定义个公共的公共实例文件bus.js,作为中间仓库来传值,不然路由组件之间达不到传值的效果。
公共bus.js
//bus.js
import Vue from 'vue'
export default new Vue()
组件A:
<template>
<div>
A组件:
<span>{{elementValue}}</span>
<input type="button" value="点击触发" @click="elementByValue">
</div>
</template>
<script>
// 引入公共的bug,来做为中间传达的工具
import Bus from './bus.js'
export default {
data () {
return {
elementValue: 4
}
},
methods: {
elementByValue: function () {
Bus.$emit('val', this.elementValue)
}
}
}
</script>
组件B:
<template>
<div>
B组件:
<input type="button" value="点击触发" @click="getData">
<span>{{name}}</span>
</div>
</template>
<script>
import Bus from './bus.js'
export default {
data () {
return {
name: 0
}
},
mounted: function () {
var vm = this
// 用$on事件来接收参数
Bus.$on('val', (data) => {
console.log(data)
vm.name = data
})
},
methods: {
getData: function () {
this.name++
}
}
}
</script>


评论