发表于: 2019-04-28 23:30:03
3 905
今天完成的事:
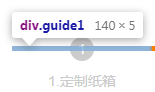
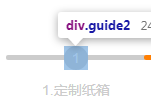
一、做完橙色的进度条

有好几种方法
1、最简单的直接切图
2、分割排列,分三个部分画上去

3、用absolute和z-index
二、学习给input type=radio换样式
1、学习checked选择器
类似于hover,不过checked只试用于input标签,表示选中之后的样式
2、after伪元素
:after 伪元素在元素之后添加内容。
这个伪元素允许创作人员在元素内容的最后面插入生成内容。默认地,这个伪元素是行内元素,不过可以使用属性 display 改变这一点。
遇到的问题:
一、制作特色的radio
首先给input关联一个label
<label for="input1">
    <input class="test" type="radio" name="radio" id="input1">
</label>
这样点击label就相当于点击了input
然后给input添加checked选择器,改变选中后的样式
.test:checked {
       background-color: #1d7ad9;
    width: 20px;
    height: 50px;
}
结果发现只有大小变了,颜色色没变
查找资料:https://segmentfault.com/a/1190000009451568

在input后面添加一个span元素,作为radio的小按钮
<label for="input1" class="label1">
    <input class="test" type="radio" name="radio" id="input1">
    <span class="radioinput"></span>选择
</label>
编辑span的样式
.radioinput {
       display: inline-block;
    width: 20px;
    height: 20px;
    background-color: #3c3c3c;
}
得出效果
使用checked添加选中效果
.test:checked + .radioinput {
    background-color: #1d7ad9;
}
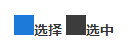
最后调整,插入图片
.test:checked + .radioinput {
    background: url(./images/t10/radio.png) no-repeat;
}

完成
疑问:没有使用教程里说的after和position,不知道这么做有什么弊端?
个人理解,本质上after跟span没有什么区别,只不过一个写在html,一个写在css,不知道对不对
明天计划:
完善任务10,学习任务11


评论