发表于: 2018-11-02 16:37:09
2 706
今天完成的事情:昨天了解并接受了任务6,今天把任务6的页头和页脚部分做完了。完成了任务2的任务总结和深度思考
<!DOCTYPE html>
<html lang="en">
<head>
    <meta charset="UTF-8">
    <title>task06</title>
    <meta name="viewport" content="width=device-width, initial-scale=1">
    <link rel="stylesheet" href="task06.css">

</head>
<body>
    <header class="heade">
        <div class="top">
            <div class="top-3"></div>
            <div class="top-one">
                <div class="top-1">
                    <span>找雇主</span>
                </div>
                <div class="top-2">
                    <span>找护工</span>
                </div>
            </div>
            <div class="top-location">
                <img src="task06-toplocation.png" height="44" width="42"/>
            </div>
        </div>
        <div class="two">
            <div class="two-1">
                <select>
                    <option value="所在地">所在地</option>
                    <option value="郑州">郑州</option>
                    <option value="北京">北京</option>
                </select>
            </div>
            <div class="two-1">
                <select>
                    <option value="食宿">食宿</option>
                    <option value="是">是</option>
                    <option value="否">否</option>
                </select>
            </div>
            <div class="two-2">
                <select>
                    <option value="病人情况">病人情况</option>
                    <option value="无法自理">无法自理</option>
                    <option value="可以行动">可以行动</option>
                </select>
            </div>
        </div>
    </header>
    <main class="content">
        <div class="content-main">

        </div>
    </main>
    <footer class="footer">
        <div class="foot">
            <div class="foot-home">
                <img src="task06-home.png" height="40" width="46"/>
                <span>首页</span>
            </div>
            <div class="foot-write">
                <img src="task06-write.png" height="94" width="94"/>
            </div>
            <div class="foot-me">
                <img src="task06-me.png" height="41" width="42"/>
                <span>我的</span>
            </div>

        </div>
    </footer>

</body>
</html>
body{
    margin: 0;
}
.heade{
    position:fixed; top:0;
    width: 100%;
}
.top{
    width: 100%;
    height: 60px;
    background-color: #4CB4C3;
    display: flex;
    align-items: center;
    justify-content: space-between;
}
.top-3{
    height: 60px;
    width: 2em;
}
.top-one{
    height: 50px;
    width: 50vw;
    background-color: #4296A3;
    border-radius: 10px;
    display: flex;
    flex-direction: row;
    align-items: center;
    text-align: center;

}
.top-1{
    height: 50px;
    line-height: 50px;
    color: white;
    width: 50vw;
    font-size: 20px;
}
.top-2{
    height: 50px;
    line-height: 50px;
    background-color:  white;
    width: 50vw;
    border-radius: 10px;
    font-size: 20px;
    color: #4CB4C3;
}
.top-location{
    height: 60px;
    width: 72px;
    display: flex;
    justify-content: center;
    align-items: center;
}
.top-location img{
    height: 30px;
    width: 28px;

}
.two{
    height: 60px;
    display: flex;
    align-items: center;
    text-align: center;
    border-bottom: 1px solid #dddddd;
}
.two-1{
    height: 50px;
    flex-grow: 1;
    color: #dddddd;
    font-size: 25px;
    text-align: center;
    border-right: 1px solid #dddddd;

}
.two-1 select{
    height: 50px;
    outline: none;
    border: none;
    -webkit-appearance: none;
    background: url("task06-two.png") no-repeat scroll right center transparent;
    width: 30vw;
    text-align:center;
    text-align-last: center;
    color: #dddddd;
}
.two select option{
    text-align: center;
}
.two-2{
    height: 50px;
    flex-grow: 1;
    color: #dddddd;
    font-size: 25px;
    text-align: center;
}
.two-2 select{
    height: 50px;
    outline: none;
    border: none;
    -webkit-appearance: none;
    background: url("task06-two.png") no-repeat scroll right center transparent;
    width: 30vw;
    text-align:center;
    text-align-last: center;
    color: #dddddd;
}

.footer{
    height: 60px;
    position:fixed; bottom:0;
    width: 100%;
}
.foot{

    height: 60px;
    display: flex;
    justify-content: center;
    background-color: #F6F9FA;
}
.foot-home {
    height: 60px;
    width: 30%;
    display: flex;
    align-items: center;
    flex-direction: column;
}
.foot-home img{
    height: 25px;
    width: 30px;
    padding-top: 10px;
}
.foot-home span{
    font-size: 5px;
    color: #4CB4C3;
    padding-top: 5px;
}


.foot-write{
    height: 60px;
    display: flex;
    align-items: center;
}
.foot-me{
    height: 60px;
    width: 30%;
    display: flex;
    align-items: center;
    flex-direction: column;
}

.foot-write img{
    height: 50px;
    width: 50px;
}
.foot-me img{
    height: 24px;
    width: 25px;
    padding-top: 10px;
}
.foot-me span{
    font-size: 5px;
    color: #979797;
    padding-top: 5px;

}
.content{
    position: fixed;
    overflow: auto;
    top: 120px;
    bottom: 60px;
    width: 100%;
    background:transparent url("sprite.png") no-repeat scroll 0 0px;
}
.content-main{
    height: 80px;
    width: 100%;
    border-bottom: 1px solid #dddddd;
}

.task06-riqi {
    width: 24px;
    height: 24px;
    background-position: -0px -0px;
}

.task06-location {
    width: 19px;
    height: 23px;
    background-position: -0px -24px;
}
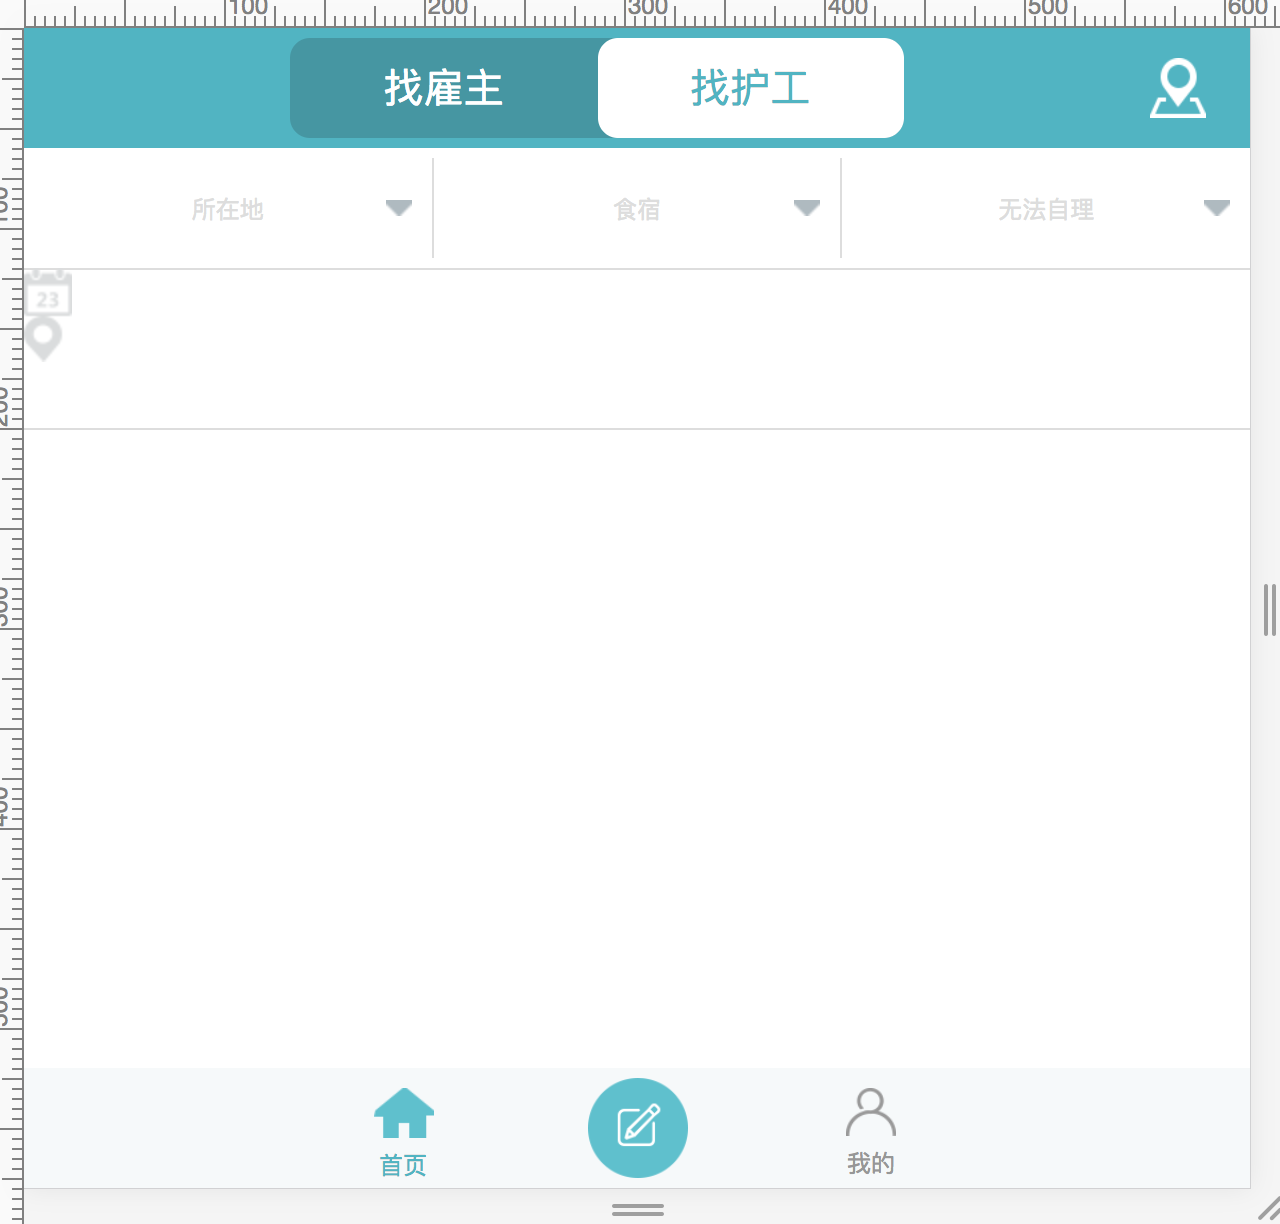
任务完成界面如图所示
明天计划的事情: 完成任务6,中间的雪碧图还要向各位师兄请教
遇到的问题:
1,首先一点是在选择建立下拉框的时候,如图所示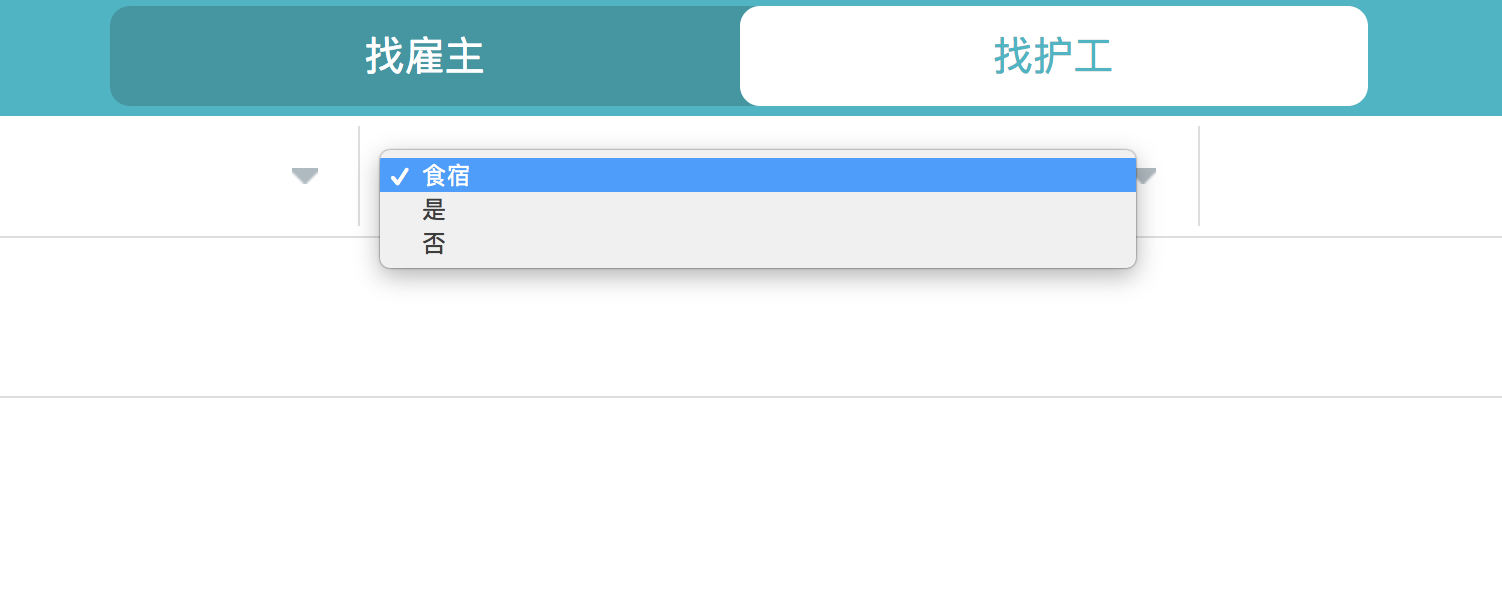
下拉框的内容无法居中,我自己尝试过在select加上属性
text-align:center;
text-align-last: center;
但是其中的内容依然无法居中,这方面有待解决还需向师兄们请教
2,其中制作雪碧图的时候,对雪碧图方面还有点疑问,有点无从下手的感觉,自己看过相关文档,但是对于其中的一些属性还有点疑问。这方面也是需要我自己下功夫的地方。
收获:通过今天的学习,第一次接触下拉框,对这方面还有点疑问需要去解决,包扩其中的一些属性呀,居中问题还需要解决
任务2总结
通过任务2的学习,了解了github的作用,以及怎么样在上面创建自己的项目并访问他,并且还学会了将任务1 的代码成功上传至上面并且向他人展示,并且配置了nginx,
任务2 的深度思考
1. 如何使用 svn 将代码上传至 github?
一、创建代码仓库,用来存储客户端所上传的代码
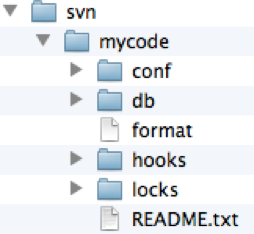
我先在 / User/apple 目录下新建一个 svn 目录,以后可以在 svn 目录下创建多个仓库目录,打开终端,创建一个 mycode 仓库,输入指令:svnadmin create /Users/apple/svn/mycode
指令执行成功后,会发现硬盘上多了个 / Users/apple/svn/mycode 目录,目录结构如下:
注:这地方出现路径的错误可以通过
输入 sudo xcode-select -switch /Applications/Xcode.app/Contents/Developer 命令
password 是你的登录密码。
 二、配置 svn 的用户权限
主要是修改 / svn/mycode/conf 目录下的三个文件
1. 打开 svnserve.conf,将下列配置项前面的 #和空格都去掉
1 2 3 4 5 6 | # anon-access = read # auth-access = write
# password-db = passwd
# authz-db = authz |
anon-access = read 代表匿名访问的时候是只读的,若改为 anon-access = none 代表禁止匿名访问,需要帐号密码才能访问
2. 打开 passwd,在 [users] 下面添加帐号和密码
[users]
mj=123
jj=456
帐号是 mj,密码是 123
3. 打开 authz,配置用户组和权限
我们可以将在 passwd 里添加的用户分配到不同的用户组里,以后的话,就可以对不同用户组设置不同的权限,没有必要对每个用户进行单独设置权限。
在 [groups] 下面添加组名和用户名,多个用户之间用逗号 (,) 隔开
[groups]
topgroup=mj,jj
说明 mj 和 jj 都是属于 topgroup 这个组的,接下来再进行权限配置。
使用 [/] 代表 svn 服务器中的所有资源库
[/]
@topgroup=rw 上面的配置说明 topgroup 这个组中的所有用户对所有资源库都有读写 (rw) 权限,组名前面要用 @
如果是用户名,不用加 @,比如 mj 这个用户有读写权限
[/]
mj=rw
至于其他精细的权限控制,可以参考 authz 文件中的其他内容
4. 启动 svn 服务器
前面配置了这么多,最关键还是看能否正常启动服务器,若启动不来,前面做再多工作也是徒劳。
在终端输入下列指令:svnserve -d -r /Users/apple/svn
或者输入:svnserve -d -r /Users/apple/svn/mycode
没有任何提示就说明启动成功了
5. 关闭 svn 服务器
如果你想要关闭 svn 服务器,最有效的办法是打开实用工具里面的 “活动监视器”
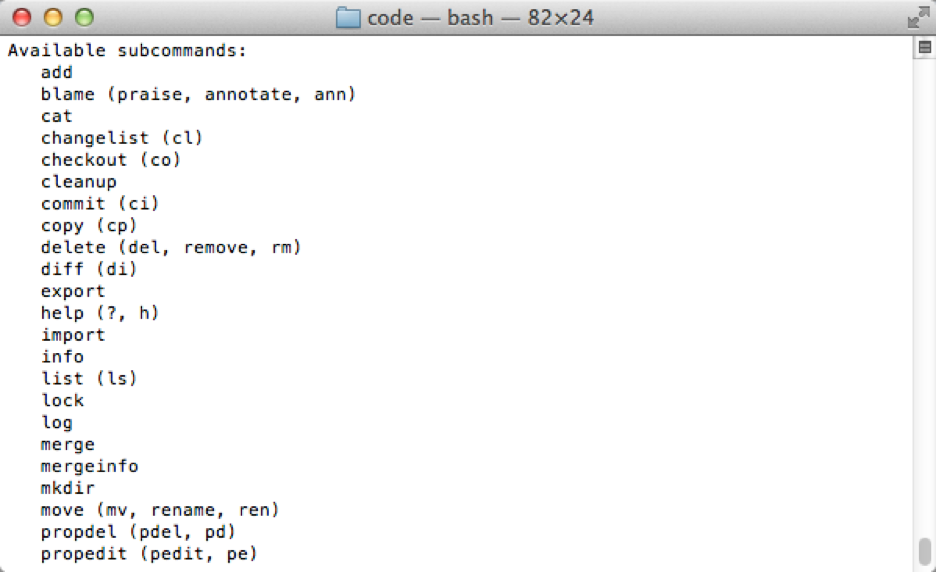
这里列出一大堆 svn 指令,后面括号中的内容的一般代表着指令的简称,比如我们可以用 svn ci 代替 svn commit,用 svn co 代替 svn checkout
注:首次配置完先关闭 svn 服务器再进行数据的上传和下载操作。
综合上述,我们就可以轻松搭建 svn 服务器环境了
三、使用 svn 客户端功能
1. 从本地导入代码到服务器 (第一次初始化导入)
在终端中输入
svn import /Users/apple/Documents/eclipse_workspace/weibo svn://localhost/mycode/weibo --username=mj --password=123 -m "初始化导入"
我解释下指令的意思:将 / Users/apple/Documents/eclipse_workspace/weibo 中的所有内容,上传到服务器 mycode 仓库的 weibo 目录下,后面双引号中的 "初始化导入" 是注释
注:apple 是用户名
2. 从服务器端下载代码到客户端本地
在终端中输入 svn checkout svn://localhost/mycode --username=mj --password=123 /Users/apple/Documents/code
我解释下指令的意思:将服务器中 mycode 仓库的内容下载到 / Users/apple/Documents/code 目录中
注:localhost(本地服务器 IP 地址)可以替换成你本地服务器的 IP 地址。当你和别人同用一个 svn 时,你可以输入你要进行数据请求的服务器的 IP 地址。
3. 提交更改过的代码到服务器
在步骤 2 中已经将服务器端的代码都下载到 / Users/apple/Documents/code 目录中,现在修改下里面的一些代码,然后提交这些修改到服务器
1> 打开终端,先定位到 / Users/apple/Documents/code 目录,输入:cd /Users/apple/Documents/code
2> 输入提交指令:svn commit -m "修改了 main.m 文件"
这个指令会将 / Users/apple/Documents/code 下的所有修改都同步到服务器端,假如这次我只修改了 main. 文件
可以看到终端的打印信息:
Sending weibo/weibo/main.m
Transmitting file data .
Committed revision 2.
4. 更新服务器端的代码到客户端
这个应该是最简单的指令了,在终端中定位到客户端代码目录后,比如上面的 / Users/apple/Documents/code 目录,然后再输入指令:svn update
2.使用git上传代码
首先注册一个github账号,然后从git官网(https://git-scm.com/)下载git工具安装。安装完成后,在本地新建一个文件夹用来存放我们所写的代码,如图所示是我创建的文件夹目录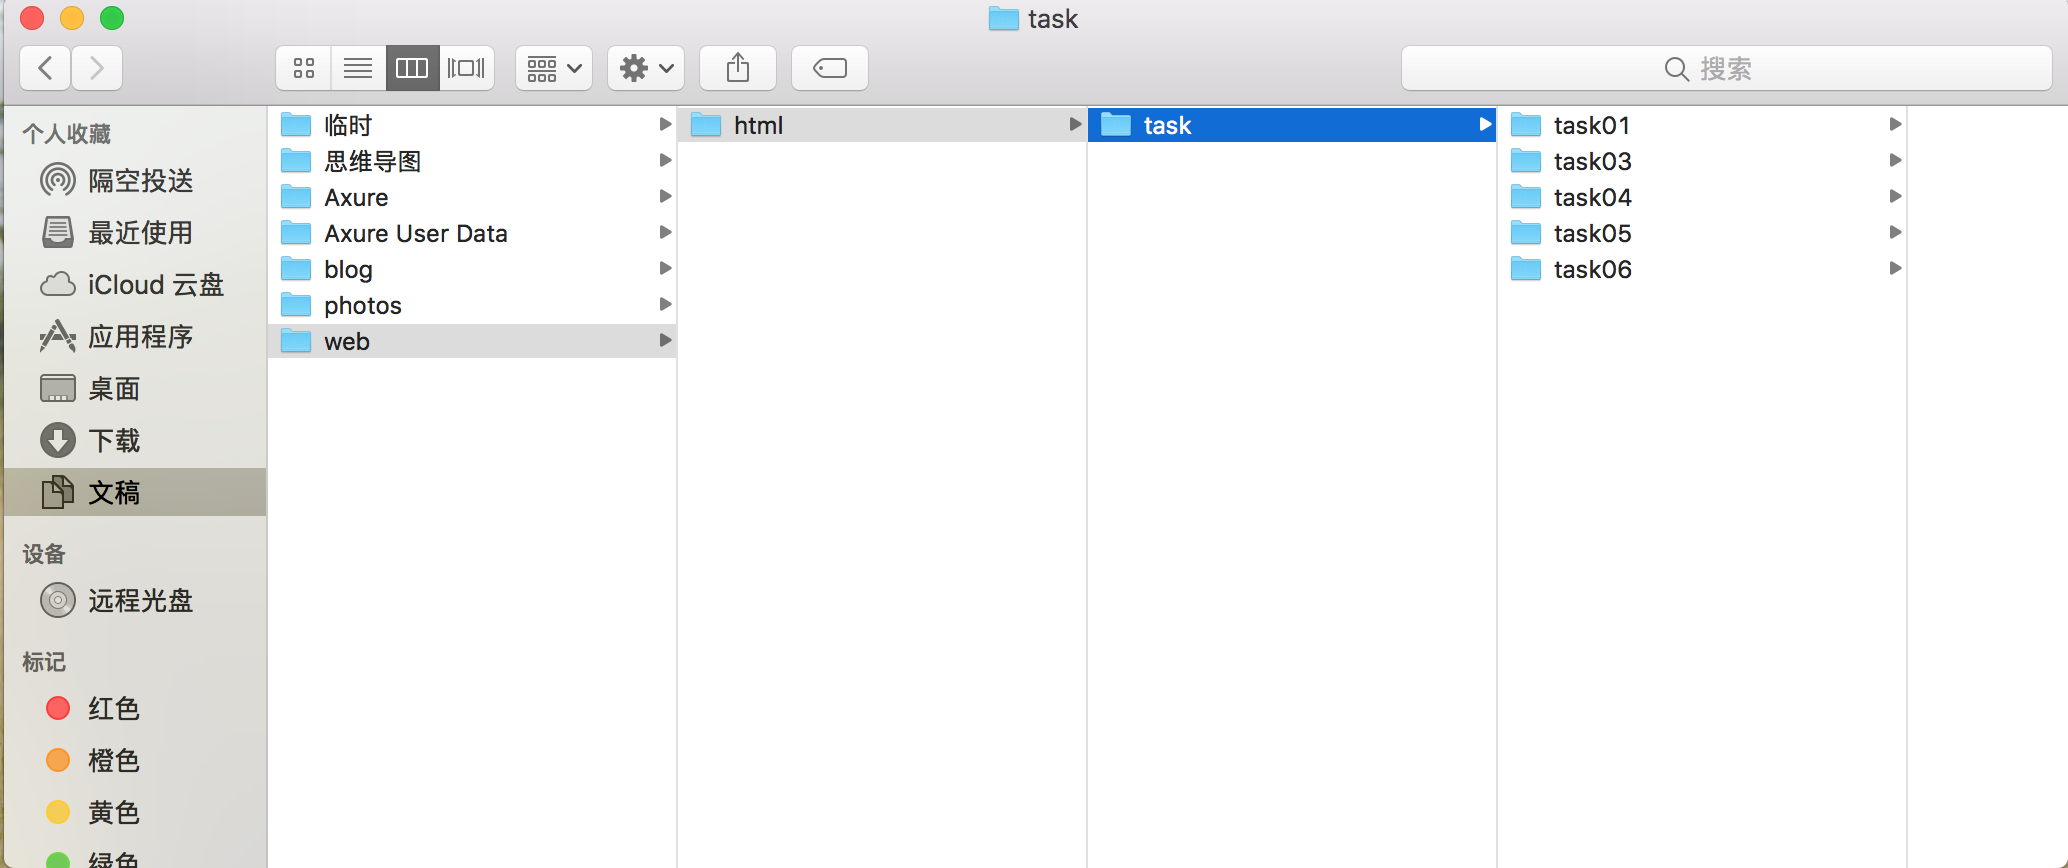
然后的话打开终端,这里打开终端要从web所在的文件夹打开,然后进入github网站,新建一个仓库名称用来存放我们的代码
在本地终端窗口,先执行
git init
初始化git,接下来依次执行
git status
git remote add origin github.com/Wa-Fe/task
wa-fe为自己仓库的地址,
接下来就是上传自己代码了
依次执行
git add .
git commit -m "first commit"
git push -u origin master
代码上传成功
wangyalongdeMacBook-Pro:web wangyalong$ git add .
wangyalongdeMacBook-Pro:web wangyalong$ git commit -m "first commit"
[master 3325e12] first commit
2 files changed, 2 insertions(+), 3 deletions(-)
wangyalongdeMacBook-Pro:web wangyalong$ git push -u origin master
Enumerating objects: 13, done.
Counting objects: 100% (13/13), done.
Delta compression using up to 4 threads
Compressing objects: 100% (5/5), done.
Writing objects: 100% (7/7), 512 bytes | 512.00 KiB/s, done.
Total 7 (delta 4), reused 0 (delta 0)
remote: Resolving deltas: 100% (4/4), completed with 4 local objects.
To github.com:Wa-Fe/css.git
bd415c1..3325e12 master -> master
Branch 'master' set up to track remote branch 'master' from 'origin'.
这样显示就是代码上传成功了。
3,svn 和 git 有什么区别?
svn初期配置稍显麻烦,没有git方便,而且git用户基数大,使用人多,出现问题容易解决。后期上传git比较简单。
4. 如何利用 github 搭建自己的个人网站?
进入刚刚我们搭建的仓库,点击settings,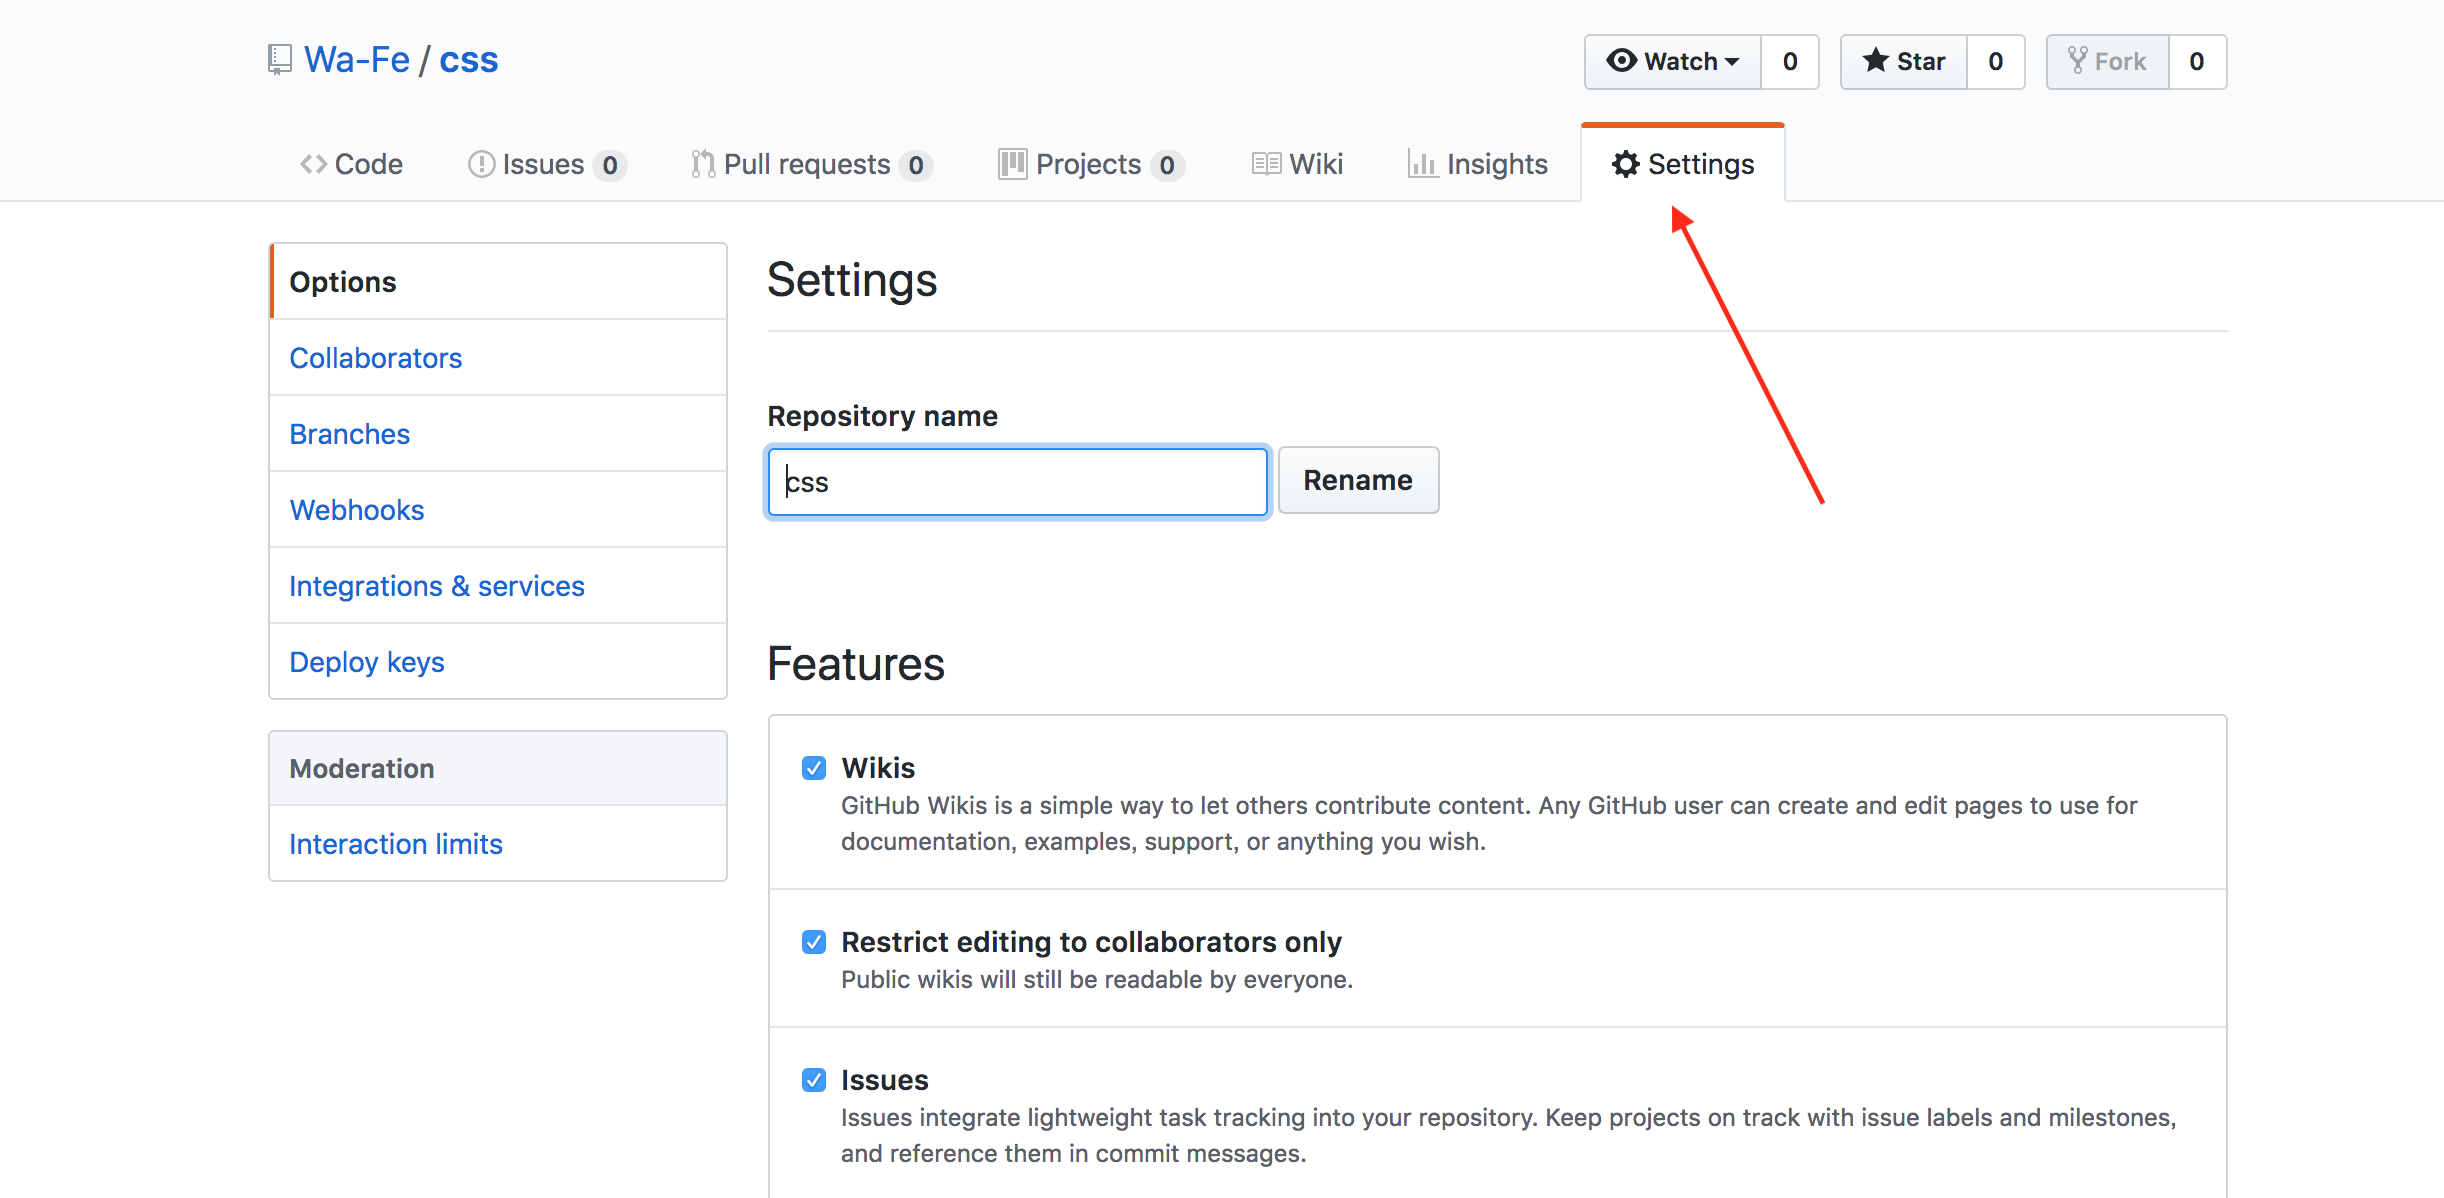
拉到最下方,
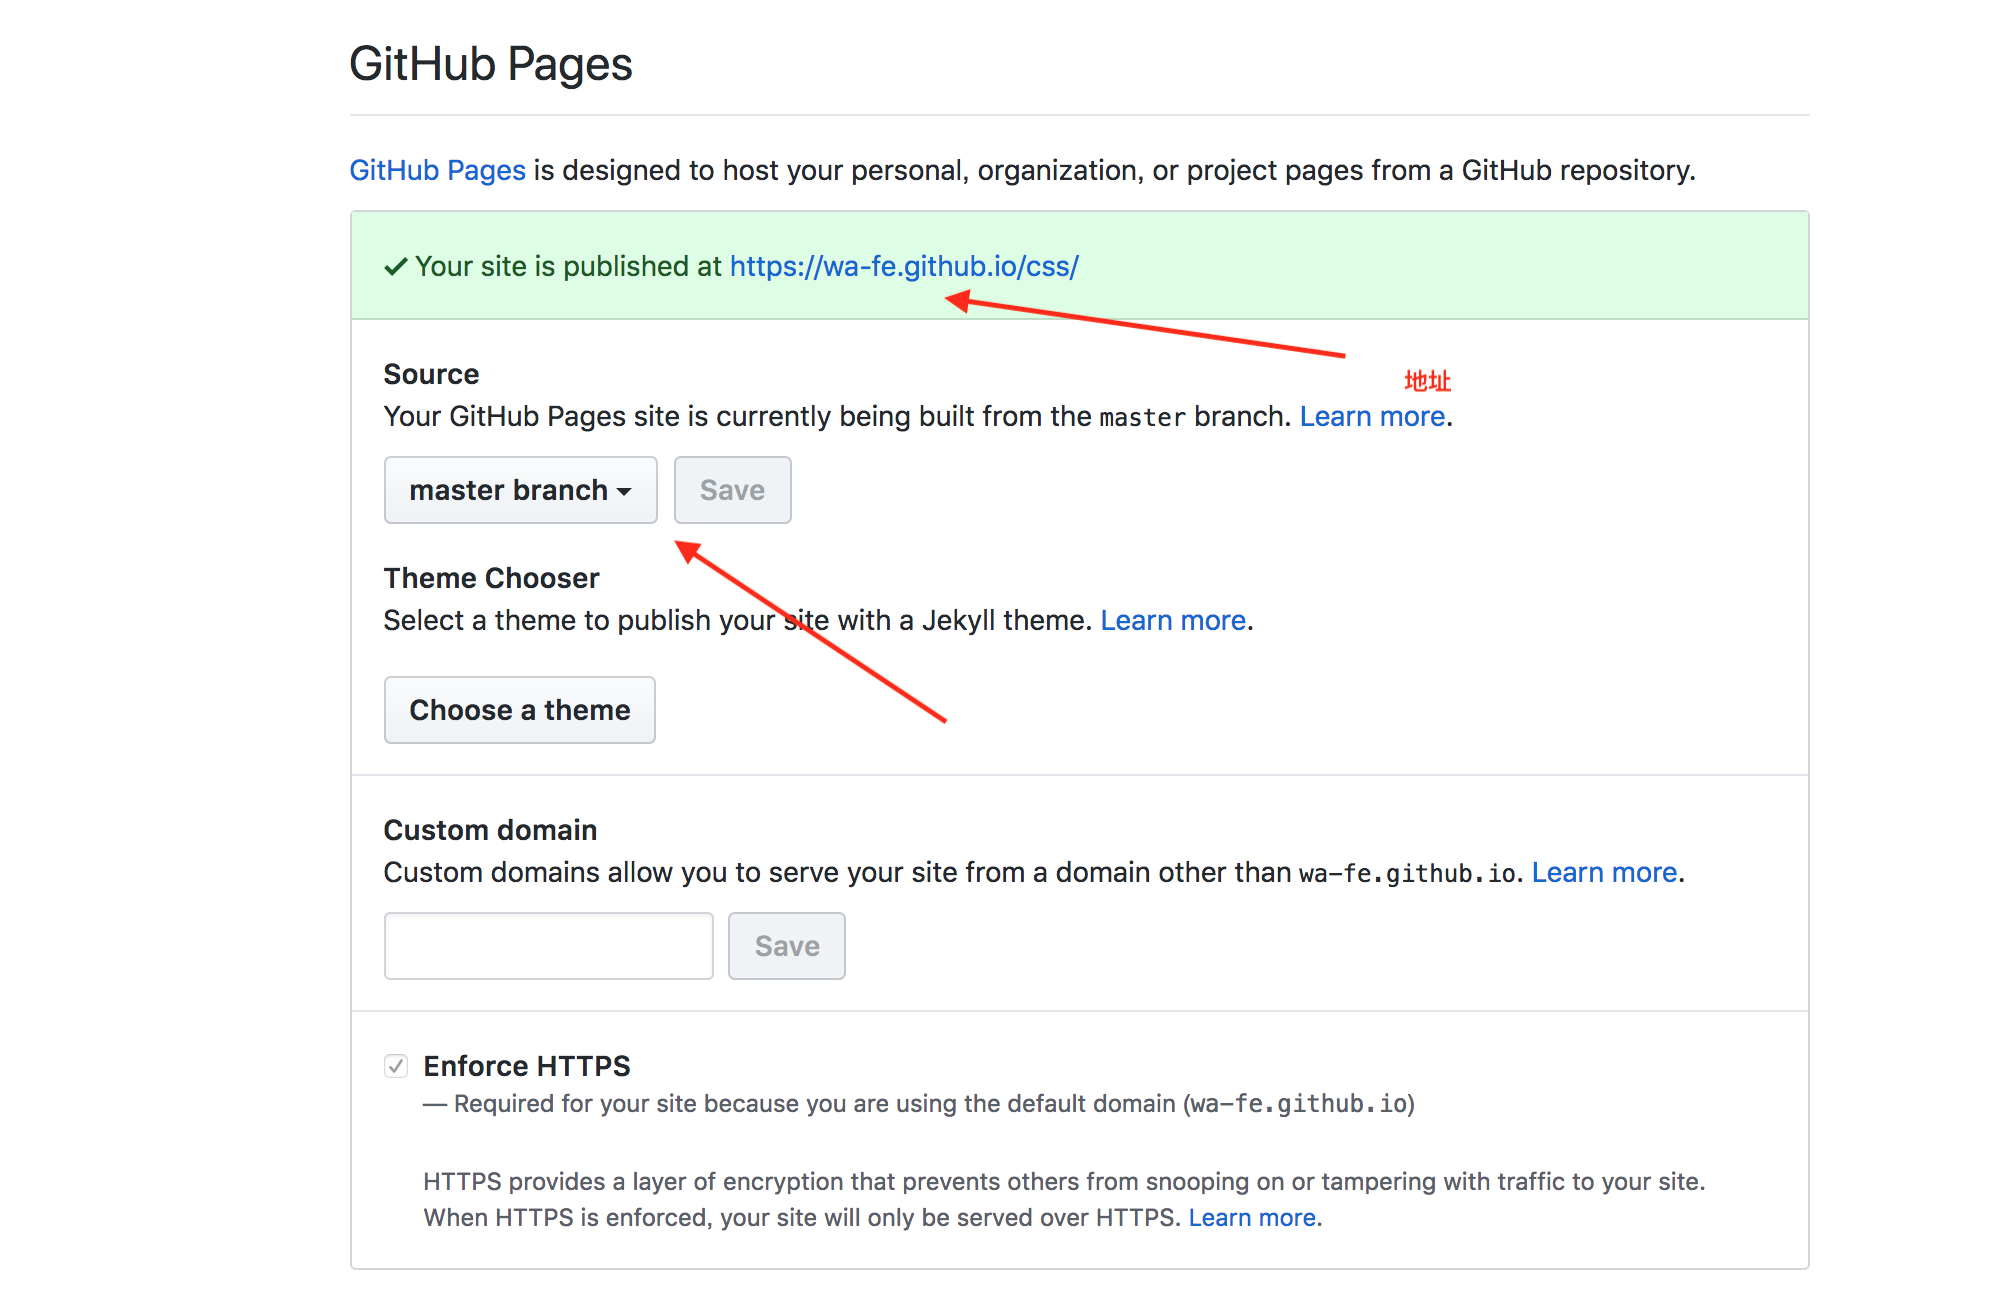
点击master branch,再次点击save出现地址。
5,如何配置 nginx,实现在手机上查看页面?
因为自己用的是mac系统,所以以此系统为例
使用 ruby 安装 HomeBrew(mac 系统已自带 ruby 了)
ruby -e "$(curl -fsSL https://raw.github.com/Homebrew/homebrew/go/install)"
,然后使用brew install nginx安装nginx ,
最后启动nginx,
sudo nginx打开浏览器,输入http://localhost:8080。显示 welcome to nginx表示成功。
6. 如何将代码部署至自己的服务器?
这就比较简单了,依次执行
git add .
git commit -m "first commit"
git push -u origin master
就可以了


评论