发表于: 2018-04-25 23:57:48
1 709
今天完成的事情: 了解Spring MVC 参数绑定,大致了解了后端数据如何通过Controller来与前端交互.
Spring 参数绑定:
1.spring参数绑定过程
1. 从 客户端 请求 Key/value 数据,经过 参数绑定 ,将 Key/value 数据绑定到 controller 方法的 形参上
2. spring MVC中,接受页面提交的数据是通过方法的形参来接收的,而不是在 controller 类定义的成员变量接收
*   处理器适配器调用 springMVC 提供的 参数绑定组件 将 key/value 数据转换成 controller 方法的 形参.
*   参数绑定组件: 在 springMVC 早期版本使用ProperEditor(只能对字符串传成java对象)
*   后期使用 converter (进行任意类型的传换)
*   springmvc 提供了很多converter(转换器)
*   在特殊情况下需要自定义converter
*   比如:对日期的数据绑定需要自定义converter
参数绑定默认支持的类型:
1. 直接在 controller 方法形参上定义下边类型的对象,就可以使用这些对象. 在参数绑定的过程中,如果遇到下边类型直接进行绑定.
* a. HttpServletRequest 通过request对象获取请求信息
* b. HttpServletResponse 通过response处理响应信息
* c. HttpSession 通过session对象,得到session存放的对象
* d. Model/ModelMap
*       - Model 是一个接口
*       - ModelMap 是一个接口的实现
*       作用: 将model数据填充到request域.
/* 商品信息编辑 */
@RequestMapping(value = "/editItems", method = {RequestMethod.GET,RequestMethod.POST})
public String editItems(Model model, Integer id) throws Exception{
    //调用service根据商品id查询商品信息
    ItemsCustom itemsCustom = itemsService.findItemsById(id);

    //通过形参中的model将model数据传到页面
    //相当于modelAndView.addObject方法
    model.addAttribute("itemsCustom", itemsCustom);

    return "items/editItems";
}
参数绑定 简单类型:
1. 通过 @RequestParam 对 简单类型 的参数进行绑定
* - 如果不使用 @RequestParam, 要求 request传入参数名称 和 controller方法 的 形参 必须一致,才能绑定成功
* - 如果使用 @RequestParam, 不用限制 request 传入参数的名称和 controller方法的形参一致.
* - 通过 required属性 指定参数是否必须传入,如果设置为true,又没有传入参数,会报错: Required Integer parameter 'id' is not present
示例:
@RequestMapping(value = "/editItems2", method={RequestMethod.POST,RequestMethod.GET})
//@RequestParam 里指定request 传入的参数名称和形参绑定,将id与items_id绑定
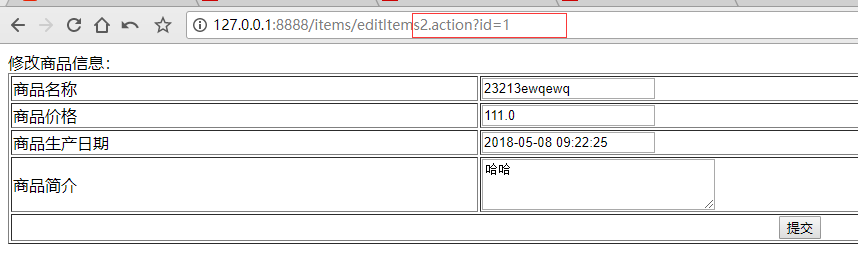
/* 正确的访问url http://localhost:8089/items/editItems2.action?id=1 会传入id值 */
/* 通过 requited属性来指定参数是否必须传入, true, defaultValue为指定默认值,不设置defaultValue又不传入id会报错 */
public String editItems2(Model model, @RequestParam(value="id",required=true,defaultValue = "1") Integer items_id) throws Exception{
//调用service根据商品id查询商品信息
ItemsCustom itemsCustom = itemsService.findItemsById(items_id);
//通过形参中的model将model数据传到页面
//相当于modelAndView.addObject方法
model.addAttribute("itemsCustom", itemsCustom);
return "items/editItems";
}
编辑页面jsp WEB-INF/jsp/items/editItems.jsp
页面中input的name和controller的pojo形参中的属性名称一致,将页面中数据绑定到pojo
<%@ page language="java" contentType="text/html; charset=UTF-8"
pageEncoding="UTF-8"%>
<%@ taglib uri="http://java.sun.com/jsp/jstl/core" prefix="c" %>
<%@ taglib uri="http://java.sun.com/jsp/jstl/fmt" prefix="fmt"%>
<!DOCTYPE html PUBLIC "-//W3C//DTD HTML 4.01 Transitional//EN" "http://www.w3.org/TR/html4/loose.dtd">
<html>
<head>
<meta http-equiv="Content-Type" content="text/html; charset=UTF-8">
<title>修改商品信息</title>
</head>
<body>
<%-- 添加一个自定义tags, 将long类型的时间转为固定格式输出 --%>
<%@ taglib uri="/tags" prefix="date"%>
<form id="itemForm" action="${pageContext.request.contextPath }/items/editItemsSubmit.action" method="post" >
<input type="hidden" name="id" value="${itemsCustom.id }"/>
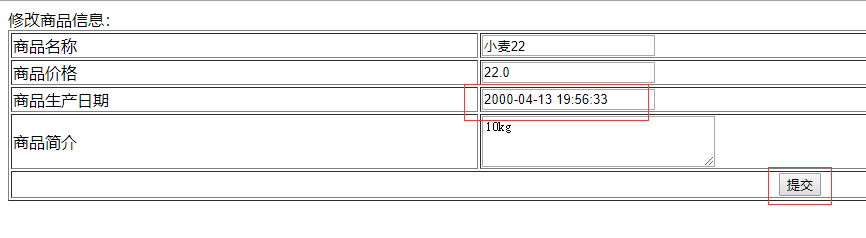
修改商品信息:
<table width="100%" border=1>
<tr>
<td>商品名称</td>
<td><input type="text" name="name" value="${itemsCustom.name }"/></td>
</tr>
<tr>
<td>商品价格</td>
<td><input type="text" name="price" value="${itemsCustom.price }"/></td>
</tr>
<td>商品生产日期</td>
<%-- 使用自定义taglib标签显示 --%>
<td><input type="text" name="createtime" value="<date:date value ="${itemsCustom.createtime} "/>"/></td>
<%--<tr>
<td>商品图片</td>
<td>
<c:if test="${item.pic !=null}">
<img src="/pic/${item.pic}" width=100 height=100/>
<br/>
</c:if>
<input type="file" name="pictureFile"/>
</td>
</tr>--%>
<tr>
<td>商品简介</td>
<td>
<textarea rows="3" cols="30" name="detail">${itemsCustom.detail }</textarea>
</td>
</tr>
<tr>
<td colspan="2" align="center"><input type="submit" value="提交"/>
</td>
</tr>
</table>
</form>
</body>
</html>
提交的/items/editItemsSubmit.action
/* 商品信息修改提交 */
@RequestMapping("/editItemsSubmit")
public String editItemsSubmit(HttpServletRequest request,Integer id,
                              ItemsCustom itemsCustom) throws Exception{
    //调用service更新商品信息,页面需要将商品信息传到此方法
    // itemsCustom.getCreatetime();
    //更新数据, 图片路径提交已在sql中屏蔽,待处理
    itemsService.updateItems(id, itemsCustom);
    //重定向到显示列表
    return "redirect:queryItems.action";
}
为了防止乱码的发生,我们现在web.xml配置文件里面设置一个乱码过滤器:
<!-- 为了能够处理中文的post请求,再配置一个encodingFilter,以避免post请求中文出现乱码情况: -->
<!-- 需要再pom.xml中添加: <project.build.sourceEncoding>UTF-8</project.build.sourceEncoding> -->
<filter>
    <filter-name>encodingFilter</filter-name>
    <filter-class>org.springframework.web.filter.CharacterEncodingFilter</filter-class>
    <init-param>
        <param-name>encoding</param-name>
        <param-value>UTF-8</param-value>
    </init-param>
    <init-param>
        <param-name>forceEncoding</param-name>
        <param-value>true</param-value>
    </init-param>
</filter>
<filter-mapping>
    <filter-name>encodingFilter</filter-name>
    <url-pattern>*.action</url-pattern>
</filter-mapping>
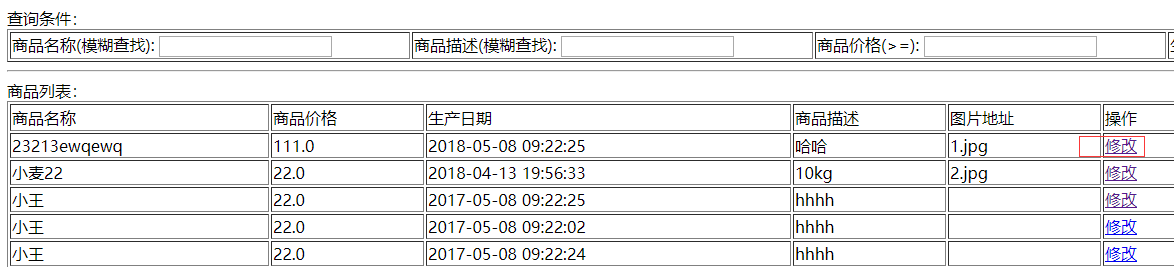
测试(此时时间被屏蔽了,时间还需要转换处理):

测试成功,说明我们绑定pojo类型成功!
由于数据库中时间是bigint ,拿到的是Long类型的时间, 前端需要显示转换后的时间格式
数据库中格式:
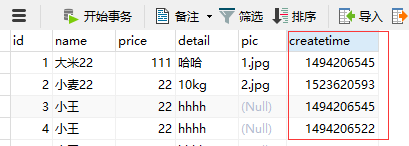
上面的:
private String pic;
private Long createtime;
这两个属性没有进行传递(我们在静态页面屏蔽了相应的input代码),所以接下来说说自定义参数绑定实现日期类型的绑定。
自定义参数绑定实现日期类型绑定,这是数据从前端发送回后台Controller方法形参过程中自动转换的:
package com.jnshu.ssm.Tools;

import org.springframework.core.convert.converter.Converter;
import java.text.ParseException;
import java.text.SimpleDateFormat;

/* spring自定义参数绑定 - string类型时间格式转换为Long类型  */
/* 这是数据从前端发送回后台Controller方法形参过程中自动转换的  */
/* 必须继承Converter接口 并且重写 * convert(String source) 方法*/
public class TimeReversal implements Converter<String, Long> {

    /* string 类型的日期格式转换为Long类型的日期格式 */
    @Override
    public Long convert(String source){
        //定义数据格式
        SimpleDateFormat simpleDateFormat = new SimpleDateFormat("yyyy-MM-dd HH:mm:ss");
        try {
            System.out.println("spring 注解绑定成功" + source);
            //将字符串类型转换为Data类型,
            // 然后使用getTime()获取Long类型的微秒数
            // 最后除以1000得到秒为单位的long类型数
            Long so = simpleDateFormat.parse(source).getTime()/1000;
            // System.out.println(simpleDateFormat.parse(source));
            return so;
        } catch (ParseException e) {
            e.printStackTrace();
            System.out.println("查询条件为空时返回所有商品信息");
        }
        //如果绑定失败返回null
        // System.out.println("null 空");
        return null;
    }
}
前端将Long类型数据转换为字符串类型并格式化,找了很久,没有直接的方法,通过jsp自定义标签来实现.
由于使用的是jstl标签,而要显示的是可读的时间类型,找来找去有个 fmt:formatDate可以转化,但是只能将String类型的转成date型,long型则不可以,觉得自定义标签比较靠谱,也不破环jsp页面这种标签结构,参考网上jstl标签编写方法,如下:
第一步 写一个类继承TagSupport,实现doStartTag() 方法:
package com.jnshu.ssm.Tools;

import javax.servlet.jsp.JspException;
import javax.servlet.jsp.tagext.TagSupport;
import java.io.IOException;
import java.text.SimpleDateFormat;
import java.util.Date;

/* 自定义 JSP 标签 */
public class DateTag extends TagSupport {
    //jsp传过来的是字符串类型的
    private String value;
    //示例中有这个 不知道是干嘛的,没有用到注释掉了
    // private static final long serialVersionUID = 6464168398214506236L;

    @Override
    public int doStartTag() throws JspException {
        // System.out.println(value);
        String vv = "" + value;
        try {
            //将字符串转换为long trim()除去空格,转换时不能有空格
            long timeLong = Long.valueOf(vv.trim());

            // System.out.println(timeLong);
            SimpleDateFormat simpleDateFormat = new SimpleDateFormat("yyyy-MM-dd HH:mm:ss");
            java.util.Date judt = new Date(timeLong * 1000);
            String s = simpleDateFormat.format(judt);
            pageContext.getOut().write(s);
        } catch (IOException e) {
            e.printStackTrace();
        }
        return super.doStartTag();
    }

    public void setValue(String value) {
        this.value = value;
    }
}
第二步 编写tld文件,datetag.tld,放在/WEB-INF/classes/tld/datetag.tld目录下:
<?xml version="1.0" encoding="UTF-8"?>
<taglib>
    <tlib-version>1.0</tlib-version>
    <jsp-version>1.2</jsp-version>
    <short-name>date</short-name>

    <tag>
        <name>date</name>
        <tag-class>com.jnshu.ssm.Tools.DateTag</tag-class>
        <body-content>JSP</body-content>
        <attribute>
            <name>value</name>
            <required>true</required>
            <rtexprvalue>true</rtexprvalue>
        </attribute>
    </tag>
</taglib>
第三步 在web.xml中加入引用:
<jsp-config>
    <taglib>
        <taglib-uri>/tags</taglib-uri>
        <taglib-location>/WEB-INF/classes/tld/datetag.tld</taglib-location>
    </taglib>
</jsp-config>
第四步 在jsp页面开始使用:
<%-- 声明 添加一个自定义tags, 将long类型的时间转为固定格式输出 --%>
<%@ taglib uri="/tags" prefix="date" %>
....
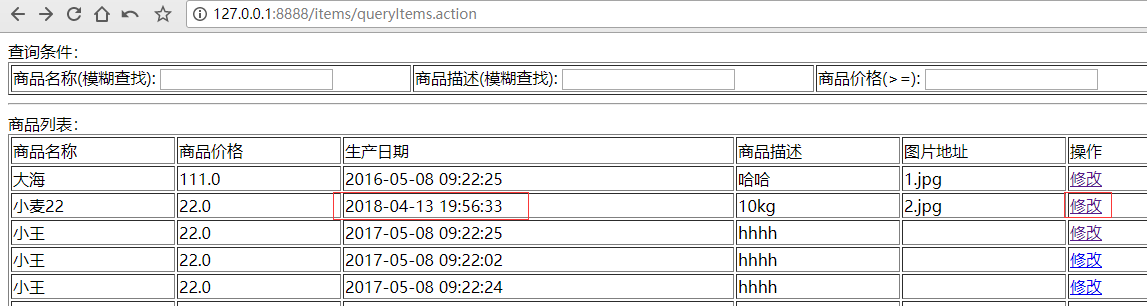
使用:
<c:forEach items="${itemsList }" var="item">
    <tr>
        <td>${item.name }</td>
        <td>${item.price }</td>
        <td><date:date value="${item.createtime} "/></td>
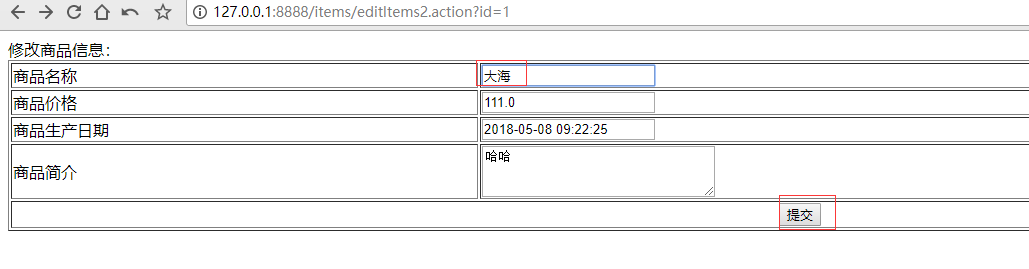
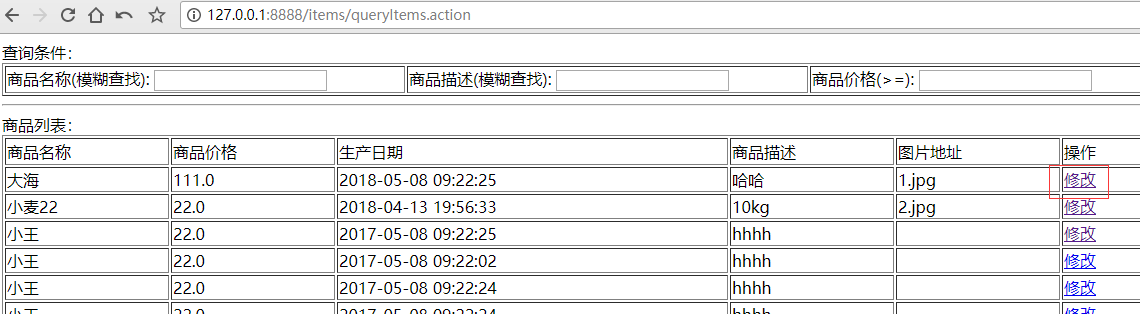
测试:
修改成功:
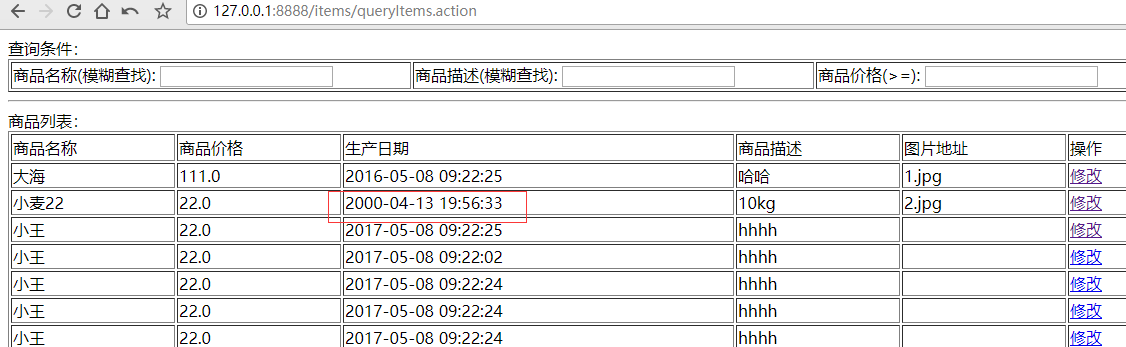
明天计划的事情:把输入效验完成,还有数据回显.
遇到的问题:框架搭建完毕了,现在都是写handler错误都比较好查,主要是jsp不熟悉. 还有数据转换的问题,都是百度查看的.
数据转换: https://www.bbsmax.com/A/gVdnNyN7dW/
收获:spring数据绑定是隐形绑定的,由spring自动将前端数据绑定到handler方法的形参上,这个理解了很久,熟悉了页面之间的数据互传,前端后端有了联动的感觉


评论