发表于: 2018-03-29 23:28:55
3 593
今日完成:
1. 连接数据库接受返回值(没有测试过)
jdbc:mysql://${jdbc.host}/${jdbc.db}?useAffectedRows=true
2. 发送验证码的方法
public boolean sendVerificationCode(PhoneVerification phoneVerification) {
// 六位数随机验证码
String verificationCodeService = String.valueOf((int)((Math.random() * 9 + 1) * 100000));
// 将登陆信息放置到map中
Map<String, String> map = pullMap(phoneVerification, verificationCodeService);
// 验证登陆信息格式,手机号位数等
boolean flag = baseVerification(map);
if (flag) {
// 调用荣联工具类,发送短信验证码
String[] datas = new String[]{map.get("verificationCodeService"), verificationTime};
flag = ccpRestSDKUtil.sendVerificationCode(map.get("phone"), verificationType, datas);
}
if (flag) {
// 将发送成功的验证信息存到redis
map.remove("passwordAgain");
String md5Password = MD5.getResult(map.get("password"));
map.put("password", md5Password);
redisTemplate.opsForHash().putAll(map.get("phone"), map);
// Map<String, String> test = redisTemplate.opsForHash().entries(map.get("phone"));
// System.out.println(test.get("phone"));
// System.out.println(test.get("password"));
// System.out.println(test.get("verificationCodeService"));
}
logger.info("验证码发送情况:" + flag + verificationCodeService);
return flag;
}
3. 使用readonly=”readonly”参数,是得form表单无法编辑
<form action="authority/sign_up_by_phone/checking" name="phoneVerification" method="post">
<input name="phone" type="tel" readonly="readonly" value="${phoneVerification.phone}"><br/>
<input name="verificationCodeClient" type="text" placeholder="请输入验证码"><br/><br/>
<button type="submit" id="login-button">注册</button>
</form>
4. 使用手机号注册的controller
    @RequestMapping("/sign_up_by_phone")
     public ModelAndView signUpByPhone() {
         ModelAndView modelAndView = new ModelAndView();
         modelAndView.setViewName("tiles_sign_up_by_phone");
         return modelAndView;
     }

     @RequestMapping(value = "/sign_up_by_phone/send_verification_code", method = RequestMethod.POST)
     public ModelAndView sendVerificationCode(@ModelAttribute("phoneVerification") PhoneVerification phoneVerification) {
         ModelAndView modelAndView = new ModelAndView();
 //        校验注册信息
         boolean flag = phoneVerificationUtil.sendVerificationCode(phoneVerification);
         if (flag) {
 //            输入验证码的界面
             modelAndView.addObject("phoneVerification", phoneVerification);
             modelAndView.setViewName("tiles_sign_up_by_phone_commit");
         } else {
 //            注册页面
             modelAndView.setViewName("redirect:/authority/sign_up_by_phone");
         }
         return modelAndView;
     }

     @RequestMapping("/sign_up_by_phone/checking")
     public String checking(@RequestParam("phone") String phone, @RequestParam("verificationCodeClient") String verificationCodeClient) {
         Map<String, String> check = redisTemplate.opsForHash().entries(phone);
 //        check验证码
         if ((check.get("verificationCodeService")).equals(verificationCodeClient)) {
 //            跳转到用户信息页面
             return "redirect:/authority/u/personal_info";
         }
 //        跳转到注册页面
         return "redirect:/authority/sign_up_by_phone";
     }
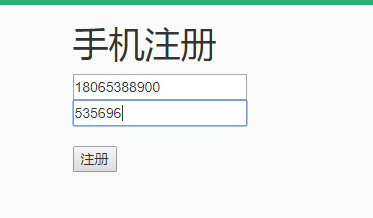
5. 发送验证码结果


6. 配置sendcloud邮件(demo)
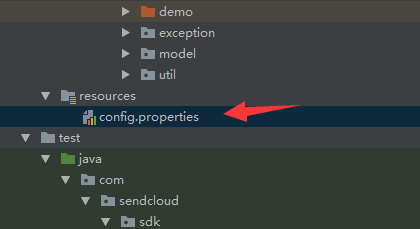
api_user和api_key

邮件设置
        MailAddressReceiver receiver = new MailAddressReceiver();
         // 添加收件人
         receiver.addTo("1191661688@qq.com");
 //    receiver.addTo("a@ifaxin.com;b@ifaxin.com");
         // 添加抄送
         receiver.addCc("yiqiang-wu@foxmail.com");
         // 添加密送
         receiver.addBcc("wuyiqiang@jnshu.com");

         MailBody body = new MailBody();
         // 设置 From
         body.setFrom("sendcloud@sendcloud.org");
         // 设置 FromName
         body.setFromName("SendCloud");
         // 设置 ReplyTo
         body.setReplyTo("reply@sendcloud.org");
         // 设置标题
         body.setSubject("来自 SendCloud SDK 的邮件");
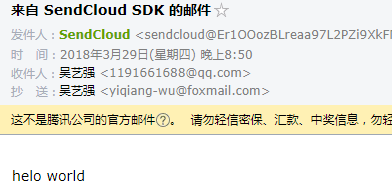
测试结果

明日计划:
1. 实现使用sendcloud进行用户注册
2. 晚上短信和邮件功能
3. 使用金山云存储图片
遇到的问题:
1. 打jar包放置在本地仓库,通过pom文件引用,会无法编辑xml和相关配置文件

是不是要直接修改源码,设置setter方法,然后在bean中配置
收获:
1. 完成使用手机验证码注册
2. 实现sendcloud发送邮件demo


评论