发表于: 2018-03-04 21:52:35
1 735
今日完成
1.在师兄们的帮助下解决了昨天遗留的问题;
2.准备小课堂的时候涉及泛型,了解了什么是泛型。
仅做了初步学习。需要更深入地学习。
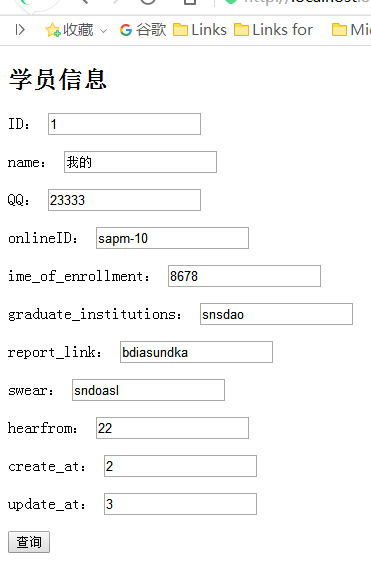
3.继续学习springMVC;
昨天照例子写了个helloworld的小demo,但是不能理解其中注释的具体作用,今天在师兄的讲解后进行进一步地操作:
@Controller
public class BarController {
    @RequestMapping(value = "/my",method = RequestMethod.GET)
    public String action11(Model model){
        //向模型中添加一个名为product的对象,用于渲染视图
        model.addAttribute("student", new Student(1l,"我的",23333,"sapm-10",8678L,
                "snsdao","bdiasundka",
                "sndoasl","22",2l,3l));
        return "action11";
    }
    @RequestMapping("/action22")
    @ResponseBody
    public Student action22(HttpServletResponse response, Student student){
        return student;
    }
}
import java.io.Serializable;
public class Student { //这里对是否需要继承Serializable类不知道;
private Long ID;
private String name;
private Integer QQ;
private String onlineID;
private Long time_of_enrollment;
private String graduate_institutions;
private String report_link;
private String swear;
private String hearfrom;
private Long create_at;private Long update_at;
//省略构造函数setter和getter
<beans xmlns="http://www.springframework.org/schema/beans"
       xmlns:context="http://www.springframework.org/schema/context"
       xmlns:xsi="http://www.w3.org/2001/XMLSchema-instance" xmlns:p="http://www.springframework.org/schema/p"
       xmlns:mvc="http://www.springframework.org/schema/mvc"
       xsi:schemaLocation="
        http://www.springframework.org/schema/mvc
        http://www.springframework.org/schema/mvc/spring-mvc-3.0.xsd
        http://www.springframework.org/schema/beans
        http://www.springframework.org/schema/beans/spring-beans-3.0.xsd
        http://www.springframework.org/schema/context
        http://www.springframework.org/schema/context/spring-context-3.0.xsd">
    <!-- 把标记了@Controller注解的类转换为bean -->
    <context:annotation-config/>
    <context:component-scan base-package="com.controller" />
    <!-- 启动Spring MVC的注解功能,完成请求和注解POJO的映射 -->
    <mvc:annotation-driven/>
    <!--<mvc:default-servlet-handler/>-->

    <!-- 对模型视图名称的解析,即在模型视图名称添加前后缀 -->
    <bean class="org.springframework.web.servlet.view.InternalResourceViewResolver"
          p:prefix="/WEB-INF/views/" p:suffix=".jsp"/>

</beans>
<%@ page language="java" contentType="text/html; charset=UTF-8" pageEncoding="UTF-8"%>
<%@ taglib prefix="c" uri="http://java.sun.com/jsp/jstl/core"%>
<%@ taglib prefix="form" uri="http://www.springframework.org/tags/form"%>
<!DOCTYPE html>
<html>
<head>
<meta http-equiv="Content-Type" content="text/html; charset=UTF-8">
<title>学生信息</title>
</head>
<body>
<div class="main">
<h2 class="title"><span>学员信息</span></h2>
<form:form modelAttribute="student">
<p>
<label for="ID">ID:</label>
<form:input path="ID" />
</p>
<p>
<label for="name">name:</label>
<form:input path="name" />
</p>
<p>
<label for="QQ">QQ:</label>
<form:input path="QQ" />
</p>
<p>
<label for="onlineID">onlineID:</label>
<form:input path="onlineID" />
</p>
<p>
<label for="time_of_enrollment">ime_of_enrollment:</label>
<form:input path="time_of_enrollment" />
</p>
<p>
<label for="graduate_institutions">graduate_institutions:</label>
<form:input path="graduate_institutions" />
</p>
<p>
<label for="report_link">report_link:</label>
<form:input path="report_link" />
</p>
<p>
<label for="swear">swear:</label>
<form:input path="swear" />
</p>
<p>
<label for="hearfrom">hearfrom:</label>
<form:input path="hearfrom" />
</p>
<p>
<label for="create_at">create_at:</label>
<form:input path="create_at" />
</p>
<p>
<label for="update_at">update_at:</label>
<form:input path="update_at" />
</p><p>
<%--下面2项都能实现一个按钮,但是有什么不同暂时未知--%>
<button>查询</button>
<%--<input type="submit" value="查询">--%> //
</p>
</form:form>
</div>
</body>
</html>
<!DOCTYPE web-app PUBLIC
        "-//Sun Microsystems, Inc.//DTD Web Application 2.3//EN"
        "http://java.sun.com/dtd/web-app_2_3.dtd" >

<web-app>
  <display-name>Archetype Created Web Application</display-name>
  <servlet>
    <servlet-name>HelloWeb</servlet-name>
    <servlet-class>
      org.springframework.web.servlet.DispatcherServlet
    </servlet-class> <!-- 如果要使用默认加载方式,满足以下2个条件:          默认加载必须规范:          * 文件命名:servlet-name-servlet.xml====springmvc.xml          * 路径规范:必须在WEB-INF目录下面          就可以不用写<init-param></init-param>   copy from bro yang -->

<!--      <init-param>
          <param-name>contextConfigLocation</param-name>
          <param-value>classpath:Hello-servlet.xml</param-value>
      </init-param>-->
    <load-on-startup>1</load-on-startup>
  </servlet>

  <servlet-mapping>
    <servlet-name>HelloWeb</servlet-name>
    <url-pattern>/</url-pattern>
  </servlet-mapping>
</web-app>

明天计划
1.准备小课堂;
2.学习springMVC;
遇到问题
想做个也没跳转,还没找到实例或者讲解,导入图片还未能成功。
收获


评论