发表于: 2018-02-28 14:06:36
1 619
今天完成的事情:(一定要写非常细致的内容,比如说学会了盒子模型,了解了Margin)
学习了spring监听器的使用,并且配置成功跨服RMI.
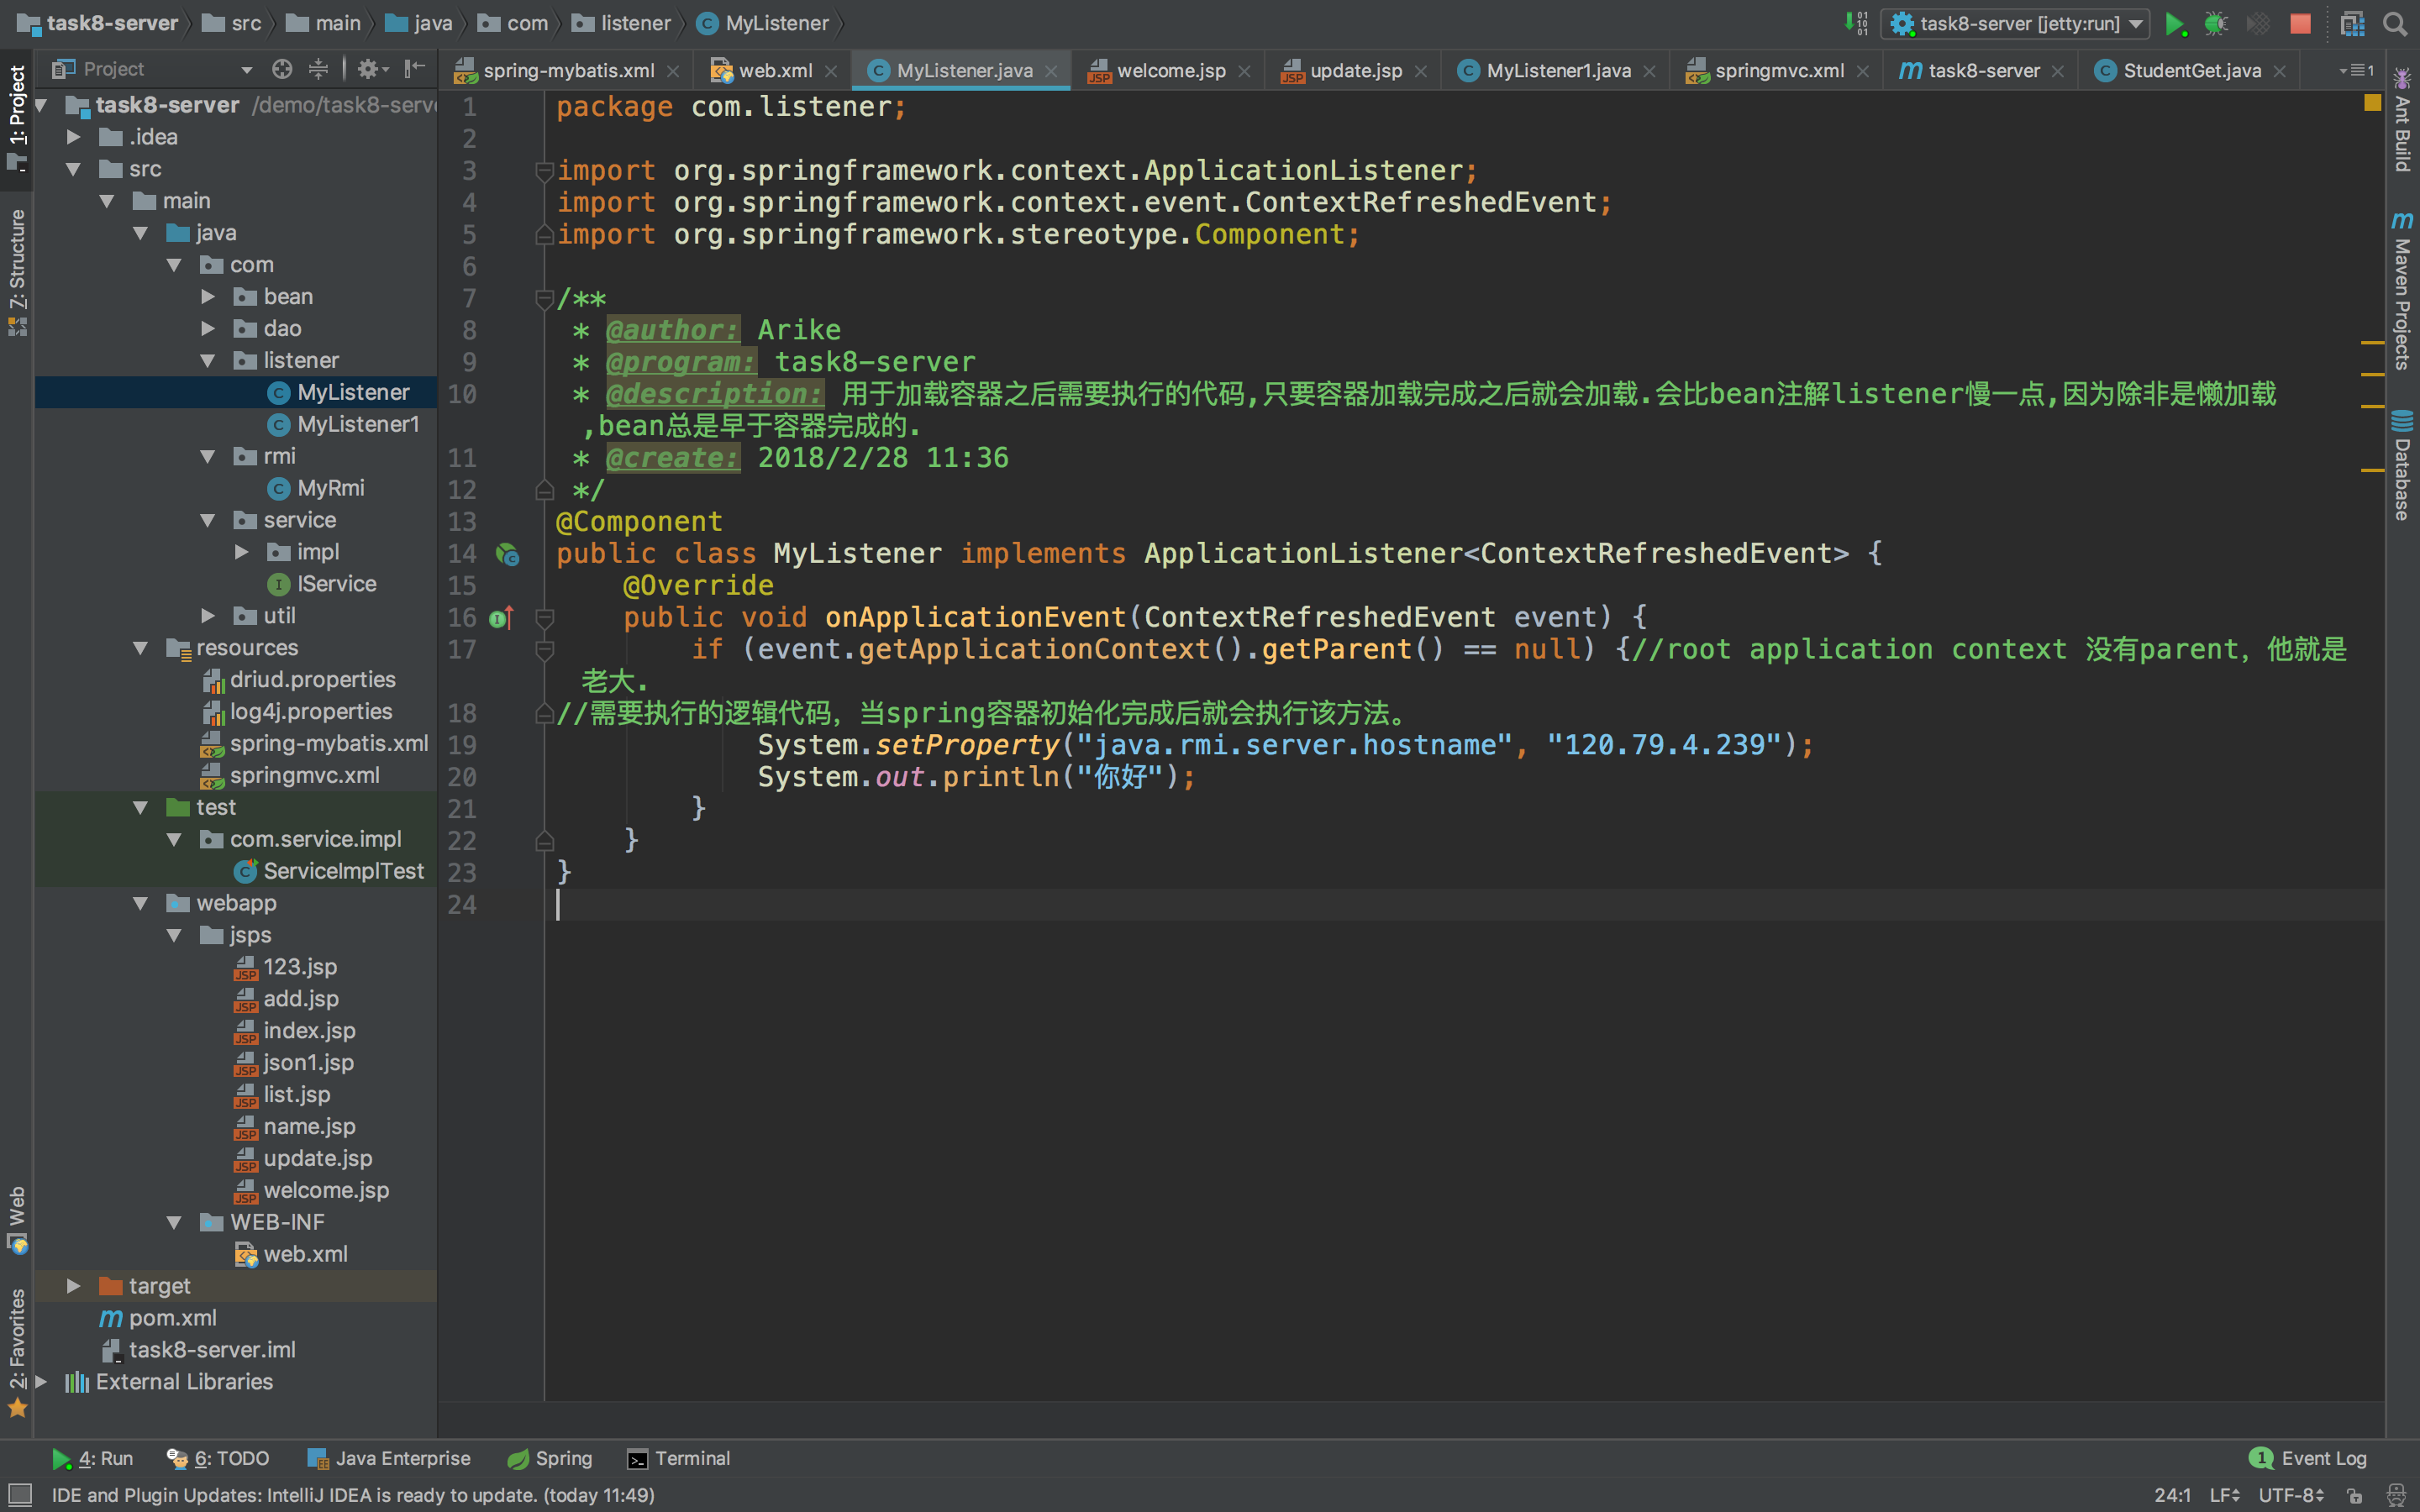
代码如下,这种方式是使用实现spring提供的的ApplicationListener接口并重写onApplicationEvent方法:
package com.listener;

import org.springframework.context.ApplicationListener;
import org.springframework.context.event.ContextRefreshedEvent;
import org.springframework.stereotype.Component;

/**
 * @author: Arike
 * @program: task8-server
 * @description: 用于加载容器之后需要执行的代码,只要容器加载完成之后就会加载.会比bean注解listener慢一点,因为除非是懒加载,bean总是早于容器完成的.
 * @create: 2018/2/28 11:36
 */
@Component
public class MyListener implements ApplicationListener<ContextRefreshedEvent> {
    @Override
    public void onApplicationEvent(ContextRefreshedEvent event) {
        if (event.getApplicationContext().getParent() == null) {//root application context 没有parent,他就是老大.
//需要执行的逻辑代码,当spring容器初始化完成后就会执行该方法。
            System.setProperty("java.rmi.server.hostname", "120.79.4.239");
            System.out.println("你好");
        }
    }
}
第二种思路,使用注解:
package com.listener;

import org.springframework.stereotype.Component;

import javax.annotation.PostConstruct;

/**
 * @author: Arike
 * @program: task8-server
 * @description: 注解测试,这个是对应bean的,也就是说这个bean不能是懒加载.
 * @create: 2018/2/28 11:54
 */

@Component
public class MyListener1 {
    @PostConstruct
    public void run(){
        System.out.println("加载驱动");
    }
}
开启springMvc项目查看日志:
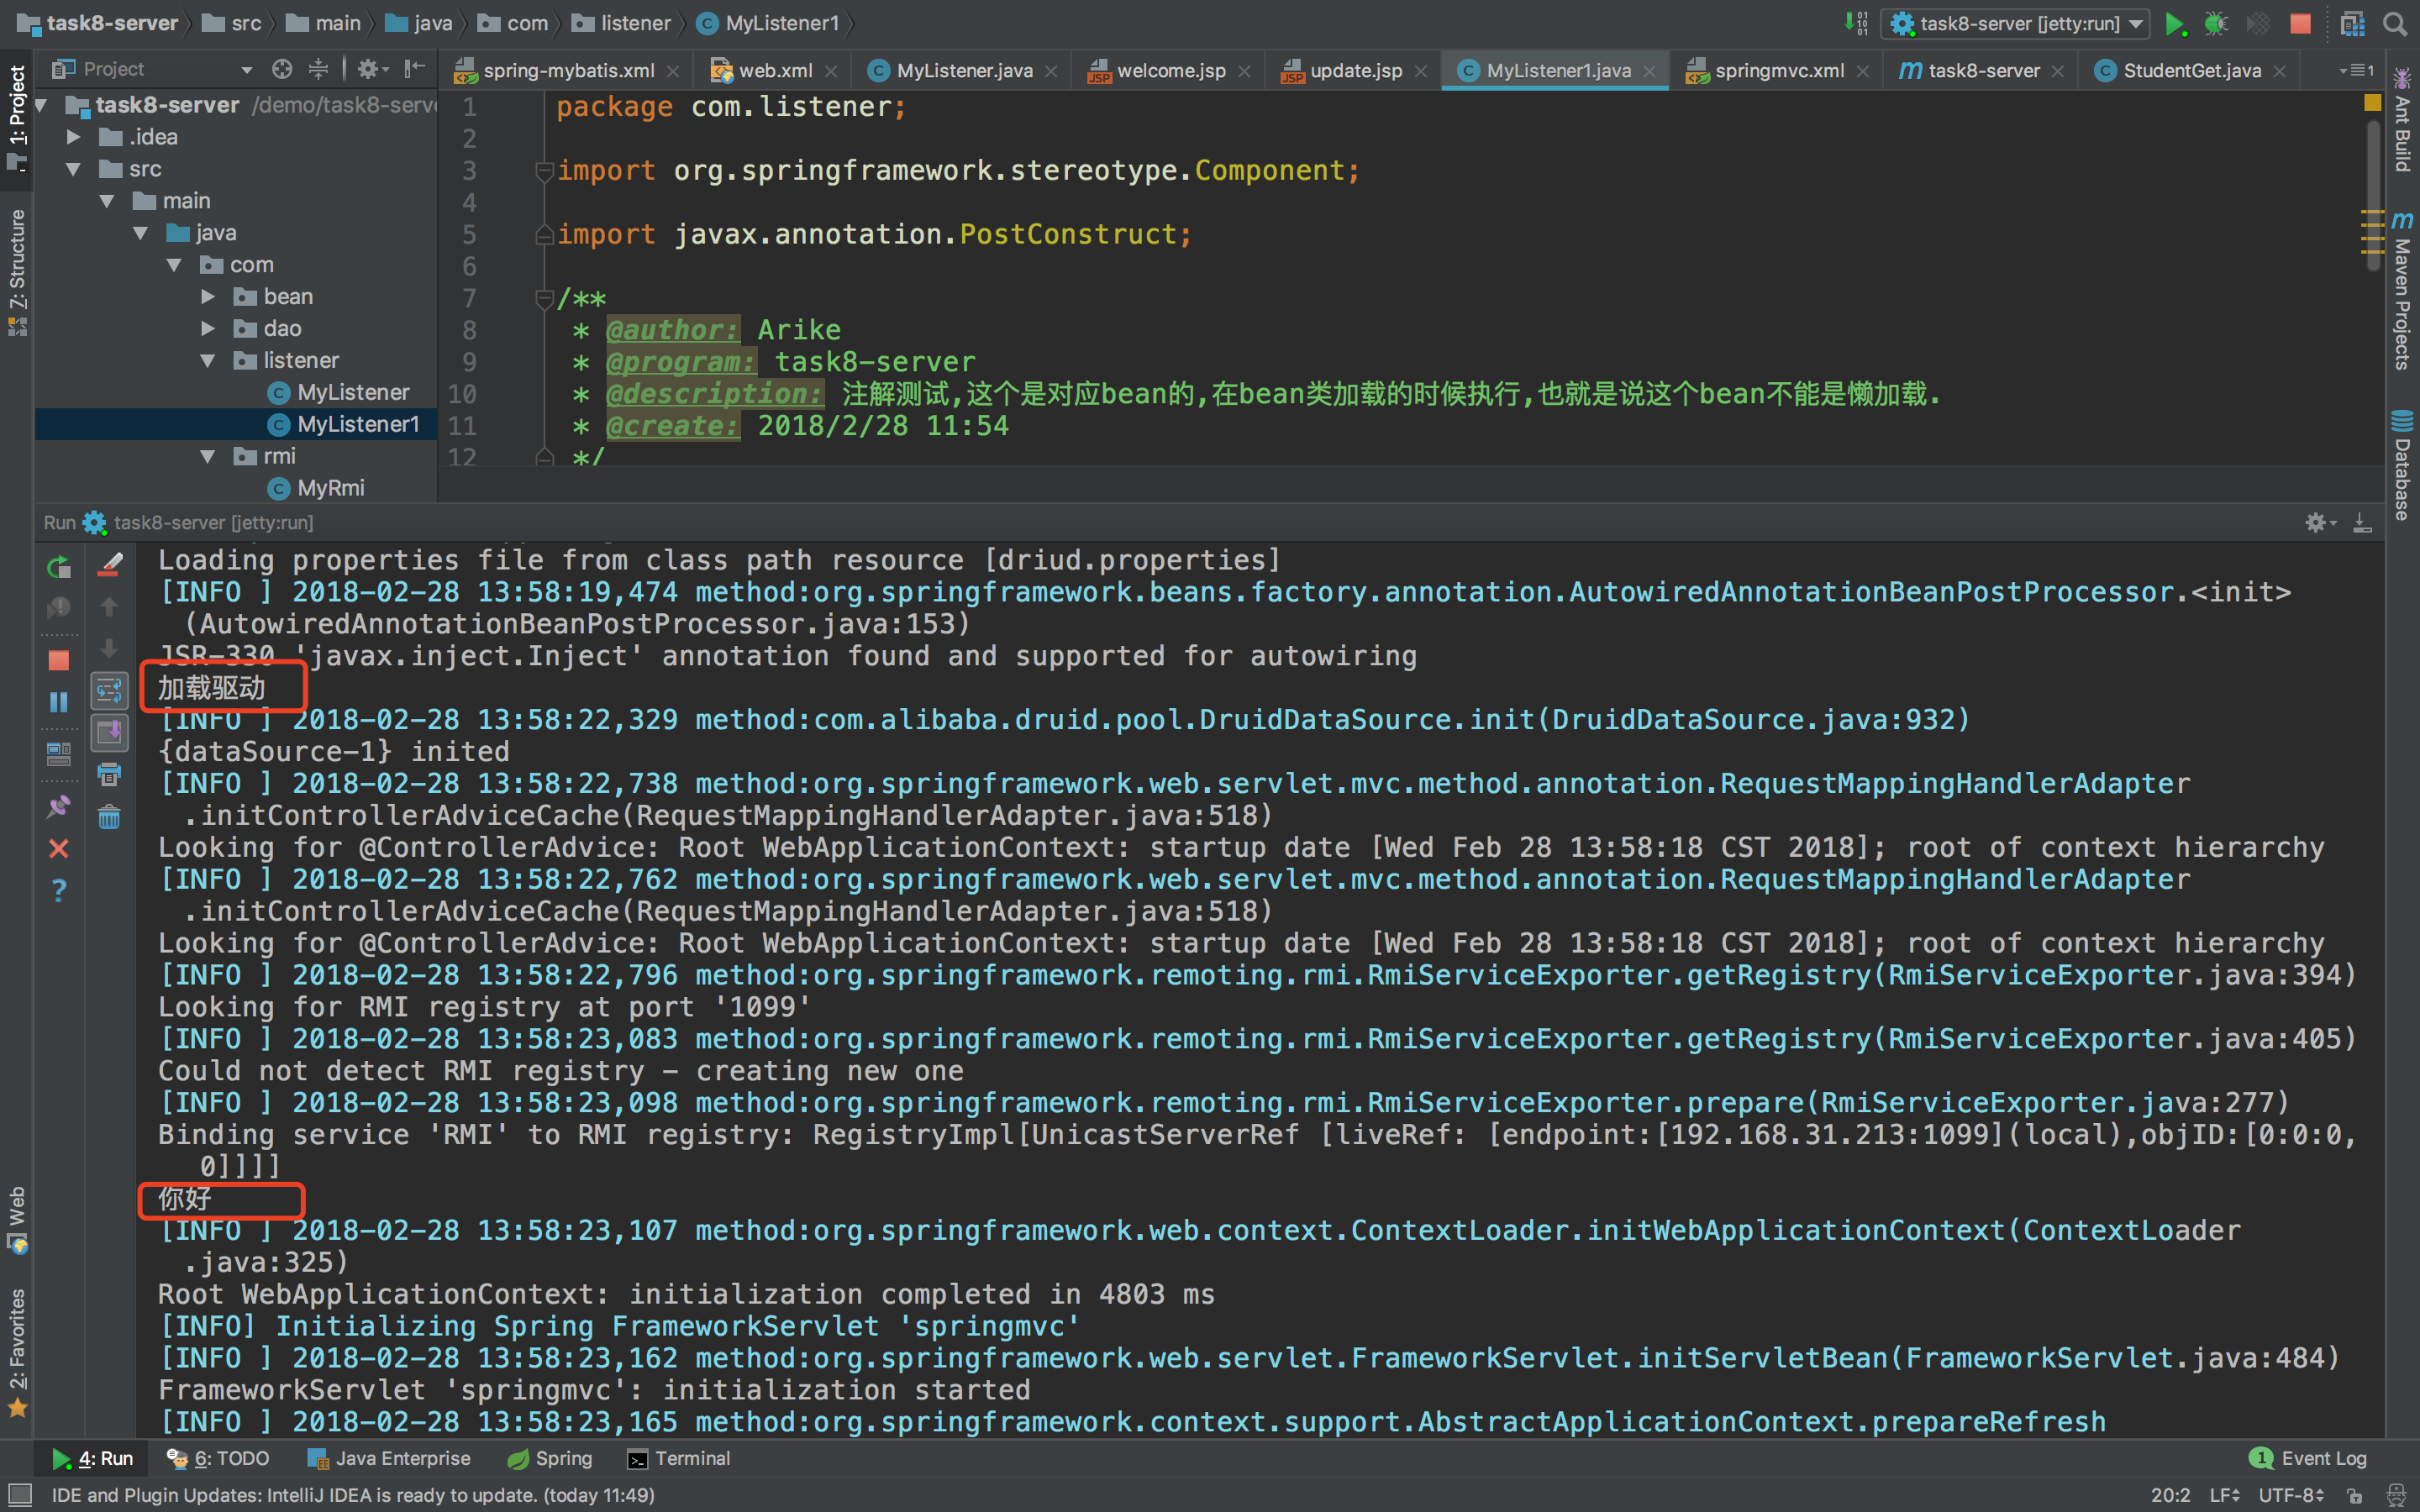
可以看到使用@PostConstruct注解的的确会在使用实现方式的监听器之前执行.
这是最简单的监听器的使用,监听器其实应该跟事件类,发布类一起联合使用,教程如下:
http://blog.csdn.net/erbao_2014/article/details/68924231?locationNum=9&fps=1
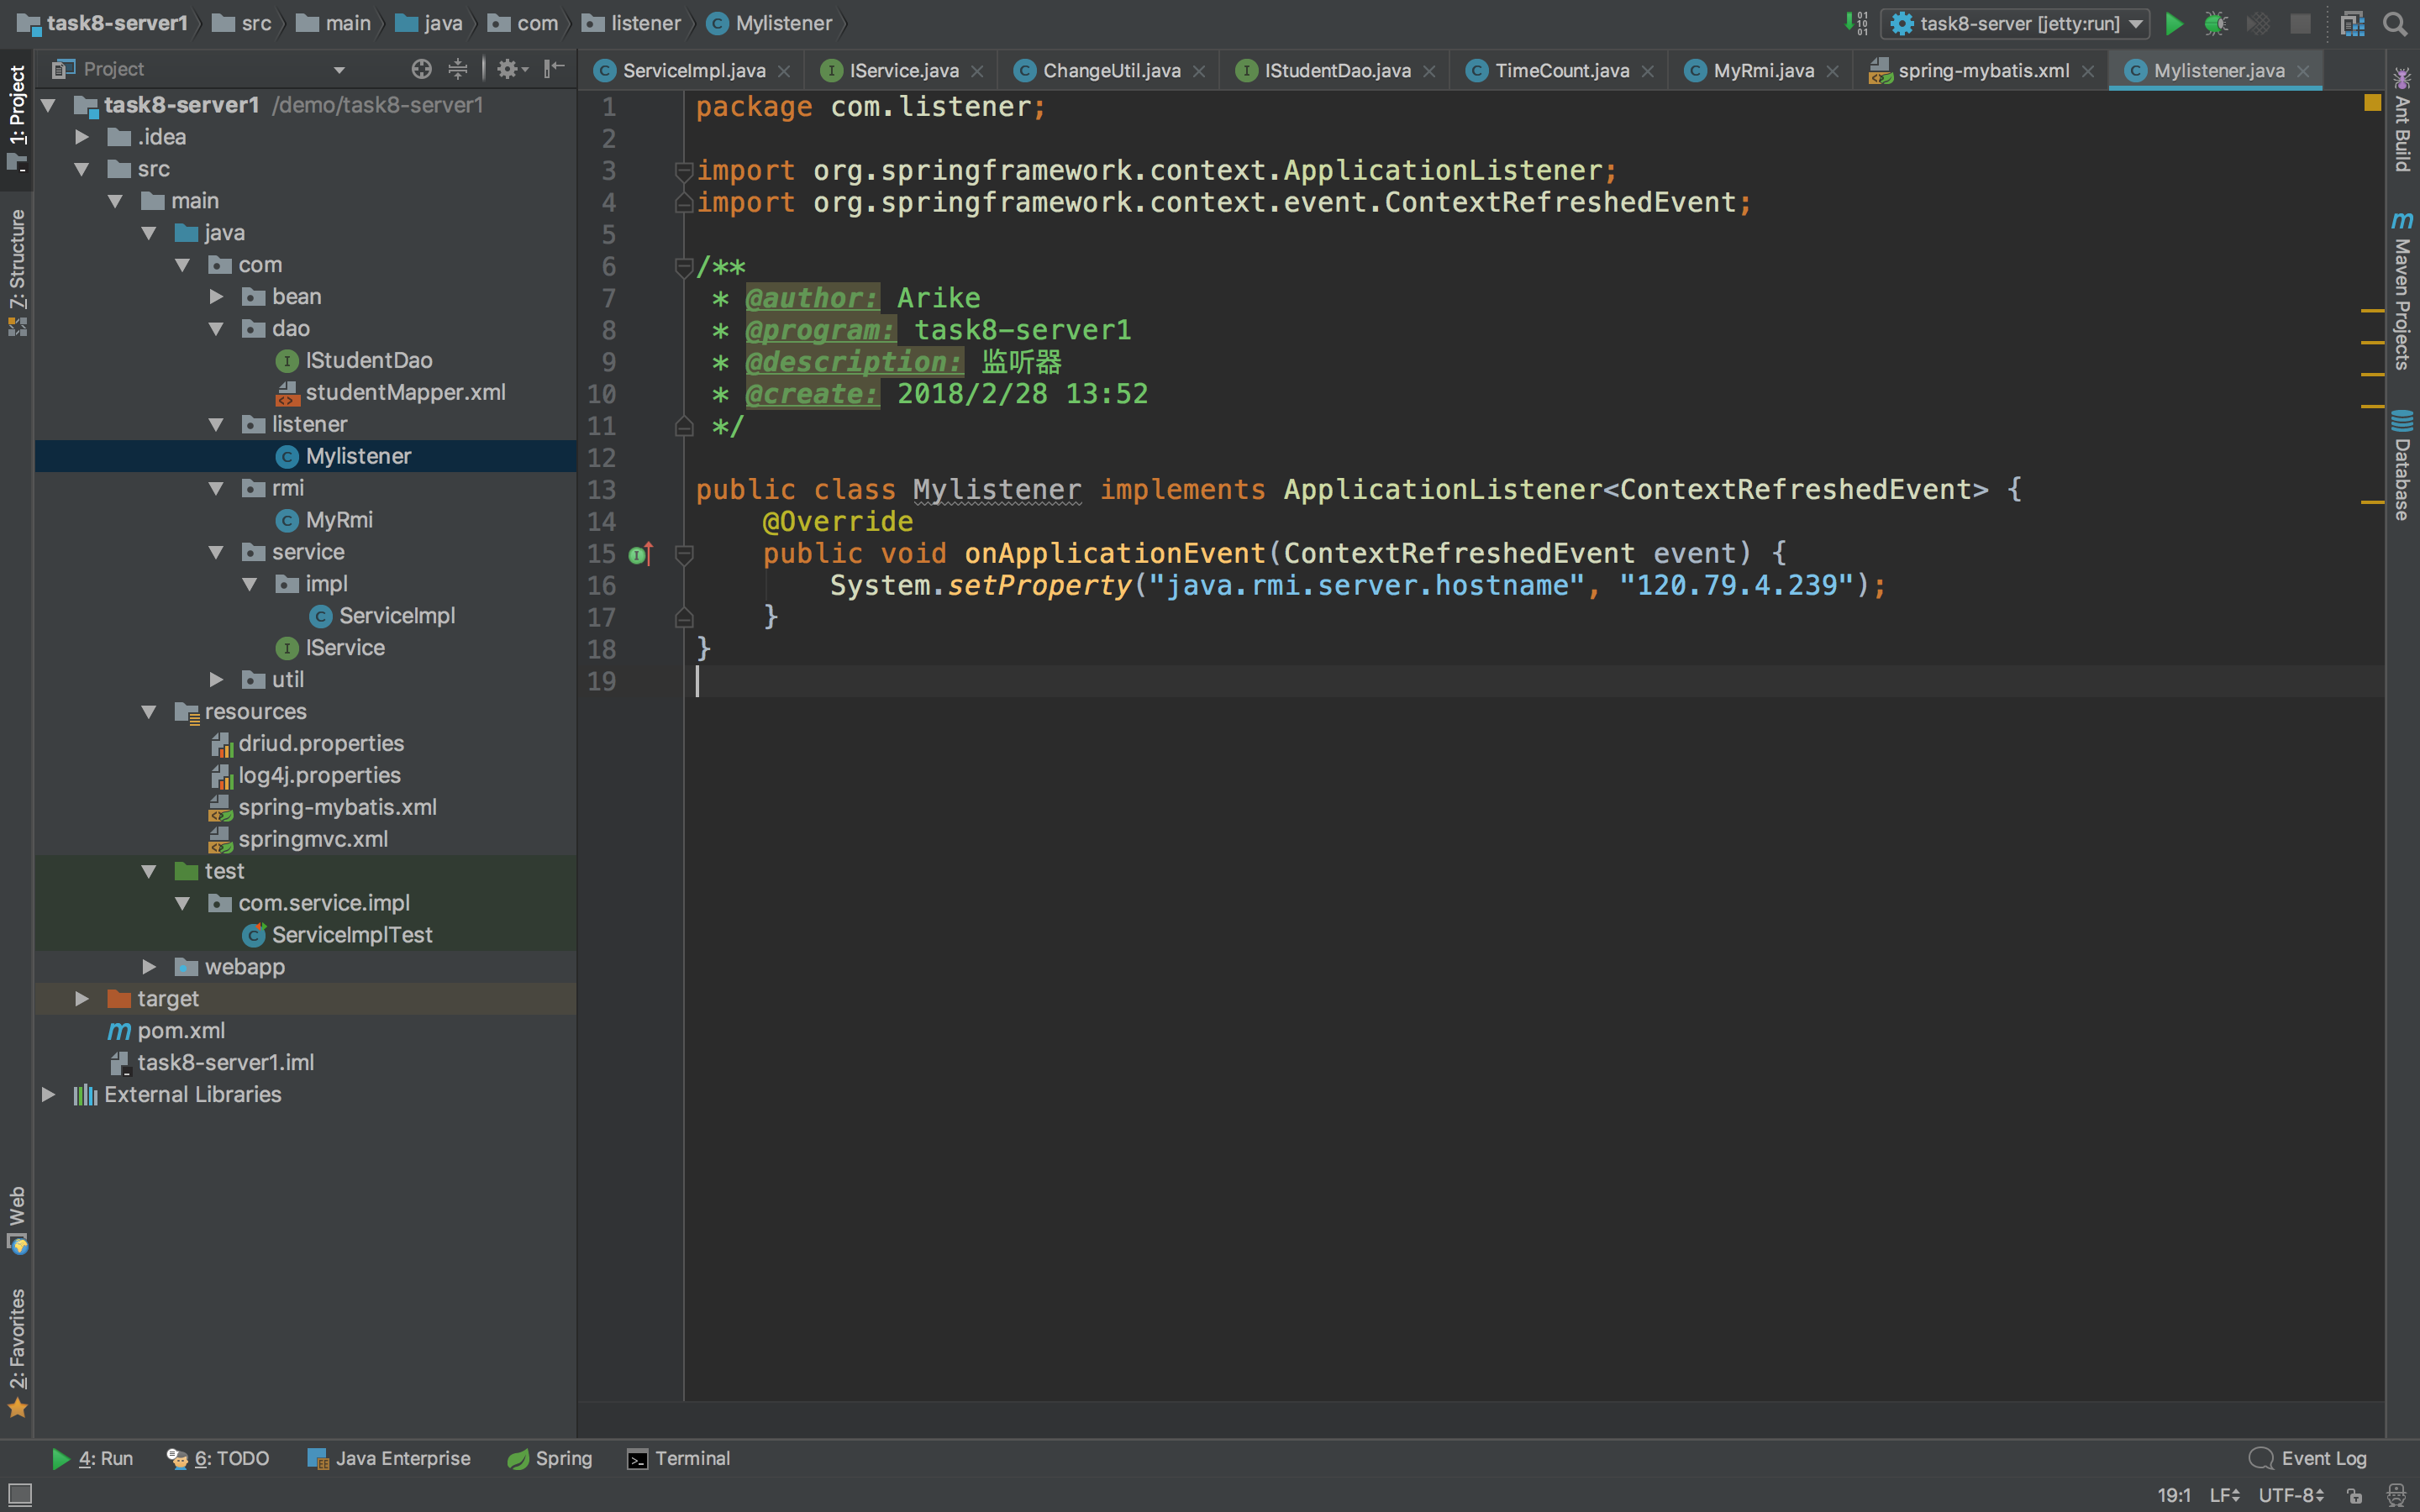
然后将我的两个server都加上监听器,部署到远程服务器上.
server1
server2:
然后是本地客户端对应的2个服务端配置:
<?xml version="1.0" encoding="UTF-8"?>
<beans xmlns="http://www.springframework.org/schema/beans"
       xmlns:xsi="http://www.w3.org/2001/XMLSchema-instance"
       xmlns:mvc="http://www.springframework.org/schema/mvc"
       xmlns:context="http://www.springframework.org/schema/context"
       xsi:schemaLocation="http://www.springframework.org/schema/beans
      http://www.springframework.org/schema/beans/spring-beans.xsd
      http://www.springframework.org/schema/mvc
      http://www.springframework.org/schema/mvc/spring-mvc.xsd
      http://www.springframework.org/schema/context
      http://www.springframework.org/schema/context/spring-context.xsd">
    <context:annotation-config />
    <context:component-scan base-package="com"/>
    <mvc:annotation-driven/>

    <!-- 服务端1 -->
    <bean id="rmiClientA"  class="org.springframework.remoting.rmi.RmiProxyFactoryBean" lazy-init="true">
    <property name="serviceInterface" value="com.service.IService"/>
    <property name="serviceUrl" value="rmi://120.79.4.239:1099/RMI"/>
</bean>


</beans>
<?xml version="1.0" encoding="UTF-8"?>
<beans xmlns="http://www.springframework.org/schema/beans"
       xmlns:xsi="http://www.w3.org/2001/XMLSchema-instance"
       xmlns:mvc="http://www.springframework.org/schema/mvc"
       xmlns:context="http://www.springframework.org/schema/context"
       xsi:schemaLocation="http://www.springframework.org/schema/beans
      http://www.springframework.org/schema/beans/spring-beans.xsd
      http://www.springframework.org/schema/mvc
      http://www.springframework.org/schema/mvc/spring-mvc.xsd
      http://www.springframework.org/schema/context
      http://www.springframework.org/schema/context/spring-context.xsd">
    <context:annotation-config />
    <context:component-scan base-package="com"/>
    <mvc:annotation-driven/>

     <!--服务端2 -->
    <bean id="rmiClientB" class="org.springframework.remoting.rmi.RmiProxyFactoryBean" lazy-init="true">
        <property name="serviceInterface" value="com.service.IService"/>
        <property name="serviceUrl" value="rmi://120.79.4.239:1098/RMI"/>
    </bean>

</beans>
运行:
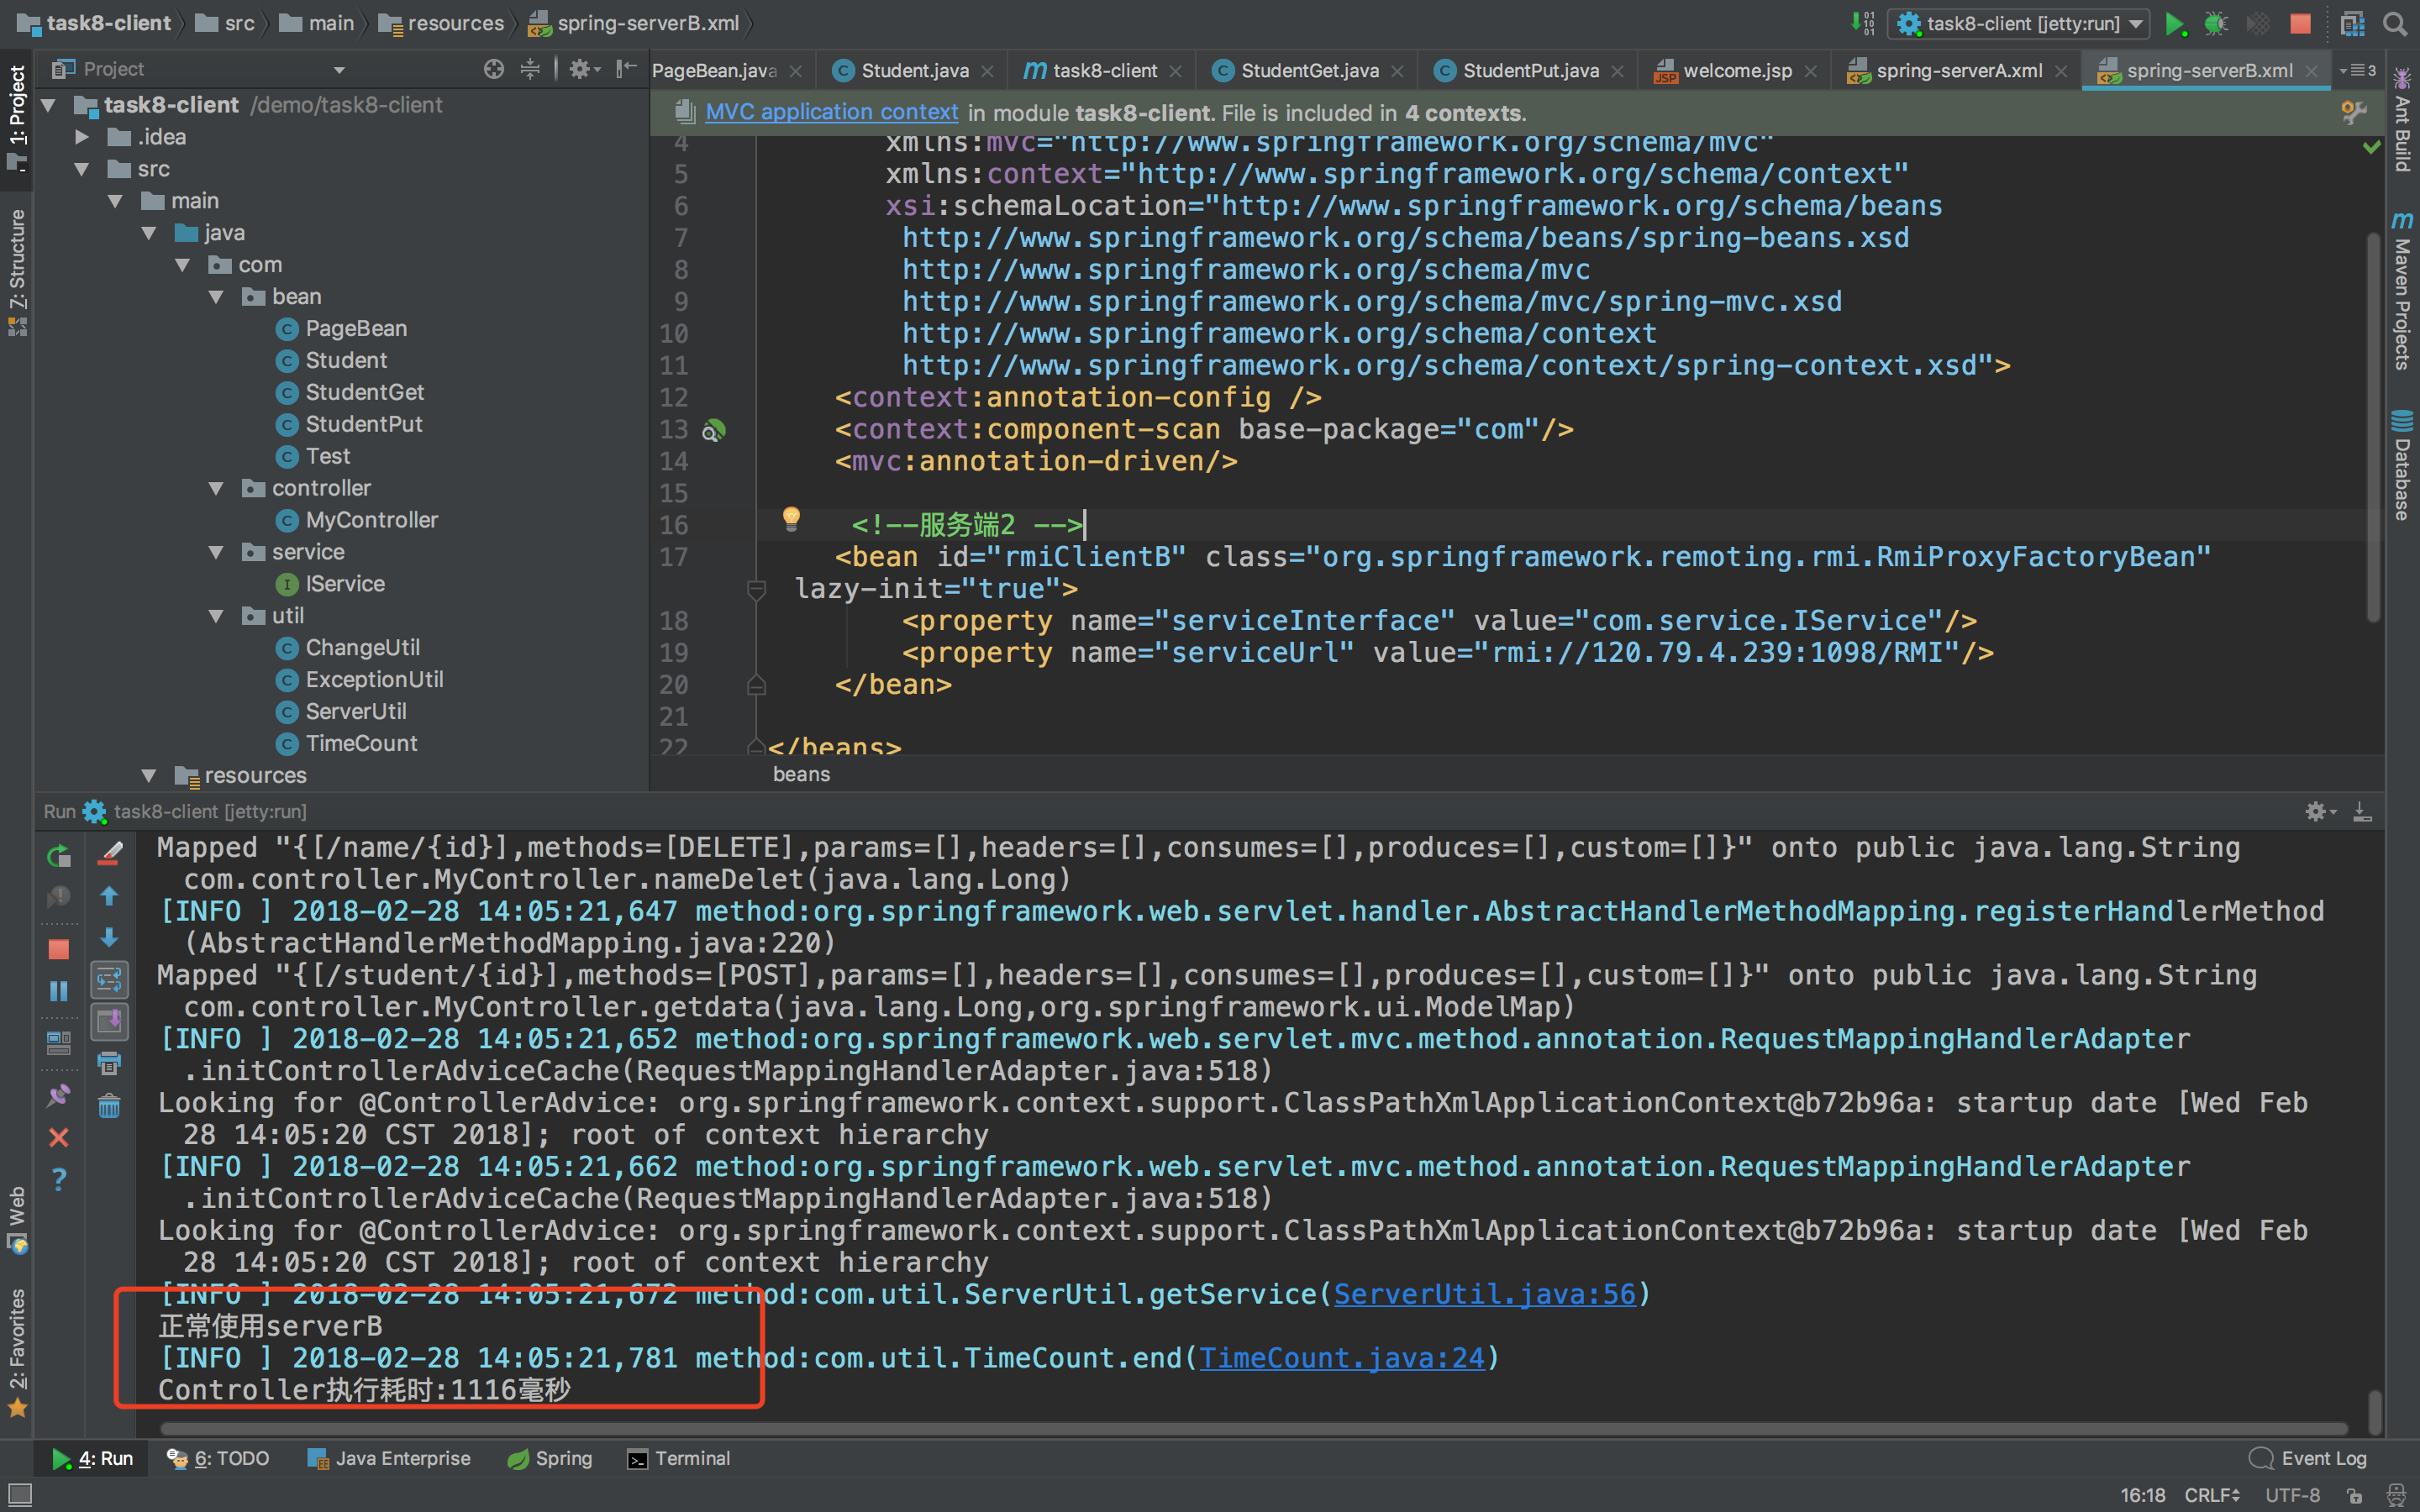
可以看到能够正常调用远程服务器了,接下来就是对之前任务8遗漏的关于服务器宕机的异常处理.
明天计划的事情:(一定要写非常细致的内容)
遇到的问题:(遇到什么困难,怎么解决的)
收获:(通过今天的学习,学到了什么知识)


评论