发表于: 2018-02-06 11:17:29
1 796
今天完成的事情
1.今天开始搞那个上传图片的弹窗。。照着师兄的日报做了一下:

这是界面,但是用户的所有信息都没有取到,一会儿解决。
点击选择文件之后:
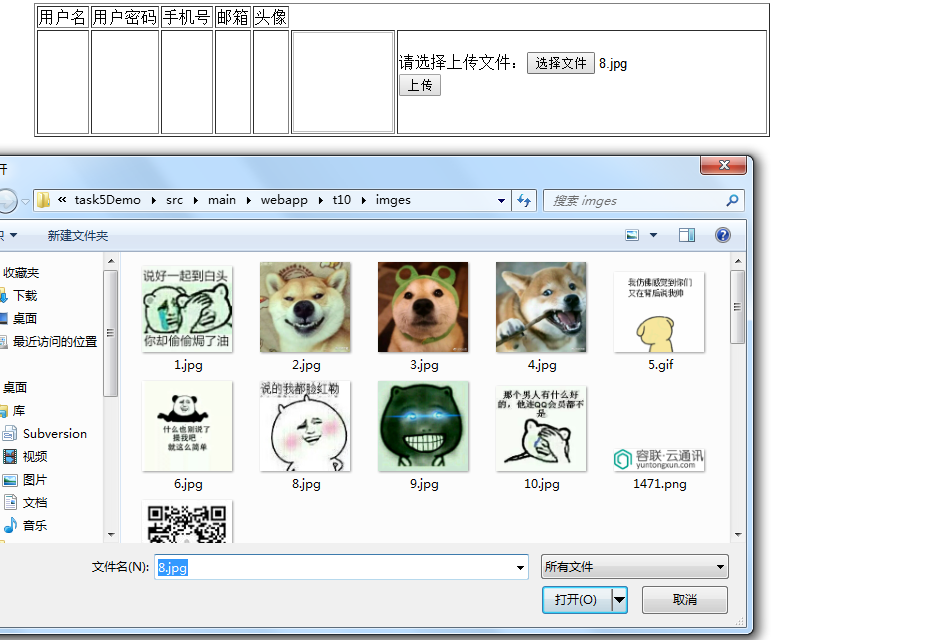
就出来这样一个弹窗可已选择图片,然后在试着上传一个的时候出现了问题:
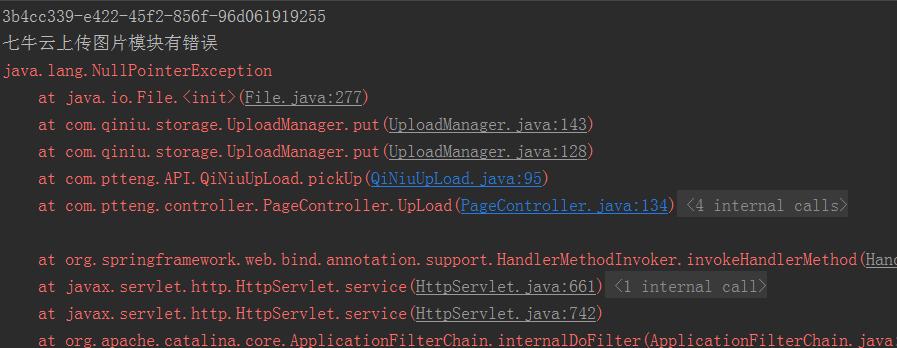
一会儿就解决这个问题。
不过搞了好久也没解决这个问题。先暂时跳过这步
2.搞邮箱验证,直接发送邮件,邮件里面带上注册信息的连接,点击连接可以直接完成登录:
@RequestMapping(value="/mail",method = RequestMethod.POST)
public  String  getEmail(String username,String password,String tel,String img,HttpServletRequest Request,String mail)throws Exception{
   userService.insertUser(username,password,tel,mail,img);
   String mima = Md5Util.getMd5(username+password);
   HttpSession session =Request.getSession();
   session.setAttribute("mima",mima);
   session.setMaxInactiveInterval(600);
   String link ="http://localhost:8080/mail?mima="+mima;
   email.sendMail(mail,link);

    return "success";

}
这样来调用这个方法来发送链接,然后运行试试看:
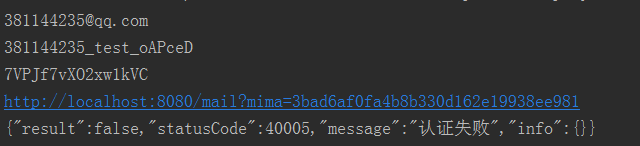
虽然各个值都传到了也取到了,但是出现了这个错误,于是我发愁了一会儿之后用测试类来跑一下:
@Test
public void test7()throws Exception{
sendCommonPostMail.sendMail("381144235@qq.com","www.baidu.com");
}
发现是可以成功的啊:
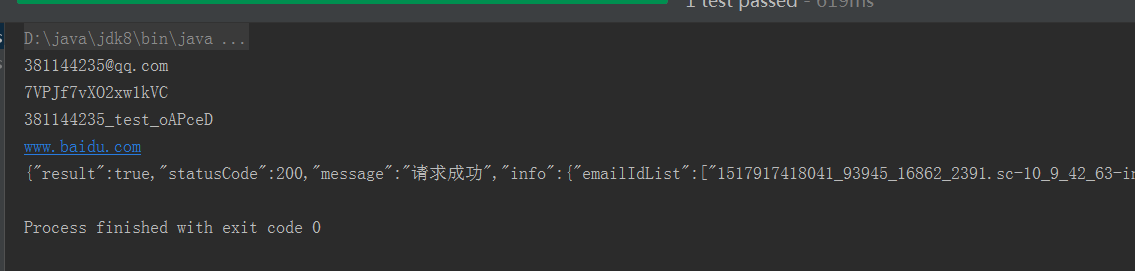
而且我去邮箱查看。也有的啊:

哎呀,这个就很难受了呀。。
经过仔细地排查发现了问题所在。。。不说了,想撞墙。
最终终于成功了,哈哈哈哈。。
3.开始回过头搞这个弹窗上传图片:
首先在一个jsp页面中写上:这个就是那个上传的页面了:
<form action="<%=request.getContextPath()%>/uploadtest" method="post" enctype="multipart/form-data">
请选择上传文件:<input type="file" name="file" /><br/>
<input type="submit" value="上传" /></form>
上传的页面:
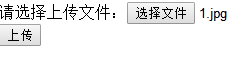 选择文件:
选择文件: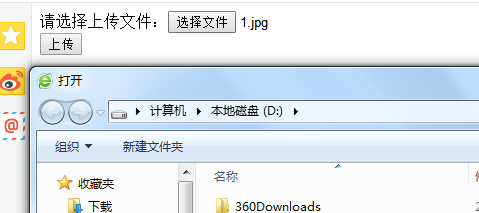 就是这样,然后上传,就行了。我就直接说我这个成功的方法了。
我先把全套的代码粘上:jsp页面上面已经有了,下面的是controller的:
@RequestMapping(value = "/uploadtest",method =RequestMethod.POST)
public String UpLoadtest(@RequestParam("file") MultipartFile file, HttpServletRequest request)throws IOException{
String filename= UUID.randomUUID().toString().replace("-", "")+file.getOriginalFilename().substring(file.getOriginalFilename().lastIndexOf("."));
qiNiuUpLoad.pickUp(file.getBytes(),filename);
return "ok";
}
这块的参数为什么这么写我也不知道,直接百度出来的,如果没有这个参数的话,就会出现这样的错误:
[org.springframework.web.multipart.MultipartFile]: Specified class is an interface
http://blog.csdn.net/zb0567/article/details/8062682 这个博客有这个的解决方法。
然后是工具类的方法了,其实就是改了个参数:
public void pickUp(byte[] uploadBytes, String filename) {
然后这样了之后运行的话还是会出错:
SSM--Required MultipartFile parameter 'file' is not present
这个时候不光参数那加东西了,还得在spring配置文件中加上这个:
<!--上传下载 -->
<bean id="multipartResolver" class="org.springframework.web.multipart.commons.CommonsMultipartResolver">
<property name="defaultEncoding" value="utf-8"/>
<property name="maxUploadSize" value="10485760000"/>
<property name="maxInMemorySize" value="40960"/>
</bean>
弄了这么半天却还是不行,此时还会报错说找不到上传类,所以还要在pom中加上个这个:
<dependency>
<groupId>commons-fileupload</groupId>
<artifactId>commons-fileupload</artifactId>
<version>1.3.1</version>
</dependency>
至此的话,这个东西就算是整好了,我的亲亲...真的麻烦。
4.任务七只剩下一个防攻击了那就,这个东西的实现应该还挺容易的吧
@RequestMapping(value = "/addUser/verify",method = RequestMethod.POST)
public String getVerify(HttpServletRequest Request,HttpServletResponse Reponse,String tel){
System.out.println("进入了发送验证码的方法哦");
int verify = (int)(Math.random()*9000+1000);
HttpSession session = Request.getSession();
if (session.getAttribute("verify")==null){
sms.Send(verify,tel);
session.setAttribute("verify",verify);
session.setMaxInactiveInterval(300);
}else{
System.out.println("五分钟只能发一次哦");
}
return null;
}
这样做了一个防攻击,五分钟一个手机号只能发一次验证码。这个却是相比较来说就很简单了。。
5.还有就是将上传的图片保存到数据库了
先是做了一个个人信息的界面:
<%@ page contentType="text/html;charset=UTF-8" language="java" %>
<%@taglib prefix="c" uri="http://java.sun.com/jsp/jstl/core" %>
<html>
<head>
<title>个人信息</title>
</head>
<body>
<table border="1" cellpadding="5" cellspacing="0" align-="center">
<tr>
<td>用户名</td>
<td>密码</td>
<td>手机号</td>
<td>邮箱</td>
<td>头像</td>
<td></td>
</tr>
<tr>
<td>${user.username}</td>
<td>${user.password}</td>
<td>${user.tel}</td>
<td>${user.mail}</td>
<td>
<img src=" ${user.img}" style="width: 100px;height: 100px">
</td>
<td>
<form action="<%=request.getContextPath()%>/uploadtest" method="post" enctype="multipart/form-data">
    请选择上传文件:<input type="file" name="file" /><br/>
    <input type="submit" value="上传" />
</form>
</td>
</tr>
</table>
<%--<form action="<%=request.getContextPath()%>/uploadtest" method="post" enctype="multipart/form-data">--%>
<%--请选择上传文件:<input type="file" name="file" /><br/>--%>
<%--<input type="submit" value="上传" />--%>
<%--</form>--%>
</body>
</html>

大概就是这样子,然后就是上传图片,并保存到数据库了
这块儿的值是这样取得:
@RequestMapping(value ="/list",method = RequestMethod.GET)
public String Detail(Model model,HttpServletRequest request){
    Cookie[] cookies = request.getCookies();
    if (cookies != null) {
        for (int i = 0; i < cookies.length; i++) {
            if (cookies[i].getName().equals("Token")) {
                try {
                    DesUtil desUtil = new DesUtil("xizi");
                    String Token = cookies[i].getValue();
                    String decToken = desUtil.decrypt(Token);
                    String[] arr = decToken.split(",");
                    String username = arr[0];
                    User user = userService.getUser(username);
                    model.addAttribute("user",user);
                } catch (Exception e) {
                    e.printStackTrace();
                }
            }
        }

}return "detail";//搞这个
}
传到前台就ok了。
传一下成功的界面好了:

具体的实现方法在下面:
@RequestMapping(value = "/uploadtest",method =RequestMethod.POST)
public String UpLoadtest(@RequestParam("file") MultipartFile file, HttpServletRequest request,Model model)throws IOException{
    String filename= UUID.randomUUID().toString().replace("-", "")+file.getOriginalFilename().substring(file.getOriginalFilename().lastIndexOf("."));
    qiNiuUpLoad.pickUp(file.getBytes(),filename);
    model.addAttribute("filename",filename);
    Cookie[] cookies = request.getCookies();
    if (cookies != null) {
        for (int i = 0; i < cookies.length; i++) {
            if (cookies[i].getName().equals("Token")) {
                try {
                    DesUtil desUtil = new DesUtil("xizi");
                    String Token = cookies[i].getValue();
                    String decToken = desUtil.decrypt(Token);
                    String[] arr = decToken.split(",");
                    String username = arr[0];
                    User user = userService.getUser(username);
                    userService.updateImg(username,"http://p3in2s9kl.bkt.clouddn.com/"+filename);
                } catch (Exception e) {
                    e.printStackTrace();
                }
            }
        }

    }

    return "ok";
}
jsp页面没有改动,这些做好之后就ojbk了。
今天遇到的问题
都在上面了。。估计看了日报再搞这个也就半小时。。。。真的详细。。
今天的收获
收获满满,也都在上面了
明天计划的事情
提交任务七。


评论