发表于: 2017-11-28 21:51:19
1 668
今天完成的事情:
今天是比昨天更痛苦的一天。
何为痛苦?束手无策。脑壳青痛,抠脑壳都没办法。
昨天看了SSM敲了SSM,看了一整天的500.
今天看了SSM敲了SSM,看了一整天的404.
或许,这就是java吧!!
废话不说,截一下今天敲的东西:
搭建SSM的详细步骤:
首先:配置webxml
<!--加载spring和mybatis文件spring-mybatis.xml(application)-->
<context-param>
  <param-name>contextConfigLocation</param-name>
  <param-value>classpath:spring-mybatis.xml</param-value>
</context-param>
<!--配置编码过滤器-->
<filter>
    <filter-name>SetCharacterEncoding</filter-name>
    <filter-class>org.springframework.web.filter.CharacterEncodingFilter</filter-class>
    <init-param>
        <param-name>encoding</param-name>
        <param-value>UTF-8</param-value>
    </init-param>
</filter>
  <filter-mapping>
      <filter-name>SetCharacterEncoding</filter-name>
      <url-pattern>/*</url-pattern>
  </filter-mapping>
<!--spring监听器-->
<listener>
  <listener-class>org.springframework.web.context.ContextLoaderListener</listener-class>
</listener>
<!-- 防止Spring内存溢出监听器 -->
<!--<listener>-->
  <!--<listener-class>org.springframework.web.util.IntrospectorCleanupListener</listener-class>-->
<!--</listener>-->
<!--spring mvc servlet 配置-->
<servlet>
  <servlet-name>SpringMVC</servlet-name>
  <servlet-class>org.springframework.web.servlet.DispatcherServlet</servlet-class>
  <init-param>
    <param-name>contextConfigLocation</param-name>
    <param-value>classpath:springmvc.xml</param-value>
  </init-param>
</servlet>
<servlet-mapping>
  <servlet-name>SpringMVC</servlet-name>
  <url-pattern>/</url-pattern>
</servlet-mapping>
  <welcome-file-list>
      <welcome-file>/WEB-INF/jsps/index.jsp</welcome-file>
  </welcome-file-list>
其次:springmvc 这个比较简单,几行代码即可。
<context:component-scan base-package="com.ssm.controller"/>
<mvc:annotation-driven/>
<bean class="org.springframework.web.servlet.view.InternalResourceViewResolver">
    <!-- 自动给后面action的方法return的字符串加上前缀和后缀,变成一个可用的url地址 -->
    <property name="prefix" value="/WEB-INF/jsps/" />
    <property name="suffix" value=".jsp" />
</bean>
接着:spring-mybatis
<!--自动扫描包-->
<context:component-scan base-package="com.ssm"/>
<!--引入配置文件-->
<bean id="placeholderConfigurer" class="org.springframework.beans.factory.config.PreferencesPlaceholderConfigurer">
    <property name="location" value="jdbc.properties"/>
</bean>
<!--配置数据库及连接池-->
<bean id="dataSource" class="org.apache.commons.dbcp.BasicDataSource">
    <property name="driverClassName" value="${driver}"/>
    <property name="url" value="${url}"/>
    <property name="username" value="${username}"/>
    <property name="password" value="${password}"/>
</bean>
<bean id="sqlSessionFactory" class="org.mybatis.spring.SqlSessionFactoryBean">
    <!--指定数据源-->
    <property name="dataSource" ref="dataSource"/>
    <!--指定mybatis配置文件位置-->
    <property name="configLocation" value="mybatis-config.xml"/>
</bean>
<!--DAO所在接口报名 自动扫描-->
<bean class="org.mybatis.spring.mapper.MapperScannerConfigurer">
    <property name="basePackage" value="com.ssm.dao"/>
    <property name="sqlSessionFactoryBeanName" value="sqlSessionFatory"/>
</bean>
<!--事务管理-->
<bean id="transactionManager" class="org.springframework.jdbc.datasource.DataSourceTransactionManager">
    <property name="dataSource" ref="dataSource"/>
</bean>
然后:编写domain
private String name;
private Long qqNumber;
private String studyType;
private Date admissionTime;
private String graduationSchool;
private String studentID;
private String post;
private String desire;
private String elder;
private String channel;
这之后编写接口:
public interface StudentMapper {
List<Student> findAll();
void add(Student student);
void delete(Long id);
void update(Student student);
Student get(Long id);}
mapper.xml 也就是通过配置文件来执行CRUD
<select id="findAll" resultMap="BaseResultMap">
SELECT * FROM student
</select>
还有一个service接口:
public interface StudentService {
List<Student> findAll();
void add(Student student);
void delete(Long id);
void update(Student student);
Student get(Long id);
}以及service接口的实现类
@Service
public class StudentServiceImpl implements StudentService {
@Resource
private StudentMapper studentMapper;
public List<Student> findAll() {
List<Student> list = studentMapper.findAll();
return list;
}
public void add(Student student) {
}
public void delete(Long id) {
}
public void update(Student student) {
}
public Student get(Long id) {
return null;
}
}最后是Controller
@Controller
public class StudentController {
@Resource
private StudentService studentService;
@RequestMapping("list")
public String list(Model model){
//List<Student> list = studentService.findAll();
//model.addAttribute("studentlist",list);
return "studentList";
}
@RequestMapping(value = "/index",method = {RequestMethod.GET})
public String toString() {
return"index";
}
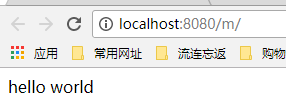
}之后测试一下效果:
连续搭了几次框架,对这个流程比较熟悉了。虽然最后还是没成功!!!!!!!
明天计划的事情:
继续研究框架,搭起框架,然后做CRUD
遇到的问题:
各种问题,某个字母写错,软件无故报错,重启又不报错了。。。。玄学代码!!!
收获:
对这个SSM 了然于胸,如同对JDBC一般了解!!!
或许这就是java吧。
继续学习~~~~~~~


评论