发表于: 2017-10-17 00:37:41
1 649
(啊啊啊,提交的时候才发现已经过零点了,可以更改日期么 )
)
今天完成的事情
1 demo学习的余下部分:
http://blog.csdn.net/walkerjong/article/details/7994326
ReqquestMapping注释:是一个处理请求地址映射的注解。用于方法和类上。
基础的两个属性value和method:
value:请求地址
可以有三种 ①/application 固定值 ②/application/{name} 包含变量 ③ 正则表达式 (没学过)
其中如果传入参数超过一个时,必须在参数前添加注释@PathVariable("id") int id。
method:请求类型
HTTP的几个类型如 GET、POST、PUT、DELETE 等
默认()内只有一个的话就是value。比如红色行,()内表示value值,并且作用在类上,表示父路径的意思。
蓝色行就是说 该方法处理/{bookId}/detail的 GET请求。
@ResponseBody
作用: 该注解用于将Controller的方法返回的对象,通过适当的HttpMessageConverter转换为指定格式后,写入到Response对象的body数据区。
使用时机: 返回的数据不是html标签的页面,而是其他某种格式的数据时(如json、xml等)使用。
接上篇日报:web包下的Controller
@Controller
@RequestMapping("/book")
public class BookController {
private Logger logger = LoggerFactory.getLogger(this.getClass());
@Autowired
private BookService bookService;
@RequestMapping(value = "/list", method = RequestMethod.GET)
private String list(Model model){
List<Book> list = bookService.getList();
model.addAttribute("list", list);
return "list";
}
@RequestMapping(value = "/{bookId}/detail", method = RequestMethod.GET)
private String detail(@PathVariable("bookId") Long bookId, Model model) {
if (bookId == null) {
return "redirect:/book/list";
}
Book book = bookService.getById(bookId);
if (book == null) {
return "forward:/book/list";
}
model.addAttribute("book", book);
return "detail";
}
@RequestMapping(value = "/{bookId}/appoint", method = RequestMethod.POST, produces = {
"application/json; charset=utf-8" })
@ResponseBody
private Result<AppointExecution> appoint(@PathVariable("bookId") Long bookId, @RequestParam("studentId") Long studentId) {
if (studentId == null || studentId.equals("")) {
return new Result<>(false, "学号不能为空");
}
AppointExecution execution = null;
try {
execution = bookService.appoint(bookId, studentId);
} catch (NoNumberException e1) {
execution = new AppointExecution(bookId, AppointStateEnum.NO_NUMBER);
} catch (RepeatAppointException e2) {
execution = new AppointExecution(bookId, AppointStateEnum.REPEAT_APPOINT);
} catch (Exception e) {
execution = new AppointExecution(bookId, AppointStateEnum.INNER_ERROR);
}
return new Result<AppointExecution>(true, execution);
}
}
2 基于任务一修改的项目结构:
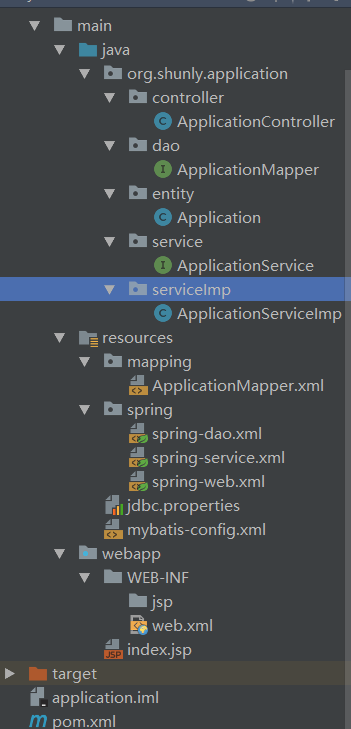
相关xml配置又重新温习一遍。
然后是任务一添加RESTful~~的Controller类:
@Controller
@RequestMapping("/application")
public class ApplicationController {
@Autowired
private ApplicationService applicationService;
@RequestMapping(value = "/{id}", method = RequestMethod.GET)
public String id(@PathVariable("id") int id){
applicationService.getById(id);
return "getById";
}
@RequestMapping(value = "/{name}", method = RequestMethod.GET)
public String name(@PathVariable("name") String name){
applicationService.getByName(name);
return "getByName";
}
@RequestMapping(value = "/list", method = RequestMethod.GET)
public String list(){
List list = applicationService.listApplication();
return "list";
}
@RequestMapping(value = "/{id}", method = RequestMethod.DELETE)
public String delete(@PathVariable("id") int id){
applicationService.getById(id);
return "delete";
}
@RequestMapping(method = RequestMethod.PUT)
public String add(Application application){
applicationService.insert(application);
return "add";
}
}
明天计划的事情:
jetty?
遇到的问题:
在写Controller时候
@Autowired
private ApplicationService applicationService;
idea提示错误:No beans of 'ApplicationService' type found.
原来是漏了注入ApplicationService的配置代码
<bean id="applicationService" class="org.mybatis.spring.mapper.MapperFactoryBean">
<property name="mapperInterface" value="org.shunly.application.service.ApplicationService"/>
<property name="sqlSessionFactory" ref="sqlSessionFactory"/>
</bean>
收获:
总算是往前进了一步,了解springmvc的基础使用。但是还需要勤加练习和巩固。


评论