发表于: 2017-08-26 15:24:47
2 1209
今天做的事:
终于可以正常使用jsp里的json标签了。
首先,json-taglib.jar这个包在maven中导不进去,所以问了师兄,需要添加公司镜像,然后在使用本地的仓库
最后导入的包是这样的
<dependency>
  <groupId>3rdparty</groupId>
  <artifactId>json-taglib</artifactId>
  <version>0.4.1</version>
</dependency>
这里的groupId有一点小小的不一样
然后所有问题就迎刃而解了。。。
之前报错
org.apache.jasper.JasperException: The absolute uri: http://www.atg.com/taglibs/json cannot be resolved in either web.xml or the jar files deployed with this application
因为我是手动导入jar包,没有使用maven依赖。
这个依赖添加完成后,看一下代码
@RequestMapping(value = "/jspJSON",method = RequestMethod.GET)
public String ha(Model model){

    ArrayList<LineItems> lineItems = new ArrayList<LineItems>();
    LineItems lineItem1 = new LineItems();
    LineItems lineItem2 = new LineItems();


    lineItem1.setTitle("The Big Book of Foo");
    lineItem1.setDescription("Bestselling book of Foo by A.N. Other");
    lineItem1.setImageUrl("/images/books/12345.gif");
    lineItem1.setPrice("$10.00");
    lineItem1.setQty(1);
    lineItem2.setTitle("Javascript Pocket Reference");
    lineItem2.setDescription("Handy pocket-sized reference for the Javascript language");
    lineItem2.setImageUrl("/images/books/56789.gif");
    lineItem2.setPrice("$5.50");
    lineItem2.setQty(1);
    lineItems.add(lineItem1);
    lineItems.add(lineItem2);
    for(LineItems l : lineItems){
        System.out.println(l);
    }

    model.addAttribute("lineItems",lineItems);


    return "json";
}
package POJO;

/**
 * Created by Administrator on 2017/08/26.
 */
public class LineItems {
    private String title;
    private String description;
    private String imageUrl;
    private String price;
    private Integer qty;

    public String getTitle() {
        return title;
    }

    public void setTitle(String title) {
        this.title = title;
    }

    public String getDescription() {
        return description;
    }

    public void setDescription(String description) {
        this.description = description;
    }

    public String getImageUrl() {
        return imageUrl;
    }

    public void setImageUrl(String imageUrl) {
        this.imageUrl = imageUrl;
    }

    public String getPrice() {
        return price;
    }

    public void setPrice(String price) {
        this.price = price;
    }

    public Integer getQty() {
        return qty;
    }

    public void setQty(Integer qty) {
        this.qty = qty;
    }
}
jsp页面
<%@ taglib prefix="json" uri="http://www.atg.com/taglibs/json" %>
<%@ page language="java"  pageEncoding="UTF-8" contentType="text/html; charset=utf-8" %>

<json:object>

    <json:array name="items" var="item" items="${lineItems}">
       <json:object>
           <json:property name="title" value="${item.title}"/>
           <json:property name="description" value="${item.description}" />
           <json:property name="imageUrl" value="${item.imageUrl}"/>
           <json:property name="price" value="${item.price}"/>
           <json:property name="qty" value="${item.qty}"/>

       </json:object>
    </json:array>

</json:object>
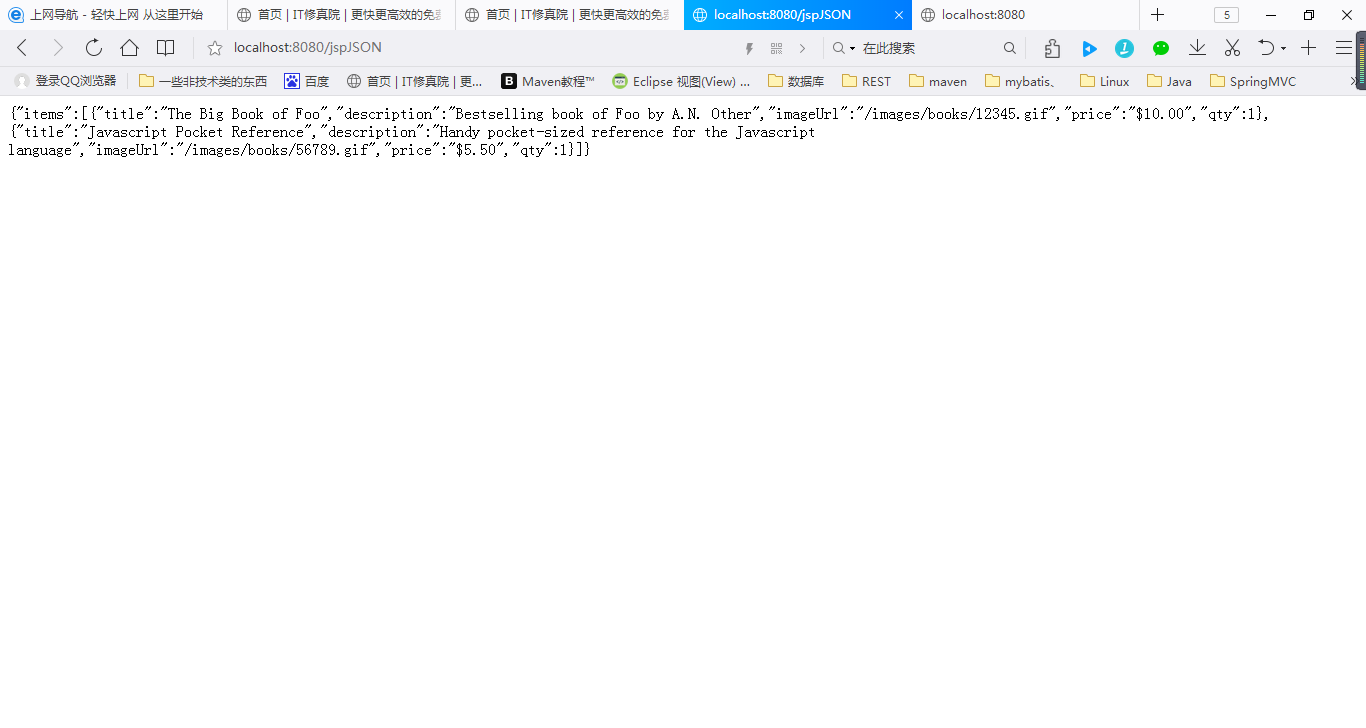
网页中是这样的
然后在postman测试时看一看到json输出
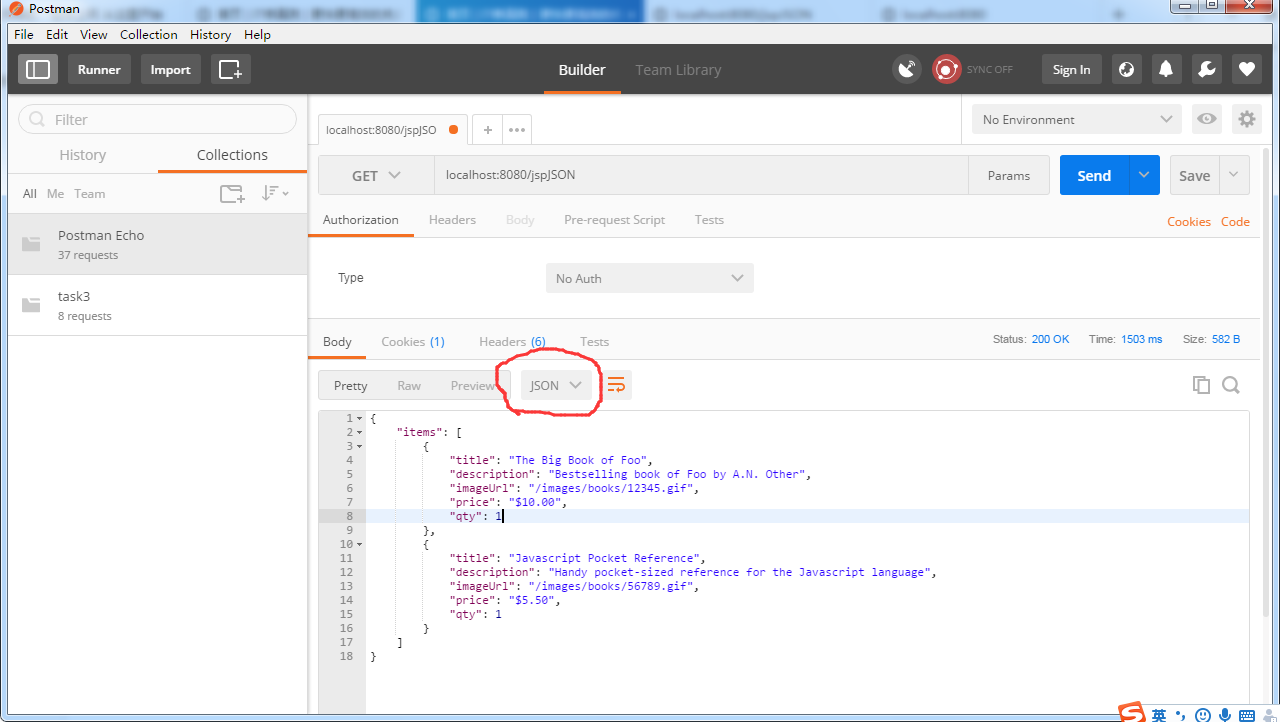
这就比较好看了
好,json学习到此告一段落。
接下来开始学习Memcache,在这之前准备一波小课堂。
接下来讲一下memcached的安装。稍微有点麻烦,综合了各个百度百科,教程等等
首先需要下载一个memcached for Windows的软件,解压后只有一个memcached.exe文件
然后进入cmd命令行,cd到文件路径下
使用命令
memcached.exe -d install
memcached.exe -d start
注意,使用这两个命令后,什么都不会发生,命令行没有任何提示,但是如果你再输入一遍上面的两个命令,会提示已安装和已启动等,证明安装成功了。
那么怎么使用呢?
这个就稍微有点复杂。
首先我们使用Telnet可以很直观的使用Memcache,这里有一个相关链接,专门讲如何使用Telnet测试Memcache的。
http://jingyan.baidu.com/article/f79b7cb310b6079144023e8f.html
但是不要急,因为Telnet是什么你肯定不知道对不对?
所以请移步:http://jingyan.baidu.com/article/ae97a646b22fb6bbfd461d19.html
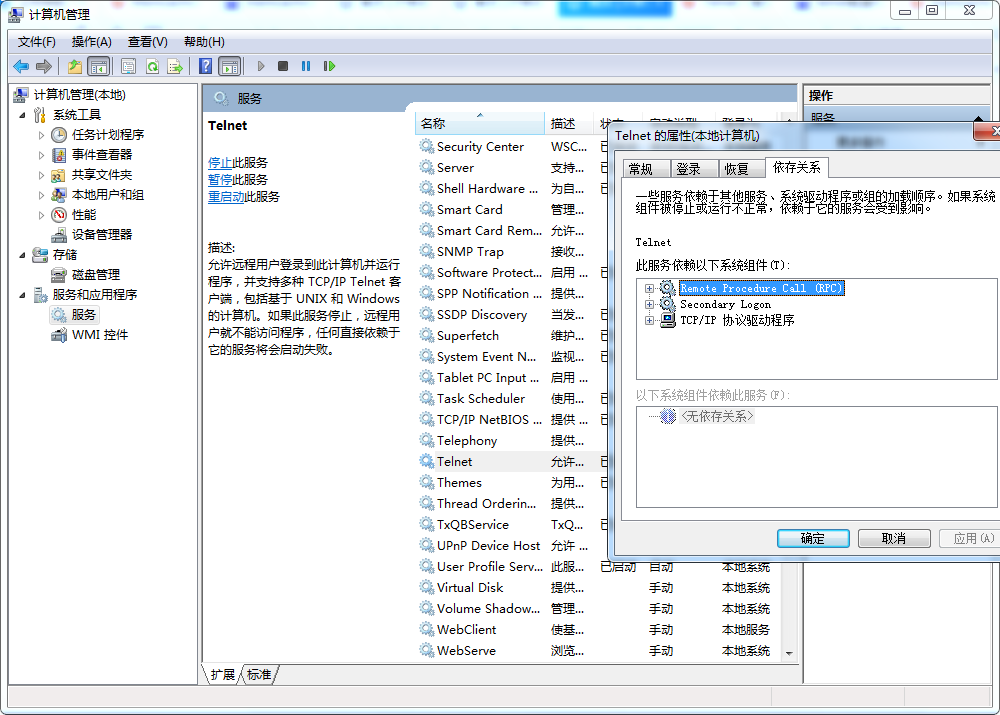
Telnet是Windows的一个服务,我们只需要配置开启就可以了,但是在配置中可能会报
无法启动telnet 服务 错误1068
这时,我们需要开启Telnet的相关依赖
https://zhidao.baidu.com/question/234474164.html
如图
之后就可以启动Telnet了
然后我们进入cmd命令行。
使用ipconfig命令获取我们的ip。
然后输入Telnet "your's ip" 11211(memcached默认端口)
进入一个空白界面,然后输入Ctrl+],进入另一个空白界面(-_-||),回车,就可以直观的使用Memcache了

可以看到我的上面有几个是ERROR报错,知识因为我的初值设置问题,也算是个坑把,所以一定要理解每个字段的具体含义啊喂!
这里有篇文章介绍的不错
http://www.cnblogs.com/sunniest/p/4154209.html
然后,接下来就需要学习如何在java中使用Memcache了。
明天计划:请假,推迟一天
问题:解决
收获:安装Memcache,暂时还没涉及配置,需要配置的时候再去了解;jsp页面的json标签
进度:开始时间:2017.08.25
预计demo:2017.08.30
是否有延期风险:未知,先放着看看,延期另说
禅道链接:http://task.ptteng.com/zentao/project-task-285-unclosed.html


评论