发表于: 2017-07-16 18:28:25
1 1194
今日完成
结束tuscany
在任务8基础上修改
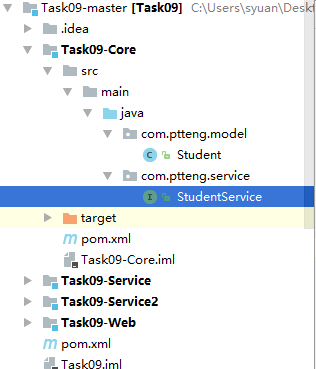
项目结构
pom.xml
<modules>
    <module>Task09-Core</module>
    <module>Task09-Service</module>
    <module>Task09-Service2</module>
    <module>Task09-Web</module>
</modules>
<!--tuscany相关jar包-->
<dependency>
    <groupId>org.apache.tuscany.sca</groupId>
    <artifactId>tuscany-base-runtime</artifactId>
    <version>2.0.1</version>
</dependency>
<dependency>
    <groupId>org.apache.tuscany.sca</groupId>
    <artifactId>tuscany-implementation-spring-runtime</artifactId>
    <version>2.0.1</version>
</dependency>
<dependency>
    <groupId>org.apache.tuscany.sca</groupId>
    <artifactId>tuscany-binding-rmi-runtime</artifactId>
    <version>2.0.1</version>
    <scope>runtime</scope>
</dependency>
和任务8一样,将项目分成core service web三个部分
core部分
core model包下的Student.java接口序列化
public class Student implements Serializable {
    private int id;
    private String name;
    private String avatar;
    private String type;
    private String introduction;
Service包添加@Remotable注释
@Remotable
public interface StudentService {

    public List<Student> getAll();


}
service部分
增加tuscany配置文件,tuscany.xml
<sca:service name="StudentService" target="StudentService" />

<bean id="StudentService"  class="com.ptteng.service.impl.StudentServiceImpl" />

<import resource="spring-mvc.xml"/>
StudentService.composite
<?xml version= "1.0" encoding ="UTF-8"?>
<composite xmlns="http://docs.oasis-open.org/ns/opencsa/sca/200912"
           xmlns:tuscany="http://tuscany.apache.org/xmlns/sca/1.1"
           targetNamespace="http://student"
           xmlns:xsd="http://www.w3.org/2001/XMLSchema"
           name= "StudentService" >
    <component name="StudentServiceComponent">
        <implementation.spring location="spring-tuscany.xml" />
        <service name= "StudentService">
            <tuscany:binding.rmi uri="rmi://localhost:8031/StudentService" />
        </service>
    </component >
</composite>
ServerStart1.java
public class ServerStart1 {
    public static void main(String[] args) throws InterruptedException {
        Node node = NodeFactory.newInstance().createNode( "StudentService.composite");
        node.start();
        while (true ) {
            System.out.println("Service1启动发布成功");
            TimeUnit. SECONDS.sleep(Long.MAX_VALUE);
        }
    }
}
web部分
spring-mvc.xml
<?xml version="1.0" encoding="UTF-8"?>
<beans xmlns="http://www.springframework.org/schema/beans"
       xmlns:xsi="http://www.w3.org/2001/XMLSchema-instance" xmlns:p="http://www.springframework.org/schema/p"
       xmlns:context="http://www.springframework.org/schema/context"
       xmlns:mvc="http://www.springframework.org/schema/mvc"
       xsi:schemaLocation="http://www.springframework.org/schema/beans
                        http://www.springframework.org/schema/beans/spring-beans-3.1.xsd
                         http://www.springframework.org/schema/context
                        http://www.springframework.org/schema/context/spring-context-3.1.xsd
                         http://www.springframework.org/schema/mvc
                         http://www.springframework.org/schema/mvc/spring-mvc-4.0.xsd">
    <context:component-scan base-package="com.ptteng" />

    <!--输出jsp-->
    <!-- 定义跳转的文件的前后缀 ,视图模式配置-->
    <bean id="viewResolve" class="org.springframework.web.servlet.view.InternalResourceViewResolver">
        <!--构造输出url-->
        <property name="prefix" value="/WEB-INF/jsp/"/>
        <property name="suffix" value=".jsp"/>
        <property name="order" value="1"/>
    </bean>

    <bean id="studentService2" class="org.springframework.remoting.rmi.RmiProxyFactoryBean" scope="prototype">
        <property name="serviceUrl" value="//localhost:8032/StudentService"/>
        <property name="serviceInterface" value="com.ptteng.service.StudentService"/>
    </bean>

    <bean id="studentService1" class="org.springframework.remoting.rmi.RmiProxyFactoryBean" scope="prototype">
        <property name="serviceUrl" value="//localhost:8031/StudentService"/>
        <property name="serviceInterface" value="com.ptteng.service.StudentService"/>
    </bean>


</beans>
同任务8一样,先启动service1和service2

用相同配置配置tomcat容器访问web
Http 500错误
看了师兄的日报提到@Reference注解,今天问问
收获
Tuscany
困难
Http 500错误
明日计划
解决Http 500错误然后总结下任务8和9


评论