发表于: 2017-07-05 23:06:05
1 1042
今日完成:
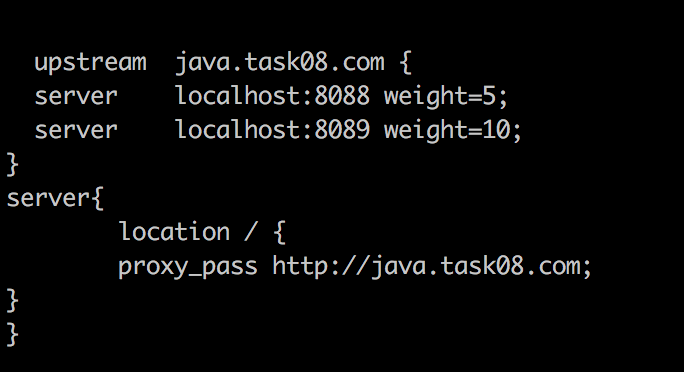
使用nginx随机访问两台web,两台web随机访问两个service
明天计划:
使用Tuscany完成WEB端和Service端的分离
收获:
重写了好几遍项目,对RMI分布式有了更多认识。
什么是RMI?
RMI(Remote Method Invocation,远程方法调用),java分布式应用程序的API。
在java中只要一个类extends了java.rmi.Remote接口,即可成为存在于服务器的远程对象,同时,远程对象必须实现java.rmi.server.UniCastRemoteObject类才能供客户端访问并提供一定的服务。
RMI开发步骤
- 首先创建远程接口并声明远程方法,需要继承自java.rmi.Remote(Client和Server需要共享这个接口);
- 创建远程接口的实现类,这个类必须继承自java.rmi.server.UnicastRemoteObject(只有Server需要这个实现类,Client可以没有);
- 编写Server,绑定端口,注册对象;
- 编写Client,监听端口并查找对象。
Spring对RMI的支持很简单
不用服务接口继承Remote
不用服务实现类继承UnicastRemoteObject
也不用我们自己注册rmi的远程服务实现类
服务器端 你需要做的仅仅是 写好你需要提供远程服务的实现类
然后将其交给RmiServiceExporter类 RmiServiceExporter会将实现类发布为RMI服务
通过 register Port 提供服务(暴露接口)
客户端 也很简单
只需要使用RmiProxyFactoryBean从服务器端的URL从获取服务对象 并进行封装给你定义的id
然后从spring容器中获取RmiProxyFactoryBean封装的id即可
通过 servicePort 传输数据。
- 什么是分布式?
分布式应用开发简单的说,是指将用户界面、控制台服务、数据库管理三个层次部署在不同的位置上。其中用户界面是客户端实现的功能,控制台服务是一个专门的服务器,数据管理是在一个专门的数据库服务器上实现的。
- 以前的项目持久层、业务层、控制层都是写在一起的,使用了分布式以后把系统的各个模块部署到不同服务器上,项目之间的访问通过指定的端口号和访问地址。
为什么要使用分布式呢?
当访问量不大的时候使用单台模式可以满足需求,但是当访问量有几百上千万的时候,单台服务器已经不能满足需求了,这时可以使用分布式,部署多个业务层缓解系统压力,当其中一个宕机了也不会影响到系统用户访问。
创建一个SpringRMI项目步骤:
1.使用Maven创建一个父项目。
2.创建三个子项目Core、Service、Web分别对应持久层、业务层、控制层。
3.在Service层的Spring配置文件中添加如下配置:
<!--服务端-->
<bean id="studentServiceExporter" class="org.springframework.remoting.rmi.RmiServiceExporter">
    <!--serviceName-->
    <property name="serviceName" value="SService"/>
    <!--service实现类-->
    <property name="service" ref="studentService"/>
    <!--service接口-->
    <property name="serviceInterface" value="com.ptteng.service.StudentService"/>
    <!--注册端口号-->
    <property name="registryPort" value="8010"/>
    <!--给服务注册端口号-->
    <property name="servicePort" value="8020"/>
</bean>

<bean id="studentService" class="com.ptteng.service.impl.StudentServiceImpl"/>
其余配置和SpringMVC的一样
4.创建服务端启动程序。
public class StartServer {
    public static void main(String[] args) {
        ApplicationContext ac = new ClassPathXmlApplicationContext("Spring-mvc.xml");
        StudentService service = (StudentService) ac.getBean("studentService");
        System.out.println("server发布成功!");
5.在Web层的配置文件中添加如下配置:
<bean id="studentService" class="org.springframework.remoting.rmi.RmiProxyFactoryBean" scope="prototype">
    <property name="serviceUrl" value="rmi://localhost:8010/SService"/>
    <property name="serviceInterface" value="com.ptteng.service.StudentService"/>
</bean>
6.启动顺序是:先启动服务端程序,再启动客户端的程序。
pom文件配置:
在父pom中配置所需要的依赖,在子项目pom.xml文件中,有个parent节点,继承了根节点的pom,这是maven的项目继承依赖,会从父POM中继承一些值,这对构建一个大型的系统来说很有必要,这样的话你就不需要一遍一遍的重复添加同样的依赖元素,如果在子项目中有同样的依赖,则会覆盖父POM中的值。
简单来说就是在父pom文件里写好依赖,子项目里使用parent继承
- 3.部署两台Service,在WEB中随机访问任意一台Service。 就是写两个Service层,内容可以一样,但是在Service的配置文件中注册端口要不同。
package com.ptteng.controller;
import com.ptteng.model.Student;
import com.ptteng.service.StudentService;
import org.springframework.context.ApplicationContext;
import org.springframework.stereotype.Controller;
import org.springframework.web.bind.annotation.RequestMapping;
import org.springframework.web.bind.annotation.RequestMethod;
import org.springframework.web.context.support.WebApplicationContextUtils;
import javax.servlet.http.HttpServletRequest;
import javax.servlet.http.HttpServletResponse;
import java.util.List;
@Controller
public class StudentController {
int i = 0;
int j = 0;
int k = 0;
int l = 0;
private ApplicationContext ac = null;
@RequestMapping(value = "/list", method = RequestMethod.GET)
public String getAll(HttpServletRequest request, HttpServletResponse response) {
ac = WebApplicationContextUtils.getWebApplicationContext(request.getServletContext());
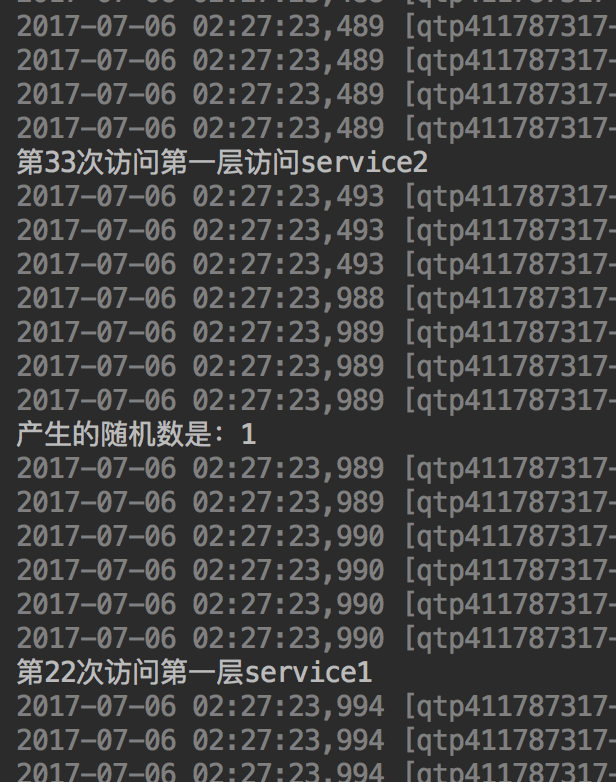
int flag = Math.random() > 0.5 ? 1 : 0;//使用random产生随机数0或1,如果是0则访问service1,如果是1则访问service2
System.out.println("产生的随机数是:" + flag);
List<Student> list = null;
try {
switch (flag) {
case 1:
StudentService studentService1 = (StudentService) ac.getBean("studentService");
i++;
System.out.println("第"+i+"次访问第一层service1");
list = studentService1.getAll();
break;
default:
j++;
StudentService studentService2 = (StudentService) ac.getBean("studentService2");
System.out.println("第"+j+"次访问第一层访问service2");
list = studentService2.getAll();
break;
}
} catch (Exception e) {
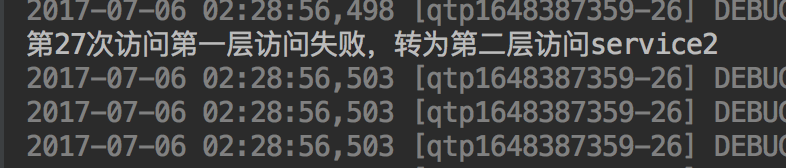
switch (flag) {
case 1:
k++;
StudentService studentService2 = (StudentService) ac.getBean("studentService2");
System.out.println("第"+k+"次访问第一层访问失败,转为第二层访问service2");
list = studentService2.getAll();
break;
default:
l++;
StudentService studentService1 = (StudentService) ac.getBean("studentService");
System.out.println("第"+l+"次访问第一层失败,转为第二层访问service1");
list = studentService1.getAll();
break;
}
}
request.setAttribute("list", list);
return "list";
}
}
- 4.部署两台WEB,通过Nginx配置两台WEB随机访问,两台WEB可以随机访问两台Service。
- 创建两个Web,端口不同。使用Nginx配置负载均衡,随机访问两个Web
- 在hosts文件中添加

- 实现效果:
关闭一个service
spring 默认scope 是单例模式
这样只会创建一个Action对象
每次访问都是同一个Action对象,数据不安全
struts2 是要求 每次次访问 都对应不同的Action
scope="prototype" 可以保证 当有请求的时候 都创建一个Action对象
使用Spring工具类WebApplicationContextUtils.getWebApplicationContext手动获取Bean
这样在1个Service宕机重启后通过非单例模式自动创建一个新的Action对象,再手动获取bean。就可以访问恢复后的Service
ac = WebApplicationContextUtils.getWebApplicationContext(request.getServletContext());
使用问题:
client的启动端口和service注册的端口不一样,导致报错 :
Error creating bean with name 'studentService' defined in class path resource [Spring-mvc-client.xml]:
Invocation of init method failed; nested exception is java.lang.IllegalArgumentException: port out of range:80100
at org.springframework.beans.factory.support.AbstractAutowireCapableBeanFactory.initializeBean(AbstractAutowireCapableBeanFactory.java:1628)


评论