发表于: 2017-05-18 16:17:32
1 1258
今日计划
按spring-mybaitis-springmybatis的顺序梳理一遍
今日完成
Spring是一个基于IOC和AOP的结构的J2EE系统的框架
IOC反转控制是Spring的基础,Inversion Of Control
简单的说就是创建对象由以前的程序员字句new构造方法来调用,变成了交由Spring创建对象DI依赖注入Dependency Inject。简单地说就是拿到的对象的属性,已经被注入好相关值了,直接使用即可。
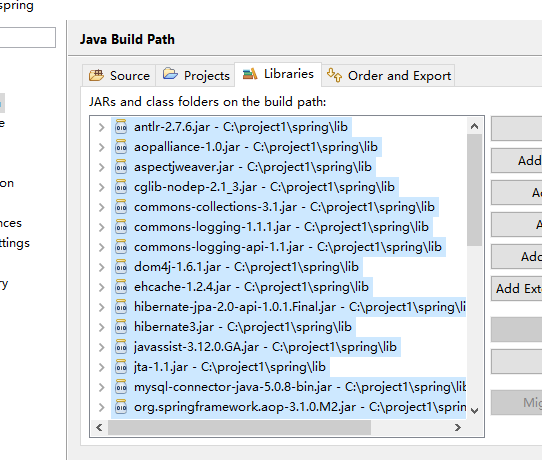
新建spring项目,加载外部jar
准备pojo Student,用来演示IOC和DI
package com.jnshu.pojo;
public class Student {
public int getId() {
return id;
}
public void setId(int id) {
this.id = id;
}
public String getName() {
return name;
}
public void setName(String name) {
this.name = name;
}
private int id;
private String name;
}
在src目录下新建applicationContext.xml文件
applicationContext.xml是Spring的核心配置文件,通过关键字c即可获取Student对象,该对象获取的时候,即被注入字符串"student1”到name属性
<?xml version="1.0" encoding="UTF-8"?>
<beans xmlns="http://www.springframework.org/schema/beans"
xmlns:xsi="http://www.w3.org/2001/XMLSchema-instance"
xmlns:aop="http://www.springframework.org/schema/aop"
xmlns:tx="http://www.springframework.org/schema/tx"
xmlns:context="http://www.springframework.org/schema/context"
xsi:schemaLocation="
http://www.springframework.org/schema/beans
http://www.springframework.org/schema/beans/spring-beans-3.0.xsd
http://www.springframework.org/schema/aop
http://www.springframework.org/schema/aop/spring-aop-3.0.xsd
http://www.springframework.org/schema/tx
http://www.springframework.org/schema/tx/spring-tx-3.0.xsd
http://www.springframework.org/schema/context
http://www.springframework.org/schema/context/spring-context-3.0.xsd">
<bean name="c" class="com.jnshu.pojo.Student">
<property name="name" value="student 1" />
</bean>
</beans>
测试类,演示通过spring获取Studnt对象,以及该对象被注入的name属性。
package com.jnshu.test;
import org.springframework.context.ApplicationContext;
import org.springframework.context.support.ClassPathXmlApplicationContext;
import com.jnshu.pojo.Student;
public class TestSpring {
public static void main(String[] args) {
ApplicationContext context = new ClassPathXmlApplicationContext(
new String[] { "applicationContext.xml" });
Student c = (Student) context.getBean("c");
System.out.println(c.getName());
}
}
以获取对象的方式来进行比较
传统的方式
通过new关键字主动创建一个对象
IOC方式
对象的生命周期由Spring来管理,直接从Spring那里去获取一个对象。IOC时反转控制的缩写,就像控制权本来在自己手里,交给了Spring。
注入对象
对Product对象,注入一个Student对象
Product类中由对Student对象的setter getter
package com.jnshu.pojo;
public class Product {
private int id;
private String name;
private Student student;
public int getId() {
return id;
}
public void setId(int id) {
this.id = id;
}
public String getName() {
return name;
}
public void setName(String name) {
this.name = name;
}
public Student getStudent() {
return student;
}
public void setstudent(Student student) {
this.student = student;
}
}
applicationContext.xml
在创建Product的时候注入一个Student对象
<?xml version="1.0" encoding="UTF-8"?>
<beans xmlns="http://www.springframework.org/schema/beans"
xmlns:xsi="http://www.w3.org/2001/XMLSchema-instance" xmlns:aop="http://www.springframework.org/schema/aop"
xmlns:tx="http://www.springframework.org/schema/tx" xmlns:context="http://www.springframework.org/schema/context"
xsi:schemaLocation="
http://www.springframework.org/schema/beans
http://www.springframework.org/schema/beans/spring-beans-3.0.xsd
http://www.springframework.org/schema/aop
http://www.springframework.org/schema/aop/spring-aop-3.0.xsd
http://www.springframework.org/schema/tx
http://www.springframework.org/schema/tx/spring-tx-3.0.xsd
http://www.springframework.org/schema/context
http://www.springframework.org/schema/context/spring-context-3.0.xsd">
<bean name="c" class="com.jnshu.pojo.Student">
<property name="name" value="student 1" />
</bean>
<bean name="p" class="com.jnshu.pojo.Product">
<property name="name" value="product1" />
<property name="student" ref="c" />
</bean>
</beans>
TestSpring
package com.jnshu.test;
import org.springframework.context.ApplicationContext;
import org.springframework.context.support.ClassPathXmlApplicationContext;
import com.jnshu.pojo.Product;
public class TestSpring {
public static void main(String[] args) {
ApplicationContext context = new ClassPathXmlApplicationContext(new String[] { "applicationContext.xml" });
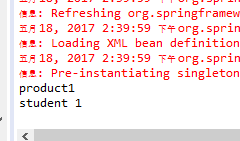
Product p = (Product) context.getBean("p");
System.out.println(p.getName());
System.out.println(p.getStudent().getName());
}
}
运行结果
注解方式IOC/DI
修改applicationContext.xml
添加
<context:annotation-config/> 告诉Spring要用注解方式进行配置
注入对象的21行注释掉,这个行为在后面将使用注解来完成
<?xml version="1.0" encoding="UTF-8"?>
<beans xmlns="http://www.springframework.org/schema/beans"
xmlns:xsi="http://www.w3.org/2001/XMLSchema-instance" xmlns:aop="http://www.springframework.org/schema/aop"
xmlns:tx="http://www.springframework.org/schema/tx" xmlns:context="http://www.springframework.org/schema/context"
xsi:schemaLocation="
http://www.springframework.org/schema/beans
http://www.springframework.org/schema/beans/spring-beans-3.0.xsd
http://www.springframework.org/schema/aop
http://www.springframework.org/schema/aop/spring-aop-3.0.xsd
http://www.springframework.org/schema/tx
http://www.springframework.org/schema/tx/spring-tx-3.0.xsd
http://www.springframework.org/schema/context
http://www.springframework.org/schema/context/spring-context-3.0.xsd">
<context:annotation-config/>
<bean name="c" class="com.jnshu.pojo.Student">
<property name="name" value="student 1" />
</bean>
<bean name="p" class="com.jnshu.pojo.Product">
<property name="name" value="product1" />
<!-- <property name="student" ref="c" /> -->
</bean>
</beans>
@Autowired
在Student.java的student属性前加上@Autowired注解
运行测试,结果一样
除了在属性前加上@Autowired这种方式之外,也可以在setStudent方法前加上@AUtowired,这样来达到相同效果
@Autowiredpublic void setStudent(Student student)
@Resource
除了@Autowired之外,@Resource也是常用手段
import javax.annotation。resource
@resource(name="c")
private Student student;
对Bean的注解
applicationContext.xml,什么都去掉,只新增
<context:component-scan base-package="com.jnshu.pojo"/>
其作用是告诉Spring,bean都放在com.jnshu.pojo这个包下
<?xml version="1.0" encoding="UTF-8"?>
<beans xmlns="http://www.springframework.org/schema/beans"
xmlns:xsi="http://www.w3.org/2001/XMLSchema-instance" xmlns:aop="http://www.springframework.org/schema/aop"
xmlns:tx="http://www.springframework.org/schema/tx" xmlns:context="http://www.springframework.org/schema/context"
xsi:schemaLocation="
http://www.springframework.org/schema/beans
http://www.springframework.org/schema/beans/spring-beans-3.0.xsd
http://www.springframework.org/schema/aop
http://www.springframework.org/schema/aop/spring-aop-3.0.xsd
http://www.springframework.org/schema/tx
http://www.springframework.org/schema/tx/spring-tx-3.0.xsd
http://www.springframework.org/schema/context
http://www.springframework.org/schema/context/spring-context-3.0.xsd">
<context:component-scan base-package="com.jnshu.pojo"/>
</beans>
@Component
为Product类加上@Component注解,即表明此类是bean
@Component("p")
public class Product {
为Student类加上@Component注解,即表明此类是bean
@Component("c")
public class Student {
另外,因为配置从applicationContext.xml中移出来了,所以属性初始化放在属性声明上进行了。
private String name="product 1";
private String name="student 1";
Product.java
package com.jnshu.pojo;
import javax.annotation.Resource;
import org.springframework.beans.factory.annotation.Autowired;
import org.springframework.stereotype.Component;
@Component("p")
public class Product {
private int id;
private String name="product 1";
@Autowired
private Student student;
public int getId() {
return id;
}
public void setId(int id) {
this.id = id;
}
public String getName() {
return name;
}
public void setName(String name) {
this.name = name;
}
public Student getStudent() {
return student;
}
public void setStudent(Student student) {
this.student = student;
}
}
Student.java
package com.jnshu.pojo;
import org.springframework.stereotype.Component;
@Component("c")
public class Student {
public int getId() {
return id;
}
public void setId(int id) {
this.id = id;
}
public String getName() {
return name;
}
public void setName(String name) {
this.name = name;
}
private int id;
private String name="student 1";
}
运行测试TestSpring,可以发现结果一样
AOP
AOP即Aspect Oriental Program 面向切面编程。首先,在面向切面编程的思想里面,把功能分为核心业务功能,和周边功能。
所谓的核心业务,比如登陆,增加数据,删除数据都叫核心业务
所谓的周边功能,比如性能统计,日志,事务管理等等
周边功能在Spring的变相切面编程AOP思想里,即被定义为切面
在面向切面编程AOP的思想里面,核心业务功能和切面功能分别独立进行开发
然后把切面功能和核心业务功能"编织"在一起,这就叫AOP
准备业务类ProductService
ProductService
package com.jnshu.service;
public class ProductService {
public void doSomeService(){
System.out.println("doSomeService");
}
}
TestSpring
在引入切面之前,调用该业务类
package com.jnshu.test;
import org.springframework.context.ApplicationContext;
import org.springframework.context.support.ClassPathXmlApplicationContext;
import com.jnshu.service.ProductService;
public class TestSpring {
public static void main(String[] args) {
ApplicationContext context = new ClassPathXmlApplicationContext(new String[] { "applicationContext.xml" });
ProductService s = (ProductService) context.getBean("s");
s.doSomeService();
}
}
准备日志切面LoggerAspect
该日志切面的功能是在调用核心功能之前和之后分别打印日志,切面就是辅助功能
Object object = joinPoint.proceed();
就是将来与某个核心功能编织之后,用于执行核心功能的代码
package com.jnshu.aspect;
import org.aspectj.lang.ProceedingJoinPoint;
public class LoggerAspect {
public Object log(ProceedingJoinPoint joinPoint) throws Throwable {
System.out.println("start log:" + joinPoint.getSignature().getName());
Object object = joinPoint.proceed();
System.out.println("end log:" + joinPoint.getSignature().getName());
return object;
}
}
applicationContext.xml
<?xml version="1.0" encoding="UTF-8"?>
<beans xmlns="http://www.springframework.org/schema/beans"
xmlns:xsi="http://www.w3.org/2001/XMLSchema-instance"
xmlns:aop="http://www.springframework.org/schema/aop"
xmlns:tx="http://www.springframework.org/schema/tx"
xmlns:context="http://www.springframework.org/schema/context"
xsi:schemaLocation="
http://www.springframework.org/schema/beans
http://www.springframework.org/schema/beans/spring-beans-3.0.xsd
http://www.springframework.org/schema/aop
http://www.springframework.org/schema/aop/spring-aop-3.0.xsd
http://www.springframework.org/schema/tx
http://www.springframework.org/schema/tx/spring-tx-3.0.xsd
http://www.springframework.org/schema/context
http://www.springframework.org/schema/context/spring-context-3.0.xsd">
<bean name="c" class="com.jnshu.pojo.Student">
<property name="name" value="yyy" />
</bean>
<bean name="p" class="com.jnshu.pojo.Product">
<property name="name" value="product1" />
<property name="jnshu" ref="c" />
</bean>
<bean name="s" class="com.jnshu.service.ProductService">
</bean> //声明业务对象
<bean id="loggerAspect" class="com.jnshu.aspect.LoggerAspect"/>
//声明日志切面
<aop:config>
<aop:pointcut id="loggerCutpoint"
expression=
"execution(* com.jnshu.service.ProductService.*(..)) "/>
//指定右边的核心业务功能
<aop:aspect id="logAspect" ref="loggerAspect">
<aop:around pointcut-ref="loggerCutpoint" method="log"/>
</aop:aspect> //指定左边的辅助功能,然后通过aop:config把业务对象与 辅助功能编织在一起
</aop:config>
</beans>
TestSpring
TestSpring代码没有发生任何变化,通过配置的方式,把切面和核心业务类编制在了一起
注解方式AOP
注解配置业务类
使用@Component("S")注解ProductService类
package com.jnshu.service;
import org.springframework.stereotype.Component;
@Component("s")
public class ProductService {
public void doSomeService(){
System.out.println("doSomeService");
}
}
注解配置切面
@Aspect 注解表示这是一个切面
@Component 表示这是一个bean,由Spring进行管理
@Around(value = "execution(* com.jnshu.service.ProductService.*(..))") 表示对com.jnshu.service.ProductService 这个类中的所有方法进行切面操作
package com.jnshu.aspect;
import org.aspectj.lang.ProceedingJoinPoint;
import org.aspectj.lang.annotation.Around;
import org.aspectj.lang.annotation.Aspect;
import org.springframework.stereotype.Component;
@Aspect
@Component
public class LoggerAspect {
@Around(value = "execution(* com.jnshu.service.ProductService.*(..))")
public Object log(ProceedingJoinPoint joinPoint) throws Throwable {
System.out.println("start log:" + joinPoint.getSignature().getName());
Object object = joinPoint.proceed();
System.out.println("end log:" + joinPoint.getSignature().getName());
return object;
}
}
applicationContext.xml
<?xml version="1.0" encoding="UTF-8"?>
<beans xmlns="http://www.springframework.org/schema/beans"
xmlns:xsi="http://www.w3.org/2001/XMLSchema-instance"
xmlns:aop="http://www.springframework.org/schema/aop"
xmlns:tx="http://www.springframework.org/schema/tx"
xmlns:context="http://www.springframework.org/schema/context"
xsi:schemaLocation="
http://www.springframework.org/schema/beans
http://www.springframework.org/schema/beans/spring-beans-3.0.xsd
http://www.springframework.org/schema/aop
http://www.springframework.org/schema/aop/spring-aop-3.0.xsd
http://www.springframework.org/schema/tx
http://www.springframework.org/schema/tx/spring-tx-3.0.xsd
http://www.springframework.org/schema/context
http://www.springframework.org/schema/context/spring-context-3.0.xsd">
<context:component-scan base-package="com.jnshu.aspect"/>
<context:component-scan base-package="com.jnshu.service"/>
//扫描两个包,定位业务类和切面类
<aop:aspectj-autoproxy/>
//找到被注解了的切面类,进行切面配置
</beans>
Mybatis
平时我们都用JDBC访问数据库,除了需要自己写SQL之外,还必须操作ConnectionStatpment,ResultSet这些其实
只是手段的辅助类。不仅如此,访问不同的表,还会写很多雷同的代码。
那么用了Mybatis之后,只需要自己提供SQL语句,其他的工作,诸如建立连接,Statement,JDBC相关异常处理等等
都交给Mybatis去做了,那些重复性的工作Mybatis也给做掉了,我们只需要关注在增删改查等操作层面,而把技术细节
都封装在了我们看不见的地方
eclipse导入jar包,mybatis-3.4.2jar和mysql-connector-java-5.0.8-bin.jar
准备实体类,用于映射表
package com.jnshu.pojo;
public class Student {
private int id;
private String name;
public int getId() {
return id;
}
public void setId(int id) {
this.id = id;
}
public String getName() {
return name;
}
public void setName(String name) {
this.name = name;
}
}
配置文件mybatis-config.xml
在src目录下创建mybatis的主配置文件mybatis-config.xml 其作用主要是提供数据库用的驱动,数据库名称,编码
方式,帐号密码
<property name="driver" value="com.mysql.jdbc.Driver"/>
<property name="url" value="jdbc:mysql://localhost:3306/student?characterEncoding=UTF-8"/>
<property name="username" value="root"/>
<property name="password" value="admin"/>
以及别名,自动扫描com.jnshu.pojo下的类型,使得在后续配置文件Student.xml中使用resultType的时候,可以
直接使用Student,而不必写全com.jnshu.pojo.Student
<typeAliases>
<package name="com.jnshu.pojo"/>
</typeAliases>
映射Student.xml
<mappers>
<mapper resource="com/jnshu/pojo/Student.xml"/>
</mappers>
mybatis-config.xml
<?xml version="1.0" encoding="UTF-8" ?>
<!DOCTYPE configuration
PUBLIC "-//mybatis.org//DTD Config 3.0//EN"
"http://mybatis.org/dtd/mybatis-3-config.dtd">
<configuration>
<typeAliases>
<package name="com.jnshu.pojo"/>
</typeAliases>
<environments default="development">
<environment id="development">
<transactionManager type="JDBC"/>
<dataSource type="POOLED">
<property name="driver" value="com.mysql.jdbc.Driver"/>
<property name="url" value="jdbc:mysql://localhost:3306/student?characterEncoding=UTF-8"/>
<property name="username" value="root"/>
<property name="password" value="admin"/>
</dataSource>
</environment>
</environments>
<mappers>
<mapper resource="com/jnshu/pojo/Student.xml"/>
</mappers>
</configuration>
配置Student.xml
在包com.jnshu.pojo下,新建文件Student.xml
namespace="com.jnshu.pojo"
表示命名空间是com.jnshu.pojo,在后续调用sql语句的时候,会用到它里面定义了一条sql语句
select*from entry_form
这条sql语句用id:listStudent进行标识以供后续代码调用。resultType="Student"表示返回的数据和
Student关联起来,这里本应该使用的是com.jnshu.pojo,但是因为上一部配置了别名,所以直接使用
Student就行了
<?xml version="1.0" encoding="UTF-8"?>
<!DOCTYPE mapper
PUBLIC "-//mybatis.org//DTD Mapper 3.0//EN"
"http://mybatis.org/dtd/mybatis-3-mapper.dtd">
<mapper namespace="com.jnshu.pojo">
<select id="listStudent" resultType="Student">
select * from entry_form
</select>
</mapper>
测试类TestMybatis
根据配置文件mybaits-config.xml得到sqlSessionFactory
String resource = "mybatis-config.xml";
InputStream inputStream = Resources.getResourceAsStream(resource);
SqlSessionFactory sqlSessionFactory = new SqlSessionFactoryBuilder().build(inputStream);
然后再根据sqlSessionFactory得到session
SqlSession session=sqlSessionFactory.openSession();
最后通过session的selectList方法,调用sql语句listStudent。listStudent这个
就是在配置文件Student.xml中那条sql语句设置的id
执行完毕之后,得到一个Student集合,遍历即可看到数据
List<Student> cs = session.selectList("listStudent");
for (Student c : cs) {
System.out.println(c.getName());
}
package com.jnshu;
import java.io.IOException;
import java.io.InputStream;
import java.util.List;
import org.apache.ibatis.io.Resources;
import org.apache.ibatis.session.SqlSession;
import org.apache.ibatis.session.SqlSessionFactory;
import org.apache.ibatis.session.SqlSessionFactoryBuilder;
import com.jnshu.pojo.Student;
public class TestMybatis {
public static void main(String[] args) throws IOException {
String resource = "mybatis-config.xml";
InputStream inputStream = Resources.getResourceAsStream(resource);
SqlSessionFactory sqlSessionFactory = new SqlSessionFactoryBuilder().build(inputStream);
SqlSession session=sqlSessionFactory.openSession();
List<Student> cs=session.selectList("listCategory");
for (Student c : cs) {
System.out.println(c.getName());
}
}
}
基本原理
1.应用程序找Mybatis要数据
2.mybatis从数据库中找来数据
2.1通过mybatis-config.xml定位哪个数据库
2.2通过Student.xml执行对应的select语句
2.3基于Student.xml把返回的数据库记录封装在Student对象
2.4把多个Student对象装在一个Student集合中
3.返回一个Student集合
CRUD
配置文件Student.xml,提供CRUD对应的sql语句
<?xml version="1.0" encoding="UTF-8"?>
<!DOCTYPE mapper
PUBLIC "-//mybatis.org//DTD Mapper 3.0//EN"
"http://mybatis.org/dtd/mybatis-3-mapper.dtd">
<mapper namespace="com.jnshu.pojo">
<insert id="addStudent parameterType="Student" >
insert into entry_form ( name ) values (#{name})
</insert>
<delete id="deleteStudent" parameterType="Student" >
delete from entry_form where id= #{id}
</delete>
<select id="getStudent" parameterType="_int" resultType="Student">
select * from entry_form where id= #{id}
</select>
<update id="updateStudent" parameterType="Student" >
update entry_form set name=#{name} where id=#{id}
</update>
<select id="listStudent" resultType="Student">
select * from entry_form
</select>
</mapper>
实现类见昨日日报
注解方式CRUD
StudentMapper.java
package com.jnshu.mapper;
import java.util.List;
import org.apache.ibatis.annotations.Delete;
import org.apache.ibatis.annotations.Insert;
import org.apache.ibatis.annotations.Select;
import org.apache.ibatis.annotations.Update;
import com.jnshu.pojo.Student;
public interface StudentMapper {
@Insert(" insert into entry_form ( name ) values (#{name}) ")
public int add(Student student);
@Delete(" delete from entry_form where id= #{id} ")
public void delete(int id);
@Select("select * from entry_form where id= #{id} ")
public Student get(int id);
@Update("update entry_form set name=#{name} where id=#{id} ")
public int update(Student student);
@Select(" select * from entry_form ")
public List<Student> list();
}
mybatis.xml 增加对StudentMapper的映射
<mapper class="com.jnshu.mapper.StudentMapper"/>
测试类
package com.jnshu;
import java.io.IOException;
import java.io.InputStream;
import java.util.List;
import org.apache.ibatis.io.Resources;
import org.apache.ibatis.session.SqlSession;
import org.apache.ibatis.session.SqlSessionFactory;
import org.apache.ibatis.session.SqlSessionFactoryBuilder;
import com.how2java.mapper.StudentMapper;
import com.how2java.pojo.Student;
public class TestMybatis {
public static void main(String[] args) throws IOException {
String resource = "mybatis-config.xml";
InputStream inputStream = Resources.getResourceAsStream(resource);
SqlSessionFactory sqlSessionFactory = new SqlSessionFactoryBuilder().build(inputStream);
SqlSession session = sqlSessionFactory.openSession();
StudentMapper mapper = session.getMapper(StudentMapper.class);
// add(mapper);
// delete(mapper);
// get(mapper);
// update(mapper);
listAll(mapper);
session.commit();
session.close();
}
private static void update(StudentMapper mapper) {
Student c= mapper.get(8);
c.setName("修改了的Student名稱");
mapper.update(c);
listAll(mapper);
}
private static void get(StudentMapper mapper) {
Student c= mapper.get(8);
System.out.println(c.getName());
}
private static void delete(StudentMapper mapper) {
mapper.delete(2);
listAll(mapper);
}
private static void add(StudentMapper mapper) {
Student c = new Student();
c.setName("新增加的Student");
mapper.add(c);
listAll(mapper);
}
private static void listAll(StudentMapper mapper) {
List<Student> cs = mapper.list();
for (Student c : cs) {
System.out.println(c.getName());
}
}
}
Spring和Mybatis的整合
pojo
package com.jnshu.pojo;
public class Student {
private int id;
private String name;
public int getId() {
return id;
}
public void setId(int id) {
this.id = id;
}
public String getName() {
return name;
}
public void setName(String name) {
this.name = name;
}
@Override
public String toString() {
return "Student [id=" + id + ", name=" + name + "]";
}
}
mapper
package com.jnshu.mapper;
import java.util.List;
import com.jnshu.pojo.Student;
public interface StudentMapper {
public int add(Student student);
public void delete(int id);
public Student get(int id);
public int update(Student student);
public List<Student> list();
public int count();
}
Student.xml 要和Mapper类放在同一个包下,并且namespace必须写StudentMapper
<?xml version="1.0" encoding="UTF-8"?>
<!DOCTYPE mapper
PUBLIC "-//mybatis.org//DTD Mapper 3.0//EN"
"http://mybatis.org/dtd/mybatis-3-mapper.dtd">
<mapper namespace="com.jnshu.mapper.StudentMapper">
<insert id="add" parameterType="Student" >
insert into entry_form ( name ) values (#{name})
</insert>
<delete id="delete" parameterType="Student >
delete from entry_form where id= #{id}
</delete>
<select id="get" parameterType="_int" resultType="Student">
select * from entry_form where id= #{id}
</select>
<update id="update" parameterType="Student" >
update entry_form set name=#{name} where id=#{id}
</update>
<select id="list" resultType="Student">
select * from entry_form
</select>
</mapper>
applicationContext.xml
<?xml version="1.0" encoding="UTF-8"?>
<beans xmlns="http://www.springframework.org/schema/beans"
xmlns:xsi="http://www.w3.org/2001/XMLSchema-instance" xmlns:aop="http://www.springframework.org/schema/aop"
xmlns:tx="http://www.springframework.org/schema/tx" xmlns:jdbc="http://www.springframework.org/schema/jdbc"
xmlns:context="http://www.springframework.org/schema/context"
xmlns:mvc="http://www.springframework.org/schema/mvc"
xsi:schemaLocation="
http://www.springframework.org/schema/context http://www.springframework.org/schema/context/spring-context-3.0.xsd
http://www.springframework.org/schema/beans http://www.springframework.org/schema/beans/spring-beans-3.0.xsd
http://www.springframework.org/schema/jdbc http://www.springframework.org/schema/jdbc/spring-jdbc-3.0.xsd
http://www.springframework.org/schema/tx http://www.springframework.org/schema/tx/spring-tx-3.0.xsd
http://www.springframework.org/schema/aop http://www.springframework.org/schema/aop/spring-aop-3.0.xsd
http://www.springframework.org/schema/mvc http://www.springframework.org/schema/mvc/spring-mvc.xsd">
<context:annotation-config />
<bean id="dataSource" class="org.springframework.jdbc.datasource.DriverManagerDataSource">
<property name="driverClassName">
<value>com.mysql.jdbc.Driver</value>
</property>
<property name="url">
<value>jdbc:mysql://localhost:3306/student?characterEncoding=UTF-8</value>
</property>
<property name="username">
<value>root</value>
</property>
<property name="password">
<value>admin</value>
</property>
</bean>
<bean id="sqlSession" class="org.mybatis.spring.SqlSessionFactoryBean">
<property name="typeAliasesPackage" value="com.jnshu.pojo" />
<property name="dataSource" ref="dataSource"/>
<property name="mapperLocations" value="classpath:com/jnshu/mapper/*.xml"/>
</bean>
<bean class="org.mybatis.spring.mapper.MapperScannerConfigurer">
<property name="basePackage" value="com.jnshu.mapper"/>
</bean>
</beans>
测试
使用spring注解方式测试,拿到注入的StudentMapper对象,当调用add方法的时候,会自动去找Studentxml里的id="add"的sql语句
package com.java.test;
import java.util.List;
import org.junit.Test;
import org.junit.runner.RunWith;
import org.springframework.beans.factory.annotation.Autowired;
import org.springframework.test.context.ContextConfiguration;
import org.springframework.test.context.junit4.SpringJUnit4ClassRunner;
import com.jnshu.mapper.StudentMapper;
import com.jnshu.pojo.Student;
@RunWith(SpringJUnit4ClassRunner.class)
@ContextConfiguration("classpath:applicationContext.xml")
public class MybatisTest {
@Autowired
private StudentMapper studentMapper;
@Test
public void testAdd() {
Student student = new Student();
student.setName("new Student");
categoryMapper.add(student);
}
@Test
public void testList() {
System.out.println(studentMapper);
List<Student> cs=studentMapper.list();
for (Student c : cs) {
System.out.println(c.getName());
}
}
困难
无
收获
spring IOC/DI
spring AOP
注解方式AOP
mybatis CRUD
mybatis 注解法CRUD
spring和mybatis整合
明日计划
深度思考和任务总结


评论