发表于: 2022-04-21 18:59:08
1 369
1,创建一个jdbcTemplate的Interface类,创建一个Imple类。
2在Interface类当中添加方法代码:
package com.dao;
public interface TestFrom {
public void a();
public void b();
public void c();
}
3、在Imple类中输入代码
public class TestFromlmpl implements TestFrom {
public void a(){};
public void b(){};
public void c(){};
}
4在Imple类添加依赖注入:
@Resource(name = "jdbcTemplate")
private JdbcTemplate jdbcTemplate;
5、在applicationContext.xml文件中添加代码:
//配置扫描路径选项
<context:annotation-config />
<context:component-scan base-package="com.dao"/>
<bean id="testFrom" class="com.dao.TestFromlmpl"/>
6、将需要使用的代码重写到方法当中:
@Override
public void c() {
String sql = "select id,name,school,type,time,student,make_a_wish from biage";
System.out.println(jdbcTemplate.queryForList(sql));
for (Map<String, Object> stringObjectMap : jdbcTemplate.queryForList(sql)) {
System.out.println(stringObjectMap);
}
List<Biage> list = jdbcTemplate.query(sql, new BeanPropertyRowMapper<>(Biage.class));
for (Biage biage : list) {
System.out.println("id是" + biage.getId());
System.out.println("名字是" + biage.getName());
System.out.println("学校是" + biage.getSchool());
System.out.println("属性是" + biage.getStudent());
System.out.println("属性是" + biage.getMake_a_wish());
}
System.out.println("test2"+list);
}
7、在测试类添加代码:
@Test
public static void test5() {
ApplicationContext context =
new ClassPathXmlApplicationContext("applicationContext.xml");
TestFrom testFrom = (TestFrom) context.getBean("testFrom");
System.out.println("开始调用dao sayhello");
testFrom.c();
System.out.println("调用结束");
}
简单的写了一个算法的单元测试类:
package test;

//导入包
import org.testng.annotations.Test;

public class CalculatorTest {

    @Test
    public void add(){
        CalculatorTest ct = new CalculatorTest();
        System.out.println(ct.add(50,50));
    }

    private int add(int a, int b) {
    return a+b;
    }

    @Test
    public void add1(){
        CalculatorTest ct = new CalculatorTest();
        System.out.println(ct.add1(90,60));
    }

    private int add1(int i, int t){
     return i-t;
    }

    @Test
    public void add2(){
        CalculatorTest ct = new CalculatorTest();
        System.out.println(ct.add2(50,60));
    }

    private int add2(int z, int y){
        return z*y;
    }

    @Test
    public void add3(){
        CalculatorTest ct = new CalculatorTest();
        System.out.println(ct.add3(50,50));
    }

    private int add3(int x, int v){
        return x%v;
    }

}
执行结果:
100
30
3000
0
===============================================
Default Suite
Total tests run: 4, Failures: 0, Skips: 0
===============================================
Process finished with exit code 0
创建一个spring mvc 框架搭建
1、在pmx.cml输入依赖:
<?xml version="1.0" encoding="UTF-8"?>
<project xmlns="http://maven.apache.org/POM/4.0.0"
xmlns:xsi="http://www.w3.org/2001/XMLSchema-instance"
xsi:schemaLocation="http://maven.apache.org/POM/4.0.0 http://maven.apache.org/xsd/maven-4.0.0.xsd">
<modelVersion>4.0.0</modelVersion>
<groupId>com.lagou.edu</groupId>
<artifactId>springmvc-demo</artifactId>
<version>1.0-SNAPSHOT</version>
<packaging>war</packaging>
<properties>
<project.build.sourceEncoding>UTF-8</project.build.sourceEncoding>
<maven.compiler.source>1.8</maven.compiler.source>
<maven.compiler.target>1.8</maven.compiler.target>
</properties>
<dependencies>
<!--引入spring webmvc的依赖-->
<dependency>
<groupId>org.springframework</groupId>
<artifactId>spring-webmvc</artifactId>
<version>5.1.12.RELEASE</version>
</dependency>
</dependencies>
<build>
<plugins>
<plugin>
<groupId>org.apache.tomcat.maven</groupId>
<artifactId>tomcat7-maven-plugin</artifactId>
<version>2.2</version>
<configuration>
<port>8080</port>
<path>/</path>
</configuration>
</plugin>
</plugins>
</build>
</project>
2、main文件夹下面新建webapp文件夹,webapp下面新建WEB-INF,下面新建web.xml
<!DOCTYPE web-app PUBLIC
"-//Sun Microsystems, Inc.//DTD Web Application 2.3//EN"
"http://java.sun.com/dtd/web-app_2_3.dtd" >
<web-app>
<display-name>Archetype Created Web Application</display-name>
<servlet>
<servlet-name>springmvc</servlet-name>
<servlet-class>org.springframework.web.servlet.DispatcherServlet</servlet-class>
<init-param>
<param-name>contextConfigLocation</param-name>
<param-value>classpath:springmvc.xml</param-value>
</init-param>
</servlet>
<servlet-mapping>
<servlet-name>springmvc</servlet-name>
->
<!--拦截匹配规则的url请求,进入springmvc框架处理-->
<url-pattern>/</url-pattern>
</servlet-mapping>
</web-app>
3、在resource目录下新建springmvc.xml:
<?xml version="1.0" encoding="UTF-8"?>
<beans xmlns="http://www.springframework.org/schema/beans"
xmlns:xsi="http://www.w3.org/2001/XMLSchema-instance"
xmlns:context="http://www.springframework.org/schema/context"
xmlns:mvc="http://www.springframework.org/schema/mvc"
xsi:schemaLocation="
http://www.springframework.org/schema/beans
https://www.springframework.org/schema/beans/spring-beans.xsd
http://www.springframework.org/schema/context
https://www.springframework.org/schema/context/spring-context.xsd
http://www.springframework.org/schema/mvc
https://www.springframework.org/schema/mvc/spring-mvc.xsd
">
<!--开启controller扫描-->
<context:component-scan base-package="com.lagou.edu.controller"/>
<!--配置springmvc的视图解析器-->
<bean class="org.springframework.web.servlet.view.InternalResourceViewResolver">
<property name="prefix" value="/WEB-INF/jsp/"/>
<property name="suffix" value=".jsp"/>
</bean>
<!--
自动注册最合适的处理器映射器,处理器适配器(调用handler方法)
-->
<mvc:annotation-driven/>
</beans>
4、在java目录下新建包com.lagou.edu.controller,下面新建DemoController:
package com.lagou.edu.controller;

import org.springframework.stereotype.Controller;
import org.springframework.web.bind.annotation.RequestMapping;
import org.springframework.web.servlet.ModelAndView;

import java.util.Date;

/**
 * @author lyj
 * @Title: DemoController
 * @ProjectName springmvc-demo
 * @Description: TODO
 * @date 2020/6/9 21:21
 */
@Controller
//访问路径
@RequestMapping("/demo")
public class DemoController {
    private Object Date;

    /**
     * http://localhost:8080/demo/handle01
     */
    //访问路径
    @RequestMapping("/handle01")


    public ModelAndView handle01(){
        Date date=new Date();

        ModelAndView ma=new ModelAndView();
        ma.addObject("date",date);
        ma.addObject("data", "你好,小明");
        ma.setViewName("data");
        ma.setViewName("success");
        return ma;
    }

}
5、在WEB-INF下面新建jsp文件夹,下面新建success.jsp:
%@ page language="java" isELIgnored="false" contentType="text/html; charset=utf-8" pageEncoding="utf-8"%>
<html lang="en">
<head>
<meta charset="UTF-8">
<title>Title</title>
</head>
<body>
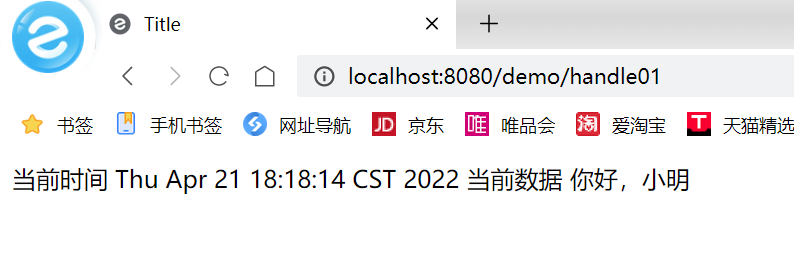
当前时间 ${date}
当前数据 ${data}
</body>
</html>
测试:

在浏览器中输入:http://localhost:8080/demo/handle01
结果:


评论