发表于: 2022-03-22 23:26:38
2 1297
一,今天完成的事情
任务九
1,
根据拆分原则,我首先不考虑项目中一定要有entity,dao等针对数据库的操作。先把Spring Cloud能正常使用。
2,
我在看最近Spring Cloud官方demo注意到的一位作者,Olga Maciaszek-Sharma 小姐姐。她的相关的代码和说明我一定要参考。
她的履历比较清楚,所以她展示的Spring Cloud相关部分一般都必要而且重要的。
我查找了她维护的项目,发现没有Ribbon。然后查看我在项目中
<dependency>
  <groupId>org.springframework.cloud</groupId>
  <artifactId>spring-cloud-dependencies</artifactId>
  <version>2021.0.0</version>
  <type>pom</type>
  <scope>import</scope>
</dependency>
很多中文资料说包含的Ribbon,这个负载均衡的解决方案在2021版本包中找不到了。
继续查找现在的官方文档,我收回我之前日报中说明的:Spring Cloud Netflix是绕不过去的组件的话。Spring Cloud Netflix除了现在的Eureka,2020版本以及之后,就是不是只有伦敦地铁站的名字命名的版本,都不再优先考虑使用。
Hystrix功能应该考虑 Resilience4j。
Hystrix Dashboard / Turbine 应该考虑Micrometer + Monitoring System。
Ribbon 应该使用Spring Cloud Loadbalancer。
Zuul应该使用 Spring Cloud Gateway。
Archaius本来就不考虑在我的项目中,采用 Spring Boot外部化配置 + Spring Cloud配置。
所以我的项目不会包含Ribbon。
3,我上次代码中,下面的代码也能完成随机的操作
@RestController
public class HelloServerController {
    @Autowired
    DiscoveryClient client;

    @RequestMapping("/")
    public String hello() {
        List<ServiceInstance> instances = client.getInstances("HelloServer");
        ServiceInstance selectedInstance = instances
                .get(new Random().nextInt(instances.size()));
        return "Hello World: " + selectedInstance.getServiceId() + ":" + selectedInstance
                .getHost() + ":" + selectedInstance.getPort()+"  uri:   " +selectedInstance.getUri();
    }
}
DiscoveryClient
是Spring Cloud中重要的类,能通过在Eureka的注册名拿到实例。它带有的方法值得学习。
但是它的特性,应该不能和OpenFeign搭配使用。OpenFeign的设计方适合微服务调用,比较无感知的调用,应该使用,而不是换成带DiscoveryClient类的代码完成随机。而且我发现Olga Maciaszek-Sharma 小姐姐对LoadBalancer的介绍比较多,我感觉就是这个。
4,如果不设置,没有其它代码,2021年版本的Spring Cloud OpenFeign提供负载均衡,而且是自动提供,策略是轮询负载均衡。我只用Feign的时候点了30次以上,是不会改变顺序的轮询。
并且,我倒是在2021版本包中注意到了下面代码。
//
// Source code recreated from a .class file by IntelliJ IDEA
// (powered by FernFlower decompiler)
//

package org.springframework.cloud.loadbalancer.core;

import java.util.List;
import java.util.concurrent.ThreadLocalRandom;
import org.apache.commons.logging.Log;
import org.apache.commons.logging.LogFactory;
import org.springframework.beans.factory.ObjectProvider;
import org.springframework.cloud.client.ServiceInstance;
import org.springframework.cloud.client.loadbalancer.DefaultResponse;
import org.springframework.cloud.client.loadbalancer.EmptyResponse;
import org.springframework.cloud.client.loadbalancer.Request;
import org.springframework.cloud.client.loadbalancer.Response;
import reactor.core.publisher.Mono;

public class RandomLoadBalancer implements ReactorServiceInstanceLoadBalancer {
    private static final Log log = LogFactory.getLog(RandomLoadBalancer.class);
    private final String serviceId;
    private ObjectProvider<ServiceInstanceListSupplier> serviceInstanceListSupplierProvider;

    public RandomLoadBalancer(ObjectProvider<ServiceInstanceListSupplier> serviceInstanceListSupplierProvider, String serviceId) {
        this.serviceId = serviceId;
        this.serviceInstanceListSupplierProvider = serviceInstanceListSupplierProvider;
    }

    public Mono<Response<ServiceInstance>> choose(Request request) {
        ServiceInstanceListSupplier supplier = (ServiceInstanceListSupplier)this.serviceInstanceListSupplierProvider.getIfAvailable(NoopServiceInstanceListSupplier::new);
        return supplier.get(request).next().map((serviceInstances) -> {
            return this.processInstanceResponse(supplier, serviceInstances);
        });
    }

    private Response<ServiceInstance> processInstanceResponse(ServiceInstanceListSupplier supplier, List<ServiceInstance> serviceInstances) {
        Response<ServiceInstance> serviceInstanceResponse = this.getInstanceResponse(serviceInstances);
        if (supplier instanceof SelectedInstanceCallback && serviceInstanceResponse.hasServer()) {
            ((SelectedInstanceCallback)supplier).selectedServiceInstance((ServiceInstance)serviceInstanceResponse.getServer());
        }

        return serviceInstanceResponse;
    }

    private Response<ServiceInstance> getInstanceResponse(List<ServiceInstance> instances) {
        if (instances.isEmpty()) {
            if (log.isWarnEnabled()) {
                log.warn("No servers available for service: " + this.serviceId);
            }

            return new EmptyResponse();
        } else {
            int index = ThreadLocalRandom.current().nextInt(instances.size());
            ServiceInstance instance = (ServiceInstance)instances.get(index);
            return new DefaultResponse(instance);
        }
    }
}
通过中文资料大家的观察,LoadBalancer只有轮询和随机两种算法。可以通过implements ReactorServiceInstanceLoadBalancer自定义方式进行负载均衡。虽然LoadBalancer直接提供的负载均衡方式只有两种,远远少于Ribbon自带的7种,还是LoadBalancer更优秀。
通过官方例子,看到
@SpringBootApplication
@RestController
public class UserApplication {

   private final WebClient.Builder loadBalancedWebClientBuilder;
   private final ReactorLoadBalancerExchangeFilterFunction lbFunction;

   public UserApplication(WebClient.Builder webClientBuilder,
         ReactorLoadBalancerExchangeFilterFunction lbFunction) {
      this.loadBalancedWebClientBuilder = webClientBuilder;
      this.lbFunction = lbFunction;
   }

   public static void main(String[] args) {
      SpringApplication.run(UserApplication.class, args);
   }

   @RequestMapping("/hi")
   public Mono<String> hi(@RequestParam(value = "name", defaultValue = "Mary") String name) {
      return loadBalancedWebClientBuilder.build().get().uri("http://say-hello/greeting")
            .retrieve().bodyToMono(String.class)
            .map(greeting -> String.format("%s, %s!", greeting, name));
   }

   @RequestMapping("/hello")
   public Mono<String> hello(@RequestParam(value = "name", defaultValue = "John") String name) {
      return WebClient.builder()
            .filter(lbFunction)
            .build().get().uri("http://say-hello/greeting")
            .retrieve().bodyToMono(String.class)
            .map(greeting -> String.format("%s, %s!", greeting, name));
   }
}
提供了
WebClient.Builder
和
ReactorLoadBalancerExchangeFilterFunction
能看懂代码,才更知道怎么做。
5,Spring Cloud的负载均衡设置在客户端。
我配合LoadBalancer使用的最终还是
RestTemplate
,它的应用范围广,需要了解基本使用。
服务器提供的服务代码就是controller能够回复自己的接口号,说明自己是同
spring:
  application:
    name: HelloClient
的服务器,但是端口不同。
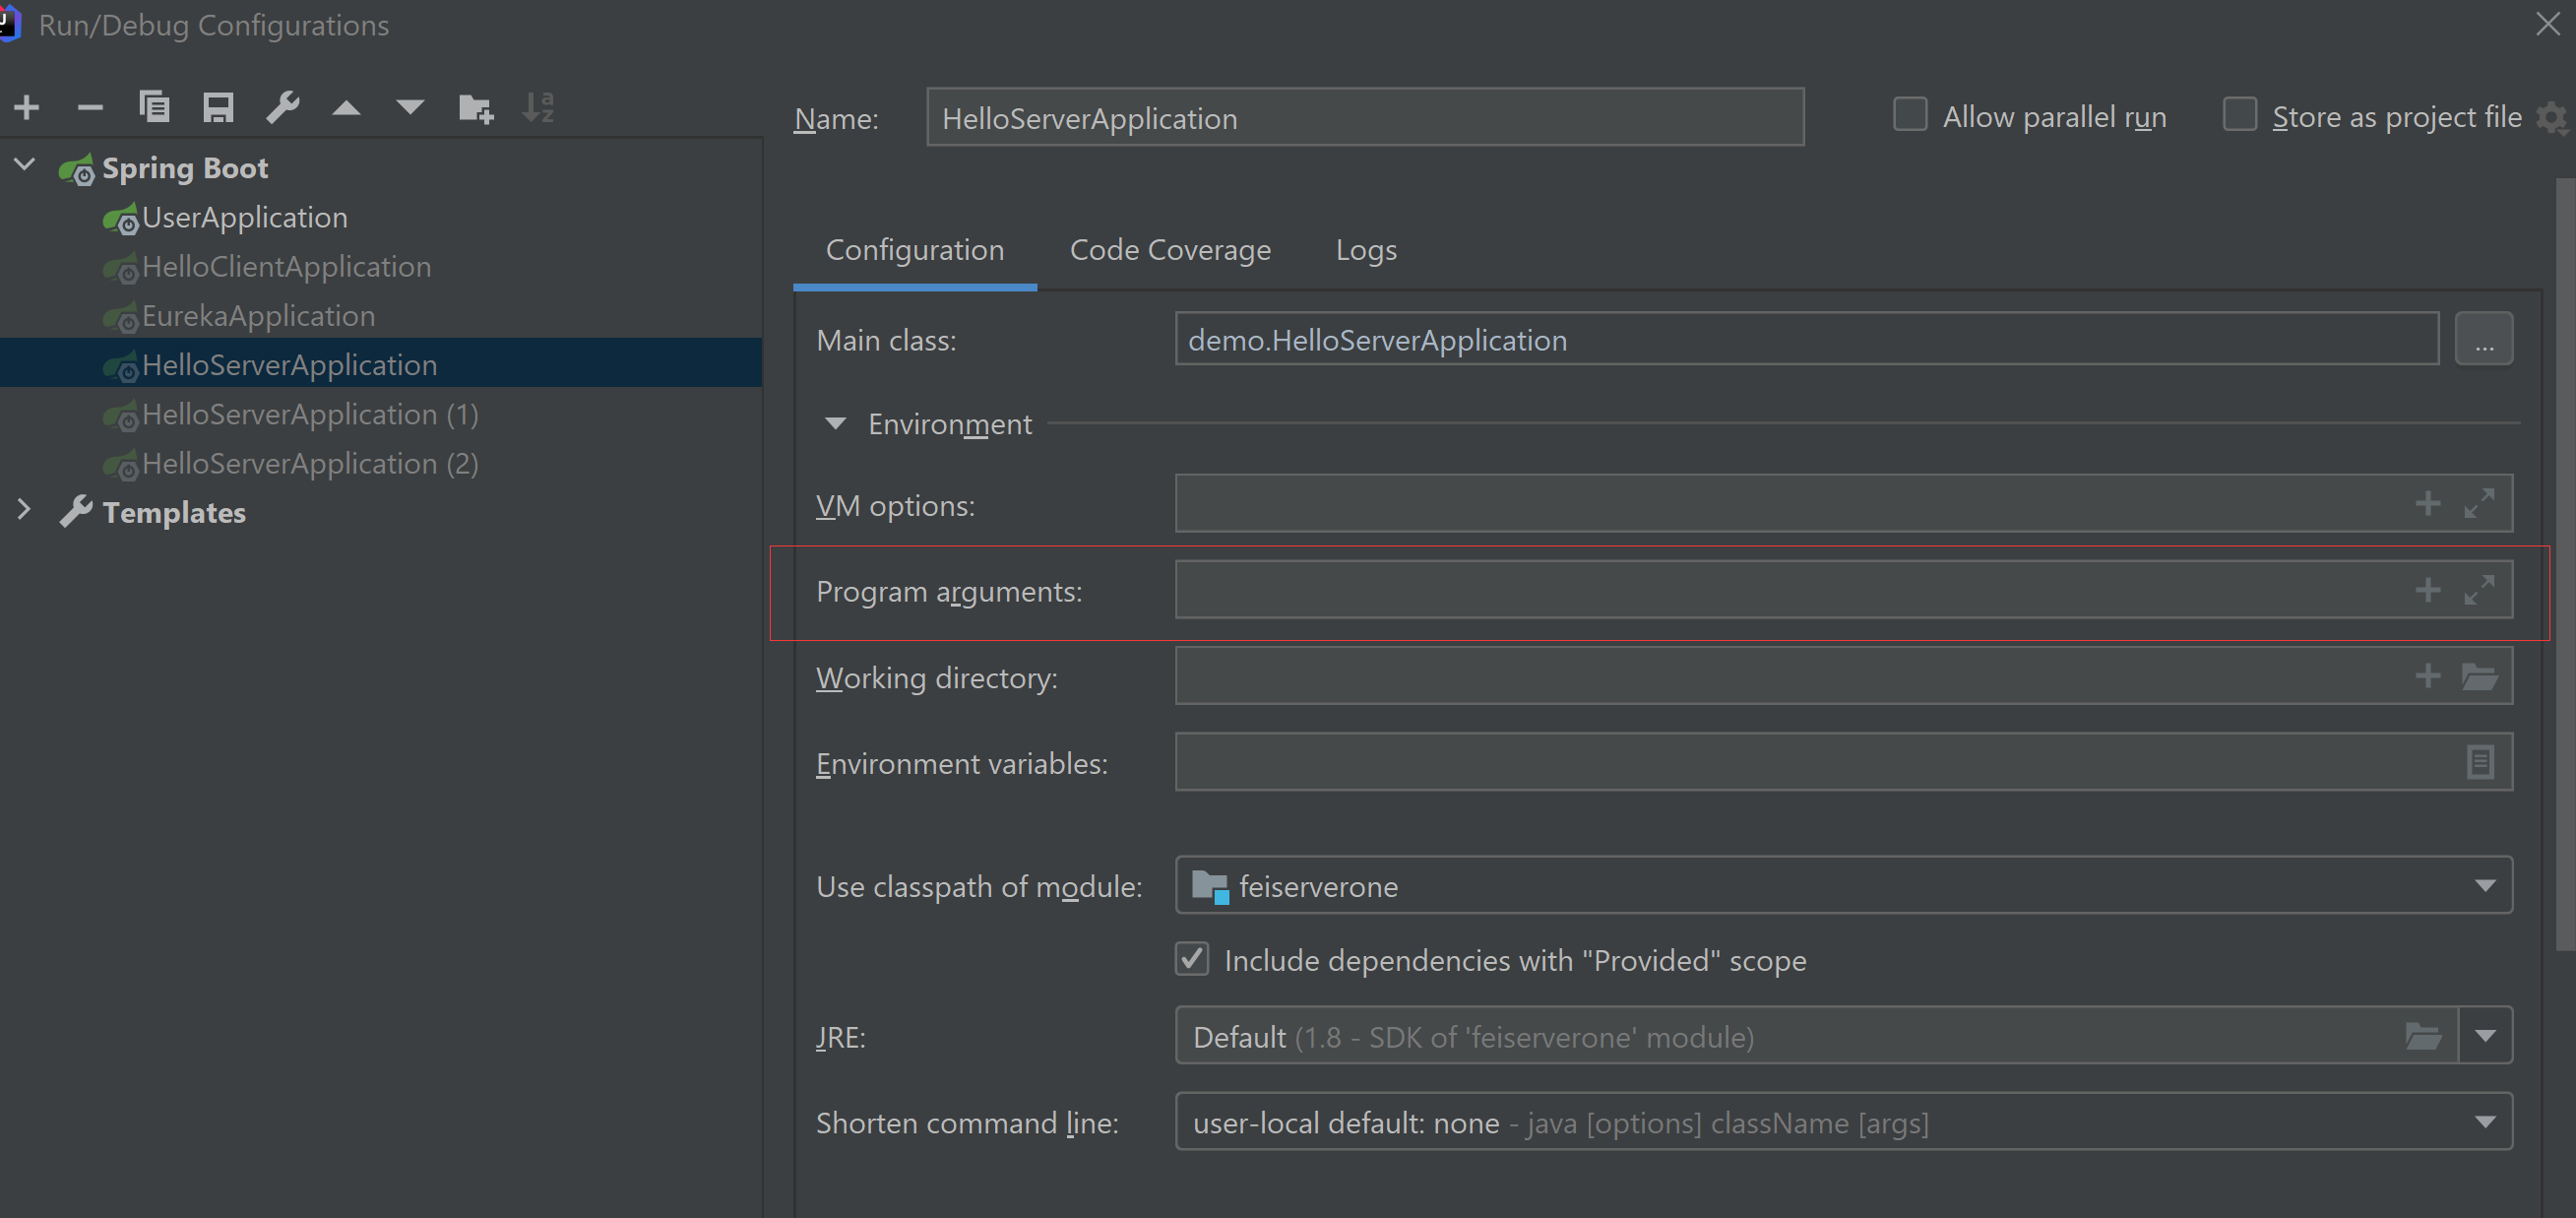
可以复制多台服务器,只改端口号,写出能证明自己端口号的controller即可,区分不同服务器。也可以用Intellij

设置端口等属性。
最后要运行至少2台服务器,所以复制代码没错。
通过OpenFeign调用。但是修改为随机的负载均衡方式。
最终我的客户端的模块结构如下:

需要特别贴出的是loadbalance包中的内容
package demo.loadbalance;

import org.springframework.cloud.client.ServiceInstance;
import org.springframework.cloud.loadbalancer.core.RandomLoadBalancer;
import org.springframework.cloud.loadbalancer.core.ReactorLoadBalancer;
import org.springframework.cloud.loadbalancer.core.ServiceInstanceListSupplier;
import org.springframework.cloud.loadbalancer.support.LoadBalancerClientFactory;
import org.springframework.context.annotation.Bean;
import org.springframework.core.env.Environment;

//这里 不需要 @configuration注解  不需要 不需要
public class CustomLoadBalancerConfiguration {

    @Bean
    ReactorLoadBalancer<ServiceInstance> randomLoadBalancer(Environment environment,
                                                            LoadBalancerClientFactory loadBalancerClientFactory) {
        String name = environment.getProperty(LoadBalancerClientFactory.PROPERTY_NAME);

        return new RandomLoadBalancer(loadBalancerClientFactory
                .getLazyProvider(name, ServiceInstanceListSupplier.class),
                name);
    }
}
package demo.loadbalance;

import org.springframework.cloud.client.loadbalancer.LoadBalanced;
import org.springframework.cloud.loadbalancer.annotation.LoadBalancerClient;
import org.springframework.context.annotation.Bean;
import org.springframework.context.annotation.Configuration;
import org.springframework.web.client.RestTemplate;

@Configuration
//在这里配置我们自定义的LoadBalancer策略 如果有大佬想自己扩展算法 需要实现ReactorServiceInstanceLoadBalancer接口
//@LoadBalancerClients(defaultConfiguration = {name = "CLOUD-PAYMENT-SERVICE", configuration = CustomLoadBalancerConfiguration.class})
//注意这里的name属性 需要和eureka页面中的服务提供者名字一直 此时页面中是大写
@LoadBalancerClient(name = "HELLOSERVER",configuration = CustomLoadBalancerConfiguration.class)
public class ApplicationContextConfig {

    //将这个对象放入ioc容器
    @Bean
    @LoadBalanced  //使用这个注解给restTemplate赋予了负载均衡的能力
    public RestTemplate getRestTemplate(){
        return new RestTemplate();
    }
}
因为configuration = CustomLoadBalancerConfiguration.class,所以根据
return new RandomLoadBalancer(,如果能理解这个随机负载均衡类怎么使用,就能知道能使用RestTemplate达到使用随机策略的目的。
最终controller
package demo.controller;

import demo.service.HelloClient;
import org.slf4j.Logger;
import org.slf4j.LoggerFactory;
import org.springframework.beans.factory.annotation.Autowired;
import org.springframework.cloud.client.ServiceInstance;
import org.springframework.cloud.client.discovery.DiscoveryClient;
import org.springframework.core.env.Environment;
import org.springframework.web.bind.annotation.GetMapping;
import org.springframework.web.bind.annotation.RequestMapping;
import org.springframework.web.bind.annotation.RestController;
import org.springframework.web.client.RestTemplate;

import java.util.List;
import java.util.Random;

@RestController
public class HelloClientController {

    private static final Logger LOGGER = LoggerFactory.getLogger(HelloClientController.class);

    @Autowired
    HelloClient client;

    @Autowired
    RestTemplate template;

    @Autowired
    Environment environment;

    @RequestMapping("/")
    public String hello() {
        return client.hello();

    }

    @RequestMapping("/random")
    public String slow() {
        String url = "http://HelloServer";
        String callmeResponse = template.getForObject(url, String.class);
        LOGGER.info("Response: {}", callmeResponse);
        return "I'm Caller running on port " + environment.getProperty("local.server.port")
                + " calling-> " + callmeResponse;
    }
}
启动类就只有SpringBoot启动类的代码
6,
@Override
public Flux<List<ServiceInstance>> get() {
   return Flux.just(Arrays
         .asList(new DefaultServiceInstance(serviceId + "1", serviceId, "localhost", 8090, false),
               new DefaultServiceInstance(serviceId + "2", serviceId, "localhost", 9092, false),
               new DefaultServiceInstance(serviceId + "3", serviceId, "localhost", 9999, false)));
}
官方使用的Flux也可以注意
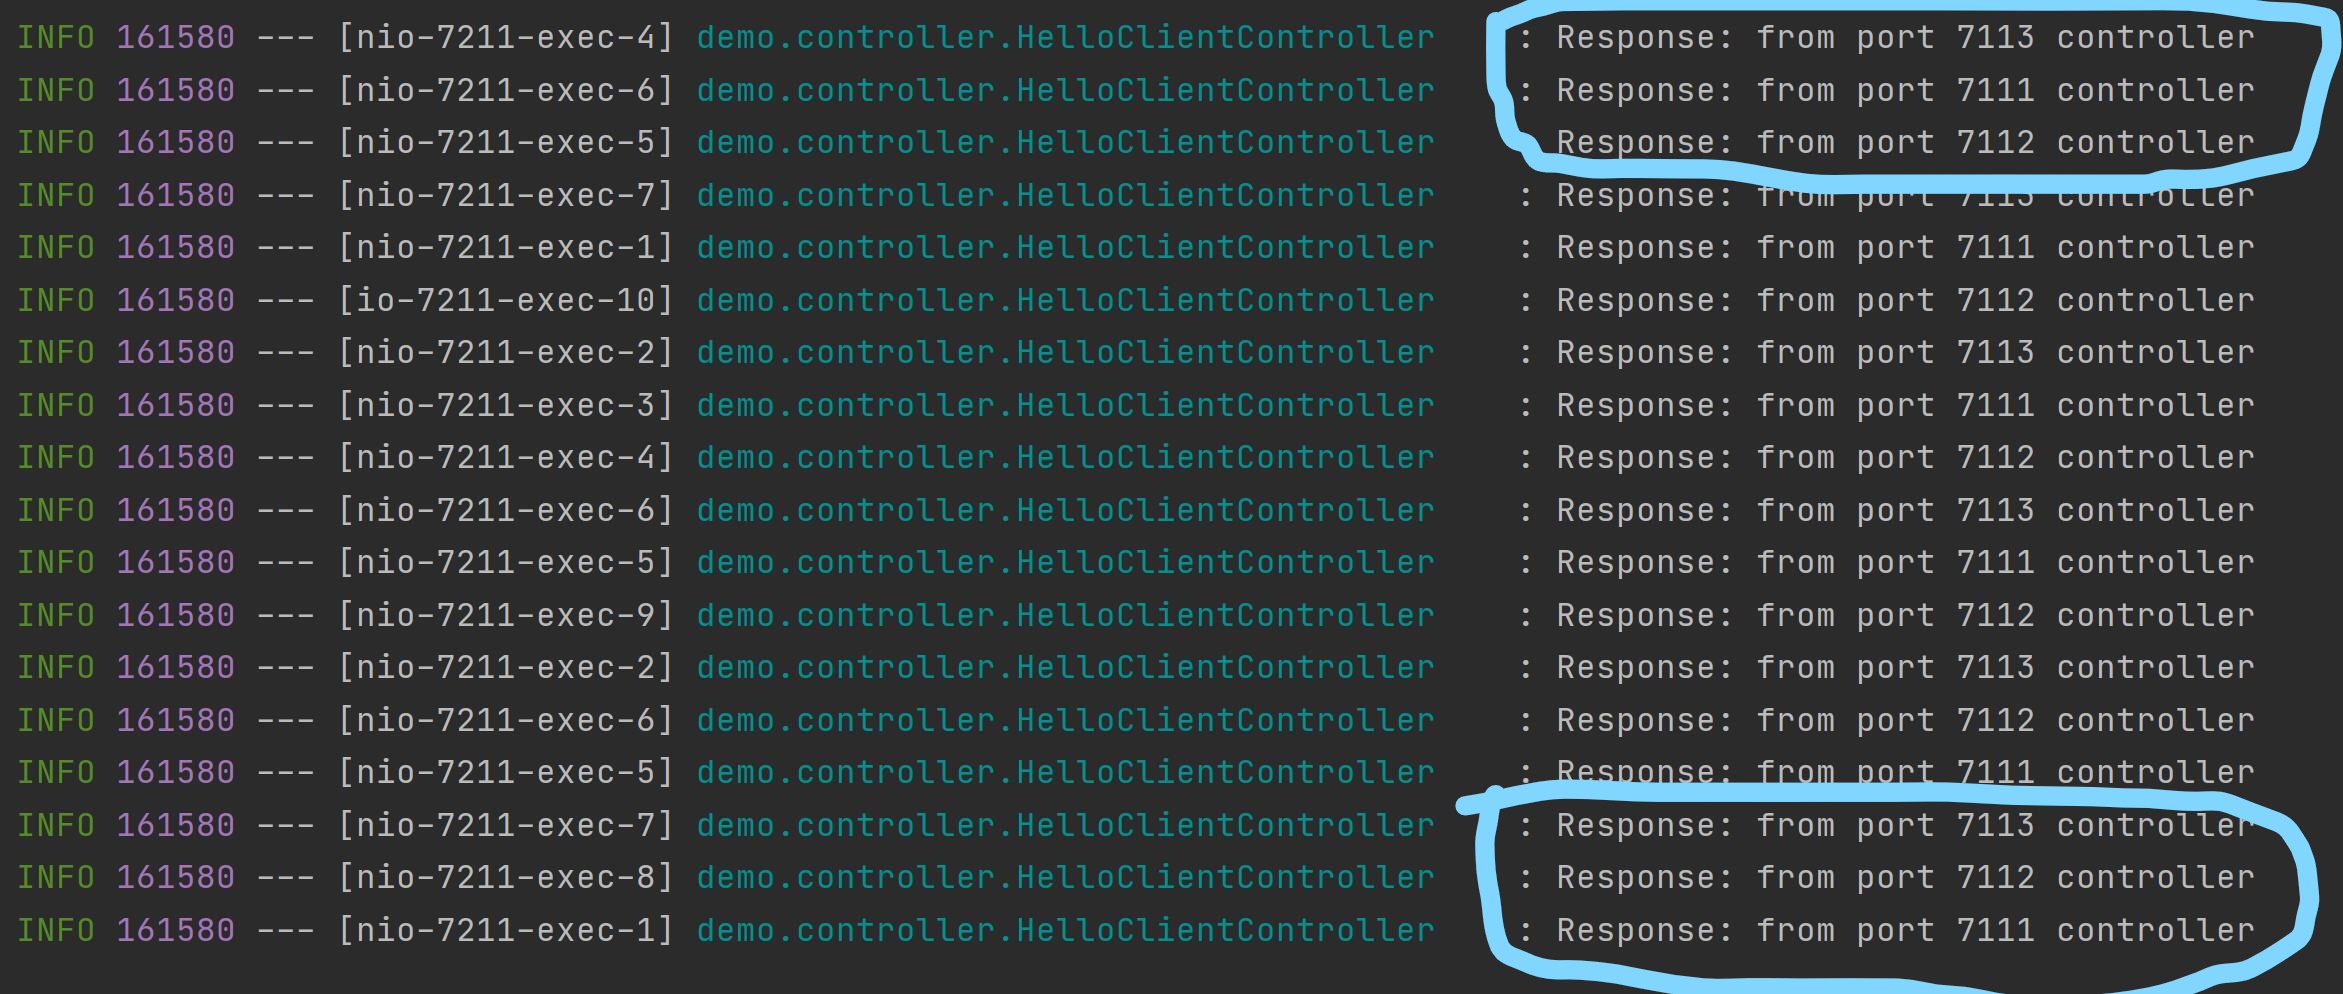
7,最后测试,发现确实是随机访问,不是轮询。成功。
3个服务,保证服务访问到可能性基本相同,从312的顺序变成了321
二,今天问题
继续理解Spring Cloud 2020及之后版本负载均衡使用过程中出现过的各类知识点
包括类的使用等知识,越容易理解
三,今天的收获
Spring Cloud 2020及之后版本负载均衡。抛开数据库先使用。
做事情我一直认为方向重要。
Spring Cloud的负载均衡设置在客户端。
不能因为一个产品中文参考资料多,使用时间长,优先考虑那个产品。
地球上有苦难。保守看顾搜救队员的工作,安慰遇难者亲人朋友的心
四,明天的计划
任务九


评论