发表于: 2022-03-14 21:12:54
2 1538
一,今天完成的事情
任务九
1,Spring Cloud系列中不能避开的是Spring Cloud Netflix。它考虑了分布式系统需要的大部分方面,开发出来时间比较长,相当稳定,参考资料多。
它介绍自己的Features,我的项目会包含它的方方面面。
Service Discovery: Eureka instances can be registered and clients can discover the instances using Spring-managed beans
Service Discovery: an embedded Eureka server can be created with declarative Java configuration
Circuit Breaker: Hystrix clients can be built with a simple annotation-driven method decorator
Circuit Breaker: embedded Hystrix dashboard with declarative Java configuration
Declarative REST Client: Feign creates a dynamic implementation of an interface decorated with JAX-RS or Spring MVC annotations
Client Side Load Balancer: Ribbon
External Configuration: a bridge from the Spring Environment to Archaius (enables native configuration of Netflix components using Spring Boot conventions)
Router and Filter: automatic registration of Zuul filters, and a simple convention over configuration approach to reverse proxy creation
2,我在项目不考虑使用Archaius。而路由功能我优先用Spring Cloud Gateway,而不考虑Spring Cloud Netflix的Zuul。
项目不考虑G,A和M这些公司的(云)服务。
3, 任务要求必须把service分给web端和service及以下端分开。
(1)Spring Cloud Netflix Feign能够把service分给web端和service及以下端。目前Netflix内部不再使用Feign并停止更新,为此Netflix把Feign提交给开源社区,命名为OpenFeign。
(2)使用Spring Cloud OpenFeign,我推荐这个使用方式。
通过resource中的application.yml中的
application:
  name: mcroservice-xxx
application.name连接。
在Spring Cloud中使用OpenFeign,可以做到使用HTTP请求访问远程服务,就像调用本地方法一样的,开发者完全感知不到这是在调用远程方法,更感知不到在访问HTTP请求,非常的方便。
4,负载均衡。
Spring Cloud OpenFeign和eureka(服务注册中心)和ribbon组合可以实现负载均衡。
所以为了任务九,Spring Cloud OpenFeign,Eureka和Ribbon是必须加入到项目中的。Feign集成了Ribbon,利用Ribbon维护了Payment的服务列表信息,并且通过轮询实现了客户端的负载均衡。
现在用了Spring Cloud OpenFeign,现在Ribbon在代码中就不会明确出现,包括不需要在pom.xml中引入dependencies。
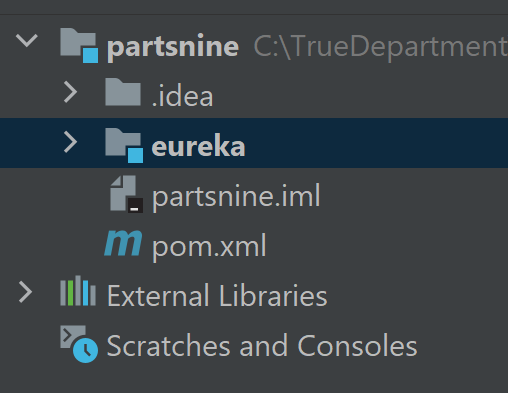
5,不考虑分层,先在自己机器运行Eureka和OpenFeign。所以我先建立了一个父工程,src可以删除。
partsnine是父工程的名字。
<packaging>pom</packaging>
注意加入spring-boot需要的version
<parent>
  <groupId>org.springframework.boot</groupId>
  <artifactId>spring-boot-starter-parent</artifactId>
  <version>2.6.1</version>
  <relativePath/> <!-- lookup parent from repository -->
</parent>
还需要加入spring-cloud的版本
<dependencyManagement>
  <dependencies>
    <dependency>
      <groupId>org.springframework.cloud</groupId>
      <artifactId>spring-cloud-dependencies</artifactId>
      <version>2021.0.0</version>
      <type>pom</type>
      <scope>import</scope>
    </dependency>
  </dependencies>
</dependencyManagement>
以上都是在父工程
6,不考虑其它,先把Eureka单独运行,并且能够正常看到页面。而且Eureka目前只有单台,我也在本地成功运行Eureka集群,Eureka能做集群,但是Eureka集群对于我的项目不是必须。
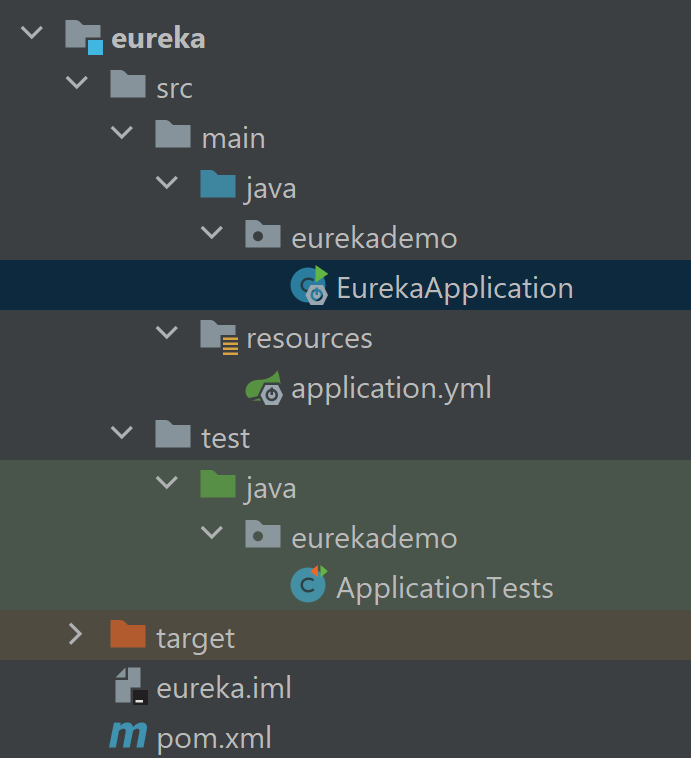
建立子模块eureka。

最终成功访问。现在是不带instance的页面。

代码构成如下:

pom.xml
<packaging>jar</packaging>
dependencies。其中,spring-cloud-starter-netflix-eureka-server是必须。spring-boot-starter-test是因为有测试。spring-cloud-starter-config是可能能使用配置中心:
1.基础版的配置中心(不集成 Eureka);
2.结合 Eureka 版的配置中心;
3.实现配置的自动刷新;
也不是为了负载均衡一定要使用的,所以在这里划掉。
spring-boot-starter-actuator是健康监测这一个module,所以也可以划掉。
<dependencies>
    <dependency>
        <groupId>org.springframework.cloud</groupId>
        <artifactId>spring-cloud-starter-netflix-eureka-server</artifactId>
    </dependency>
    <dependency>
        <groupId>org.springframework.cloud</groupId>
        <artifactId>spring-cloud-starter-config</artifactId>
    </dependency>
    <dependency>
        <groupId>org.springframework.boot</groupId>
        <artifactId>spring-boot-starter-actuator</artifactId>
    </dependency>
    <dependency>
        <groupId>org.springframework.boot</groupId>
        <artifactId>spring-boot-starter-test</artifactId>
        <scope>test</scope>
    </dependency>
</dependencies>
EurekaApplication.java代码很少。除了平时的@SpringBootApplication注解,就是一定要加上@EnableEurekaServer,证明这个是个 Eureka Server
package eurekademo;

import org.springframework.boot.SpringApplication;
import org.springframework.boot.autoconfigure.SpringBootApplication;
import org.springframework.cloud.netflix.eureka.server.EnableEurekaServer;

/**
 *
 * @author Nicole
 *
 */
@SpringBootApplication
@EnableEurekaServer
public class EurekaApplication {

   public static void main(String[] args) {
      SpringApplication.run(EurekaApplication.class, args);
   }

}
application.yml使用端口是8761
server:
  port: 8761
spring:
  application:
    name: eureka
  config:
    import: optional:configserver:${CONFIG_SERVER_URL:http://localhost:8888/}
eureka:
  client:
    registerWithEureka: false
    fetchRegistry: false
  server:
    waitTimeInMsWhenSyncEmpty: 0
management:
  endpoints:
    web:
      exposure:
        include: "*"
可以参考测试的写法,测试都通过了
package eurekademo;

import java.util.Map;

import org.junit.jupiter.api.Test;

import org.springframework.beans.factory.annotation.Autowired;
import org.springframework.boot.test.context.SpringBootTest;
import org.springframework.boot.test.web.client.TestRestTemplate;
import org.springframework.http.HttpStatus;
import org.springframework.http.ResponseEntity;

import static org.assertj.core.api.Assertions.assertThat;
import static org.springframework.boot.test.context.SpringBootTest.WebEnvironment.DEFINED_PORT;

@SpringBootTest(webEnvironment = DEFINED_PORT)
public class ApplicationTests {

   @Autowired
   private TestRestTemplate testRestTemplate;

   @Test
   public void catalogLoads() {
      @SuppressWarnings("rawtypes")
      ResponseEntity<Map> entity = testRestTemplate
            .getForEntity("/eureka/apps", Map.class);
      assertThat(entity.getStatusCode()).isEqualTo(HttpStatus.OK);
   }

   @Test
   public void adminLoads() {
      @SuppressWarnings("rawtypes")
      ResponseEntity<Map> entity = testRestTemplate.getForEntity("/actuator/env", Map.class);
      assertThat(entity.getStatusCode()).isEqualTo(HttpStatus.OK);
   }

}

7,Feign的server。生产者。
在IntelliJ中,可以直接部署两台或者以上。仅仅为了测试,一般就只换个端口,也可以使用手动改端口,allow parallel run,这样一份代码,模拟出多台服务器。
新建模块feiserverone,feiservertwo
加入feiserverone模块后,父模块的pom.xml自动加入
<modules>
  <module>eureka</module>
  <module>feiserverone</module>
</modules>
feiserverone的pom.xml加入
<packaging>jar</packaging>
<dependencies>
   <dependency>
      <groupId>org.springframework.boot</groupId>
      <artifactId>spring-boot-starter-web</artifactId>
   </dependency>
   <dependency>
      <groupId>org.springframework.boot</groupId>
      <artifactId>spring-boot-starter-actuator</artifactId>
   </dependency>
   <dependency>
      <groupId>org.springframework.cloud</groupId>
      <artifactId>spring-cloud-starter-openfeign</artifactId>
   </dependency>
   <dependency>
      <groupId>org.springframework.cloud</groupId>
      <artifactId>spring-cloud-starter-netflix-eureka-client</artifactId>
   </dependency>
   <dependency>
      <groupId>org.springframework.boot</groupId>
      <artifactId>spring-boot-starter-test</artifactId>
      <scope>test</scope>
   </dependency>
</dependencies>
注意
name: HelloServer这样在Eureka的页面,通过Eureka的帮助就以用这个名字找到这个服务,而不是用ip。ip经常可能变化,而且客户能够不感知“HelloServer”其实有多少台服务器。这就是Spring Cloud能很好的管理各个服务,简单易用的建立服务集群。
spring:
  application:
    name: HelloServer

server:
  port: 7111

eureka:
  password: password
  client:
    serviceUrl:
      defaultZone: http://user:${eureka.password}@localhost:8761/eureka/
  instance:
    leaseRenewalIntervalInSeconds: 10
    metadataMap:
      instanceId: ${vcap.application.instance_id:${spring.application.name}:${spring.application.instance_id:${server.port}}}
注意@EnableDiscoveryClient
package demo;

import org.springframework.beans.factory.annotation.Autowired;
import org.springframework.boot.SpringApplication;
import org.springframework.boot.autoconfigure.SpringBootApplication;
import org.springframework.cloud.client.ServiceInstance;
import org.springframework.cloud.client.discovery.DiscoveryClient;
import org.springframework.cloud.client.discovery.EnableDiscoveryClient;
import org.springframework.web.bind.annotation.RequestMapping;
import org.springframework.web.bind.annotation.RestController;

import java.util.List;
import java.util.Random;

/**
 * @author Nicole
 */
@SpringBootApplication
@EnableDiscoveryClient
@RestController
public class HelloServerApplication {
   @Autowired
   DiscoveryClient client;

   @RequestMapping("/")
   public String hello() {
      List<ServiceInstance> instances = client.getInstances("HelloServer");
      ServiceInstance selectedInstance = instances
            .get(new Random().nextInt(instances.size()));
      return "Hello World: " + selectedInstance.getServiceId() + ":" + selectedInstance
            .getHost() + ":" + selectedInstance.getPort();
   }

   public static void main(String[] args) {
      SpringApplication.run(HelloServerApplication.class, args);
   }
}
查看有没有能正常注册到Eureka
成功一个

再来第二个server,feiservertwo
就只改动application.yml中给这个服务配置的端口
server:
  port: 7112
启动,成功得到两个server

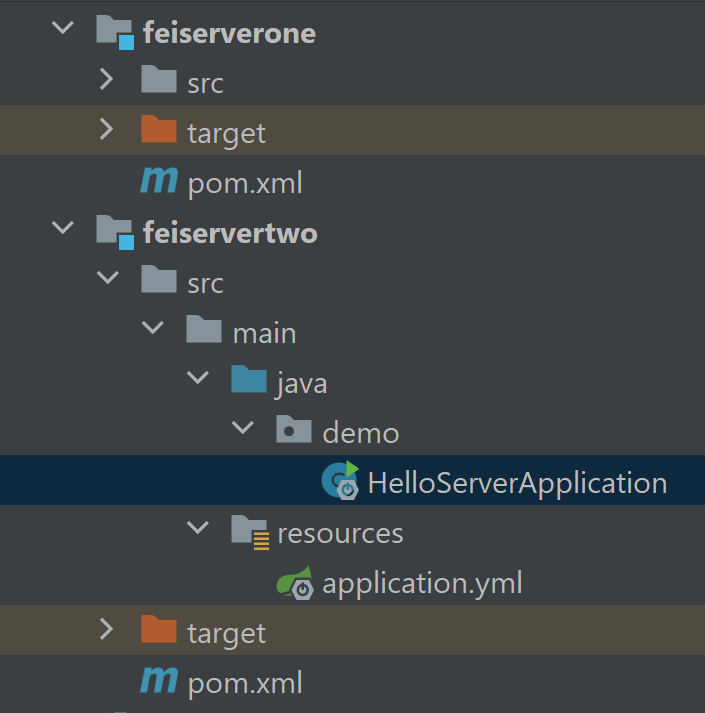
最终server的项目结构如下:

从server接口访问都正常,7111和7112


8,消费者,一个client。Feign 是在客户端的负载均衡。
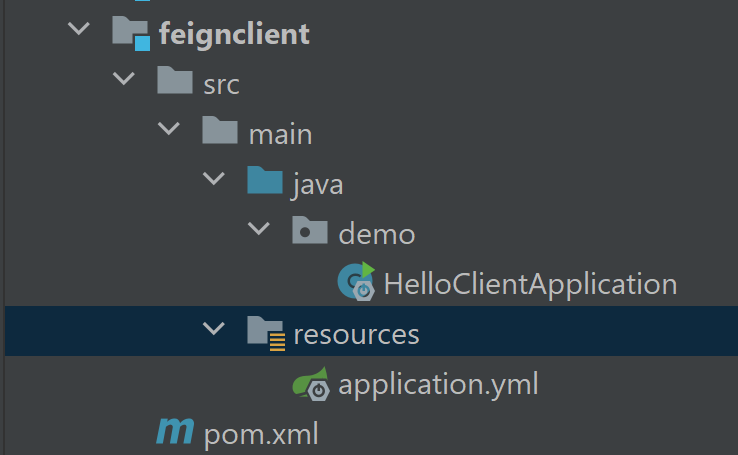
模块名feignclient
也需要服务器的spring-cloud-starter-netflix-eureka-client,声明自己可以适用在Eureka服务,发现别的服务。
spring-cloud-starter-openfeign
是使用openfeign
<properties>
   <project.build.sourceEncoding>UTF-8</project.build.sourceEncoding>
   <java.version>1.8</java.version>
</properties>

<dependencies>
   <dependency>
      <groupId>org.springframework.boot</groupId>
      <artifactId>spring-boot-starter-web</artifactId>
   </dependency>
   <dependency>
      <groupId>org.springframework.boot</groupId>
      <artifactId>spring-boot-starter-actuator</artifactId>
   </dependency>
   <dependency>
      <groupId>org.springframework.cloud</groupId>
      <artifactId>spring-cloud-starter-openfeign</artifactId>
   </dependency>
   <dependency>
      <groupId>org.springframework.cloud</groupId>
      <artifactId>spring-cloud-starter-netflix-eureka-client</artifactId>
   </dependency>
   <dependency>
      <groupId>org.springframework.boot</groupId>
      <artifactId>spring-boot-starter-test</artifactId>
      <scope>test</scope>
   </dependency>
</dependencies>
特别注意端口7211,是client自己的。而“defaultZone: http://user:${eureka.password}@localhost:8761/eureka/”,就是注册到我使用的相应的Eureka,端口是8761的地方。
spring:
  application:
    name: HelloClient

server:
  port: 7211

eureka:
  password: password
  client:
    serviceUrl:
      defaultZone: http://user:${eureka.password}@localhost:8761/eureka/
  instance:
    leaseRenewalIntervalInSeconds: 10
    metadataMap:
      instanceId: ${vcap.application.instance_id:${spring.application.name}:${spring.application.instance_id:${server.port}}}


endpoints:
  restart:
    enabled: true
注意@EnableDiscoveryClient注册到Eureka。也注意@EnableFeignClients,这样就可以通过接口调用之前的两台server。
注意
@FeignClient("HelloServer")
@FeignClient是为了使用而加入的注解,“HelloServer”在本篇文章之前的地方是
spring:
  application:
    name:
所在的地方。注意yml文件的缩进,表示层级不同。缩进如果错一点,表示的层级就不对了。日报页面不容易写缩进。一定要理解yml配置文件的常用格式,符号,代表什么情况。
package demo;

import org.springframework.beans.factory.annotation.Autowired;
import org.springframework.boot.SpringApplication;
import org.springframework.boot.autoconfigure.SpringBootApplication;
import org.springframework.cloud.client.discovery.EnableDiscoveryClient;
import org.springframework.cloud.openfeign.EnableFeignClients;
import org.springframework.cloud.openfeign.FeignClient;
import org.springframework.web.bind.annotation.RequestMapping;
import org.springframework.web.bind.annotation.RestController;

import static org.springframework.web.bind.annotation.RequestMethod.GET;

/**
 * @author Nicole
 */
@SpringBootApplication
@EnableDiscoveryClient
@RestController
@EnableFeignClients
public class HelloClientApplication {
   @Autowired
   HelloClient client;

   @RequestMapping("/")
   public String hello() {
      return client.hello();
   }

   public static void main(String[] args) {
      SpringApplication.run(HelloClientApplication.class, args);
   }

   @FeignClient("HelloServer")
   interface HelloClient {
      @RequestMapping(value = "/", method = GET)
      String hello();
   }
}
接口,controller在真实项目中都应该写在外面,不在main能run的地方,才能保证扩展性。

通过访问client的7211,实际是访问7111和7112服务器成功,并且发现是随机访问。多刷新页面,在7111和7112中随机使用服务器


模块工程位置

二,今天问题
Spring Cloud系列有其它常用,但是我不加入到我的项目中的。
Spring Cloud Config常用。 As an application moves through the deployment pipeline from dev to test and into production you can manage the configuration between those environments and be certain that applications have everything they need to run when they migrate.
但是我对放在我目前的项目里没什么兴趣。我有时候不能稳定访问github。
Spring Cloud Contract帮助测试,是 Consumer Driven Contracts approach具体实现。对自身服务进行测试,也可以生成 stub 提供给其它 service 进行调用。我在这个项目不用。
三,今天的收获
Spring Cloud Netflix,Spring Cloud Feign
用没有前端的方式展示,只展示给前端的数据。
Feign 是在客户端的负载均衡。
四,明天的计划
任务九


评论