发表于: 2021-05-19 23:31:55
8 2058
一,今天完成的事情
任务三1-9
1,但是其它没改。如果不用"Base_Column_List",能够比较灵活改成选哪些列也可以。
关于建议:
"Base_Column_List"已经设定。因为原来DAO有自动代码生产的部分,所以原来任务三没做成include list的形式。但是ArtstudioImageDao.xml的dao被提,所以改了。
<?xml version="1.0" encoding="UTF-8"?>
<!DOCTYPE mapper PUBLIC "-//mybatis.org//DTD Mapper 3.0//EN" "http://mybatis.org/dtd/mybatis-3-mapper.dtd">
<mapper namespace="com.nicole.ssm.dao.ArtstudioImageDao">

    <resultMap id="BaseResultMap" type="com.nicole.ssm.entity.ArtstudioImage">
        <!--@Table artstudio_image-->
        <result property="id" column="id" jdbcType="INTEGER"/>
        <result property="createdAt" column="created_at" jdbcType="INTEGER"/>
        <result property="updatedAt" column="updated_at" jdbcType="INTEGER"/>
        <result property="editorId" column="editor_id" jdbcType="INTEGER"/>
        <result property="status" column="status" jdbcType="INTEGER"/>
        <result property="imageUrl" column="image_url" jdbcType="VARCHAR"/>
        <result property="artstudioId" column="artstudio_id" jdbcType="INTEGER"/>
    </resultMap>

    <sql id="Base_Column_List">
    id, created_at, updated_at, editor_id, status, image_url, artstudio_id
  </sql>

    <!--查询多个,都是ArtstudioId下的图片-->
    <select id="queryByArtstudioId" resultMap="BaseResultMap">
        select
        <include refid="Base_Column_List" />
        from art_room.artstudio_image
        where artstudio_id = #{artstudioId}
    </select>

    <!--查询单个-->
    <select id="queryById" resultMap="BaseResultMap">
        select
        <include refid="Base_Column_List" />
        from art_room.artstudio_image
        where id = #{id}
    </select>

    <!--查询指定行数据-->
    <select id="queryAllByLimit" resultMap="BaseResultMap">
        select
        <include refid="Base_Column_List" />
        from art_room.artstudio_image
        limit #{offset}, #{limit}
    </select>

    <!--通过实体作为筛选条件查询-->
    <select id="queryAll" resultMap="BaseResultMap">
        select
        <include refid="Base_Column_List" />
        from art_room.artstudio_image
        <where>
            <if test="id != null">
                and id = #{id}
            </if>
            <if test="createdAt != null">
                and created_at = #{createdAt}
            </if>
            <if test="updatedAt != null">
                and updated_at = #{updatedAt}
            </if>
            <if test="editorId != null">
                and editor_id = #{editorId}
            </if>
            <if test="status != null">
                and status = #{status}
            </if>
            <if test="imageUrl != null and imageUrl != ''">
                and image_url = #{imageUrl}
            </if>
            <if test="artstudioId != null">
                and artstudio_id = #{artstudioId}
            </if>
        </where>
    </select>

    <!--新增所有列-->
    <insert id="insert" keyProperty="id" useGeneratedKeys="true">
        insert into art_room.artstudio_image(created_at, updated_at, editor_id, status, image_url, artstudio_id)
        values (#{createdAt}, #{updatedAt}, #{editorId}, #{status}, #{imageUrl}, #{artstudioId})
    </insert>

    <!--通过主键修改数据-->
    <update id="update">
        update art_room.artstudio_image
        <set>
            <if test="createdAt != null">
                created_at = #{createdAt},
            </if>
            <if test="updatedAt != null">
                updated_at = #{updatedAt},
            </if>
            <if test="editorId != null">
                editor_id = #{editorId},
            </if>
            <if test="status != null">
                status = #{status},
            </if>
            <if test="imageUrl != null and imageUrl != ''">
                image_url = #{imageUrl},
            </if>
            <if test="artstudioId != null">
                artstudio_id = #{artstudioId},
            </if>
        </set>
        where id = #{id}
    </update>

    <!--通过主键删除-->
    <delete id="deleteById">
        delete from art_room.artstudio_image where id = #{id}
    </delete>

</mapper>
2,任务三条目7.Postman测试所有接口数据是否正常。 还有条目8.手动修改数据库,填充上正确的数据。
把比较贴近项目,能够展示层次的数据填入数据库。
先在本地测试,然后到云上Linux
ArtstudioController
取出一个artstudio,它的imageUrl被成功拼接,放了3个panda图片
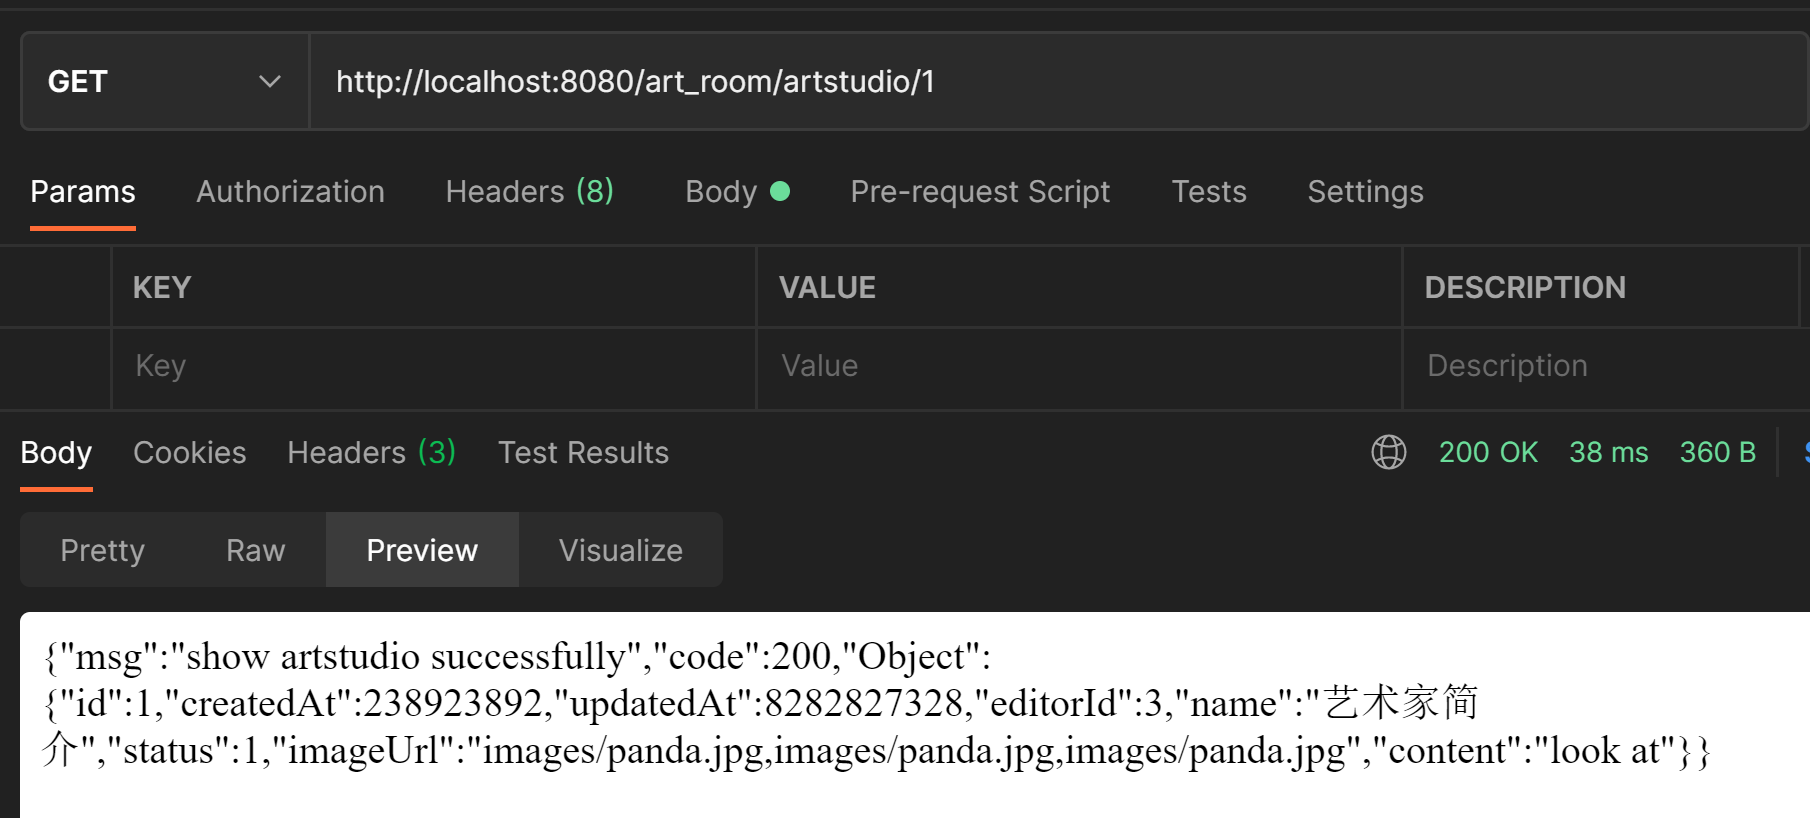
展示/all正常,status是0的不展示就没展示
ArtworkController
能找到所有作品,列表展示
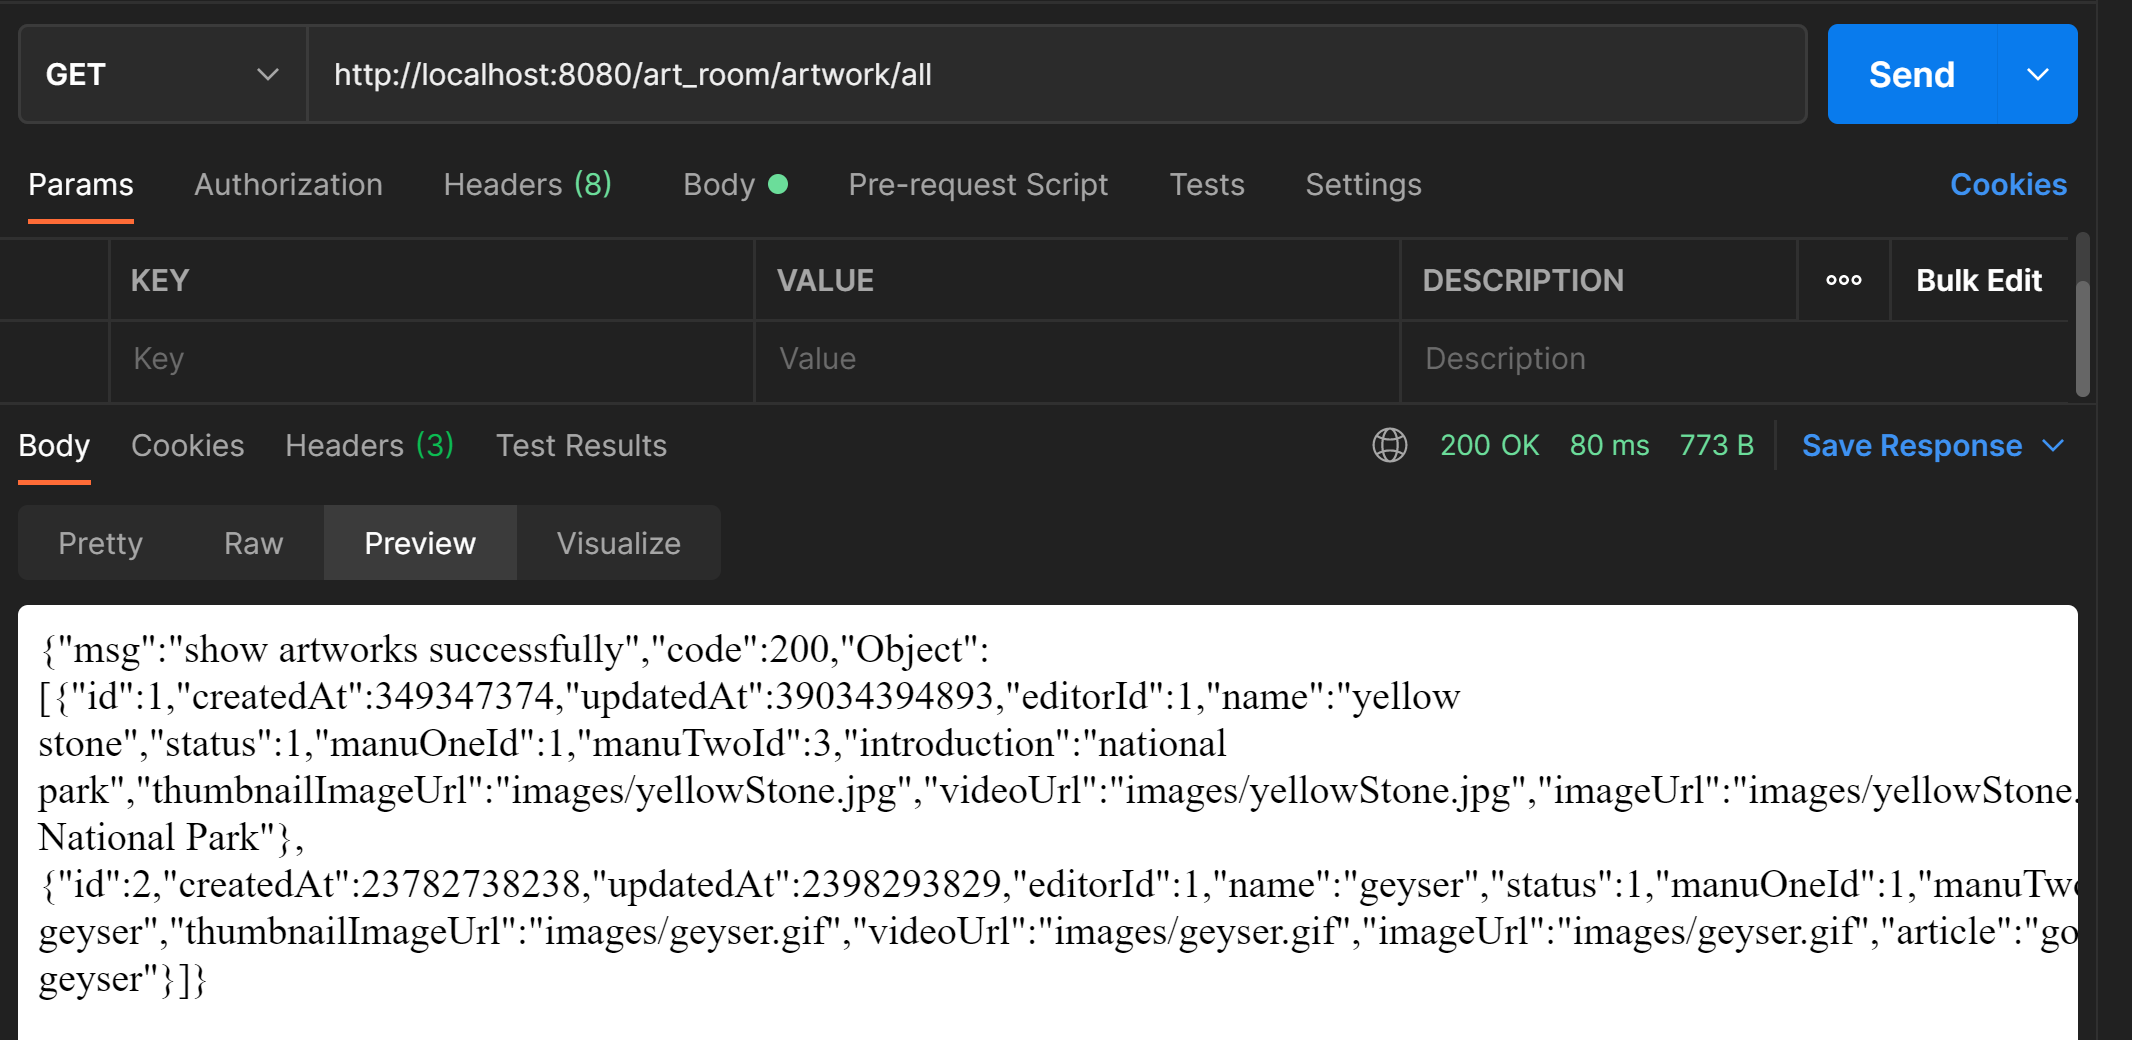
根据一级或者二级目录能找到相应的作品列表,manuid都有3,成功。
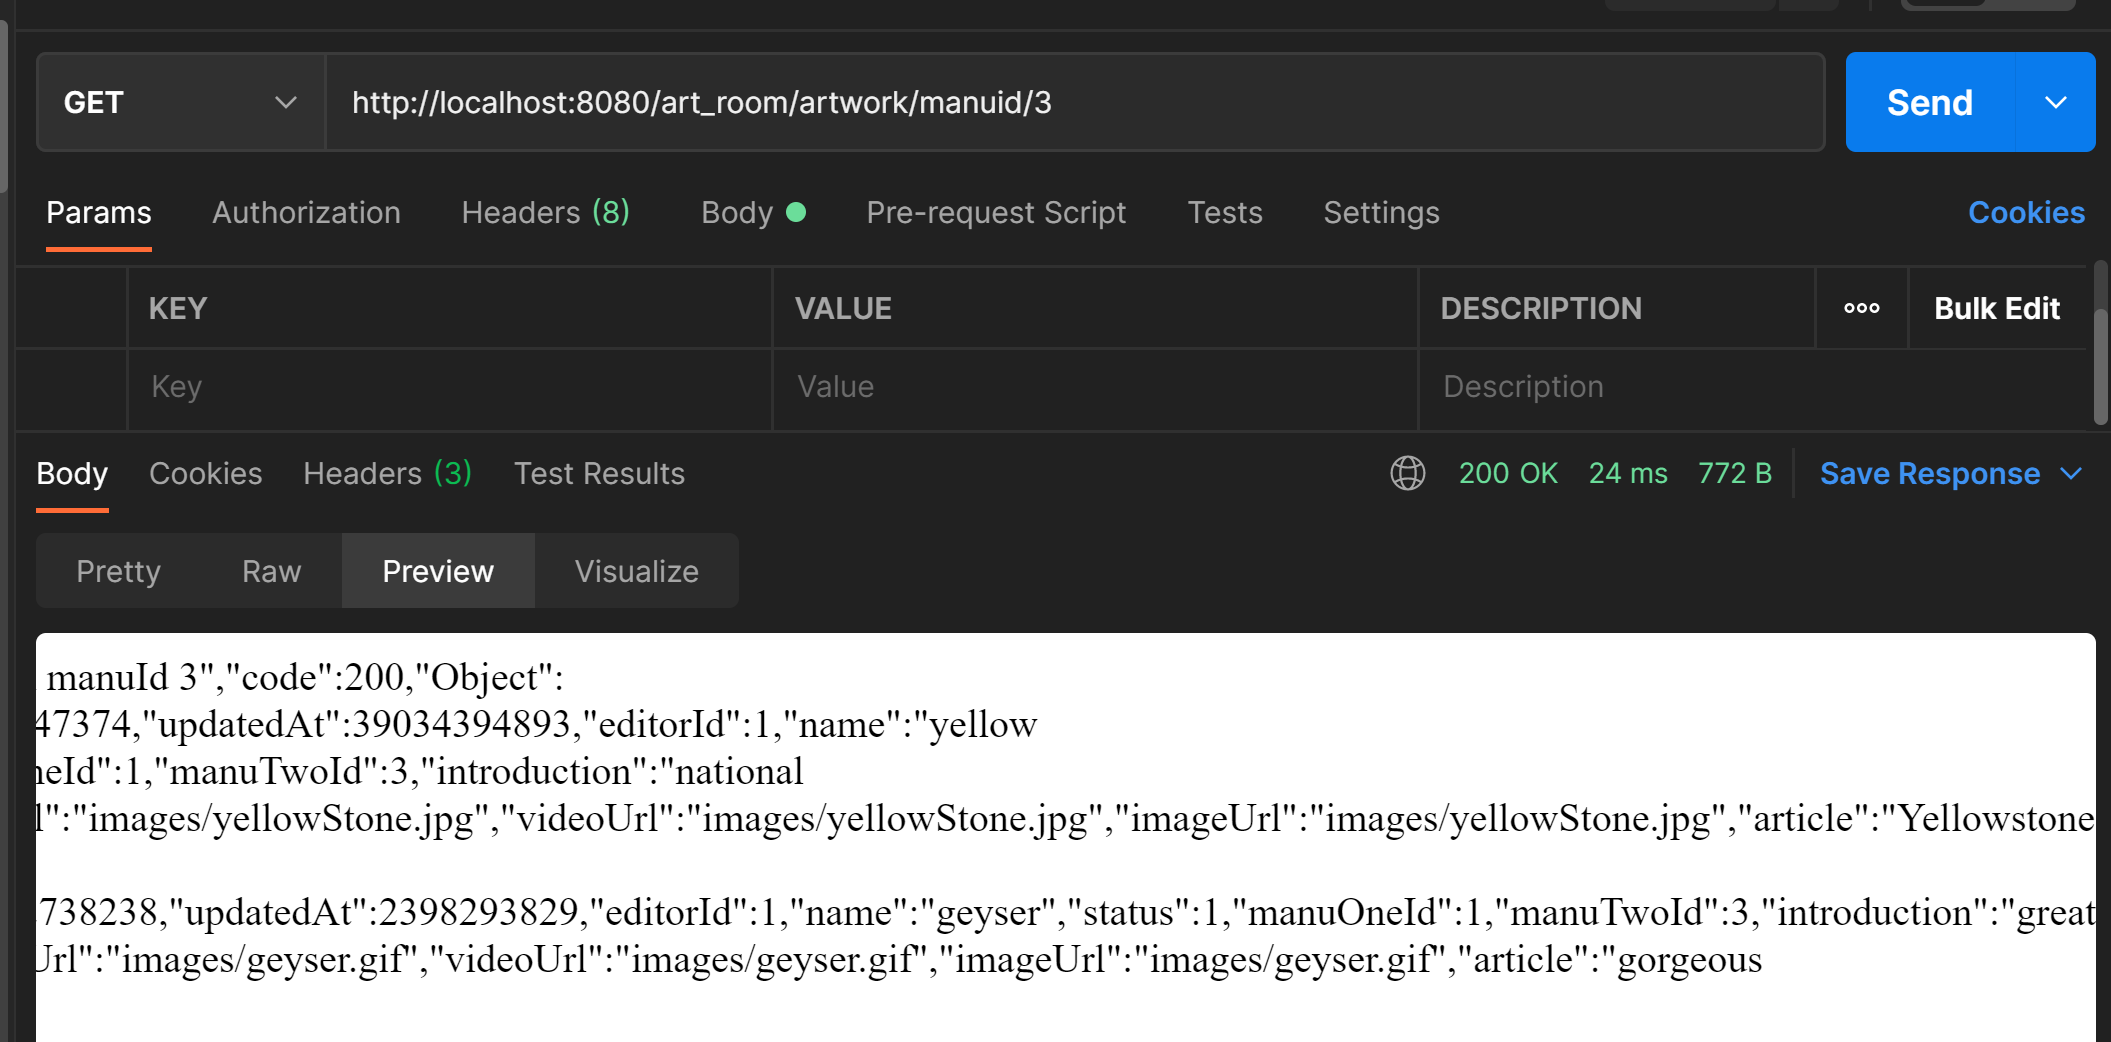
根据id找单个作品正常。
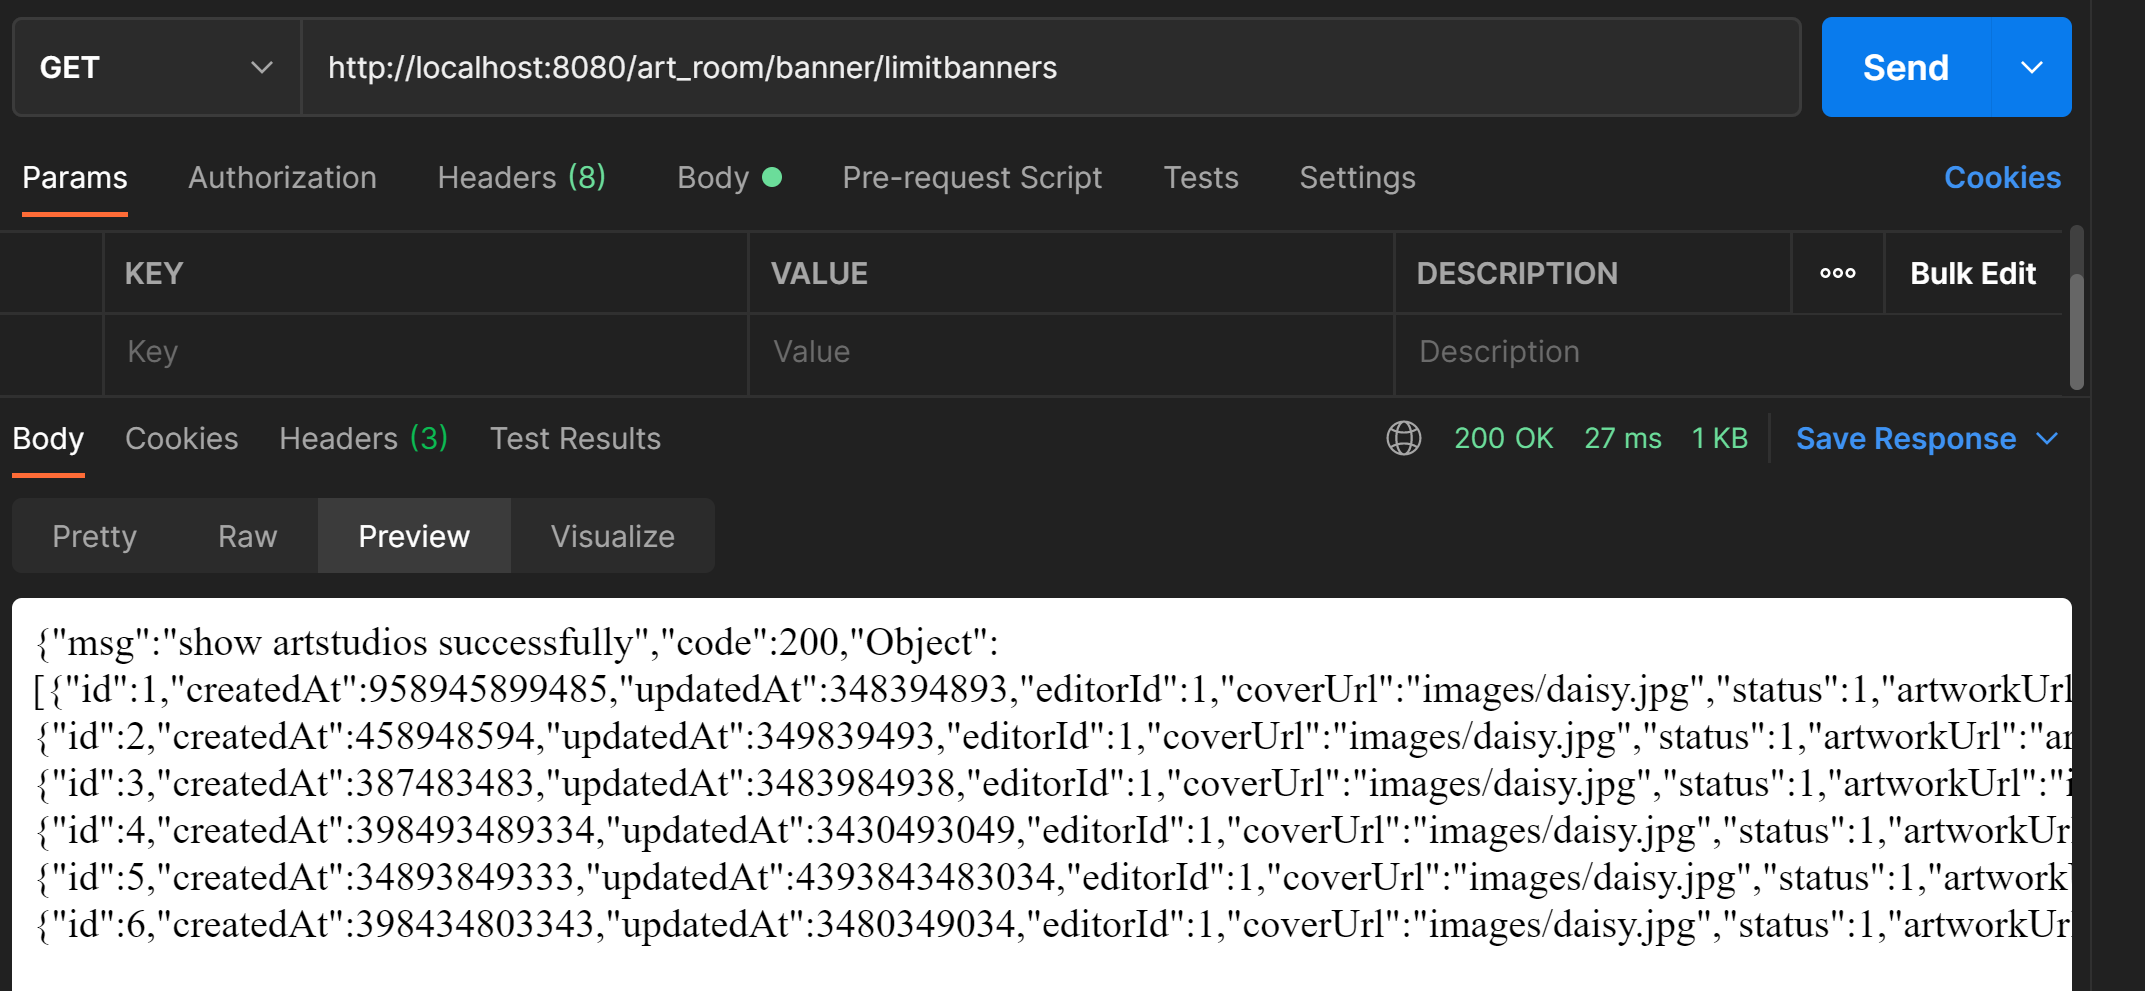
BannerController
我给了8个banner,其中一个设置不显示,但是根据逻辑,应该只能显示7个中的6个
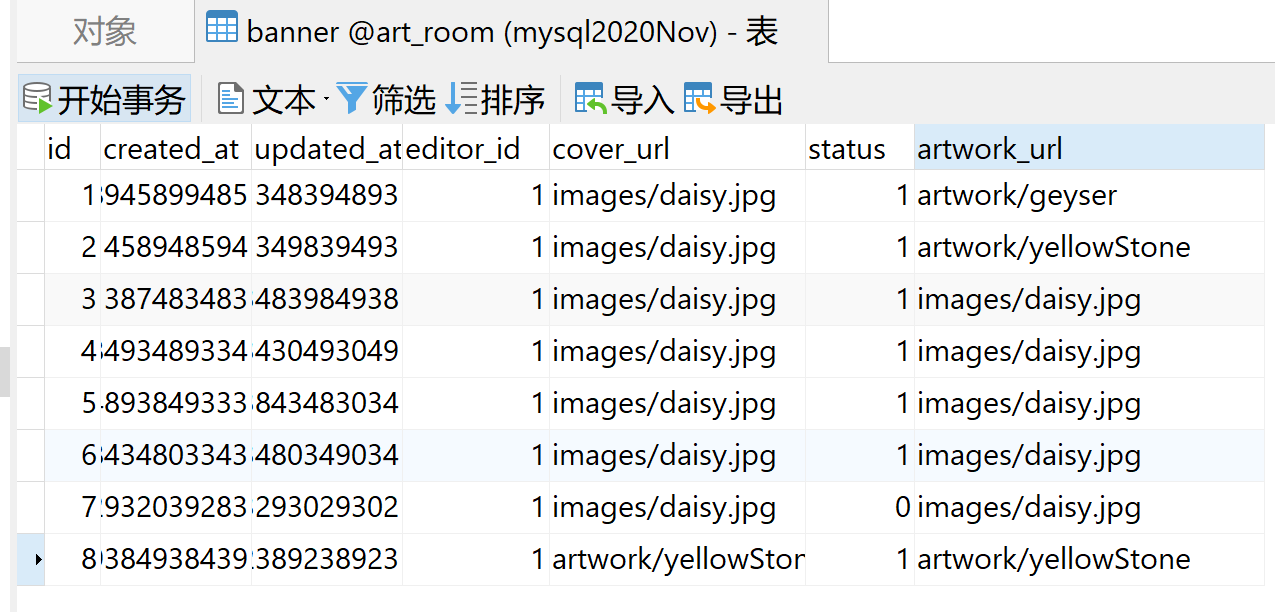
成功只显示6个。
CommentReplyController
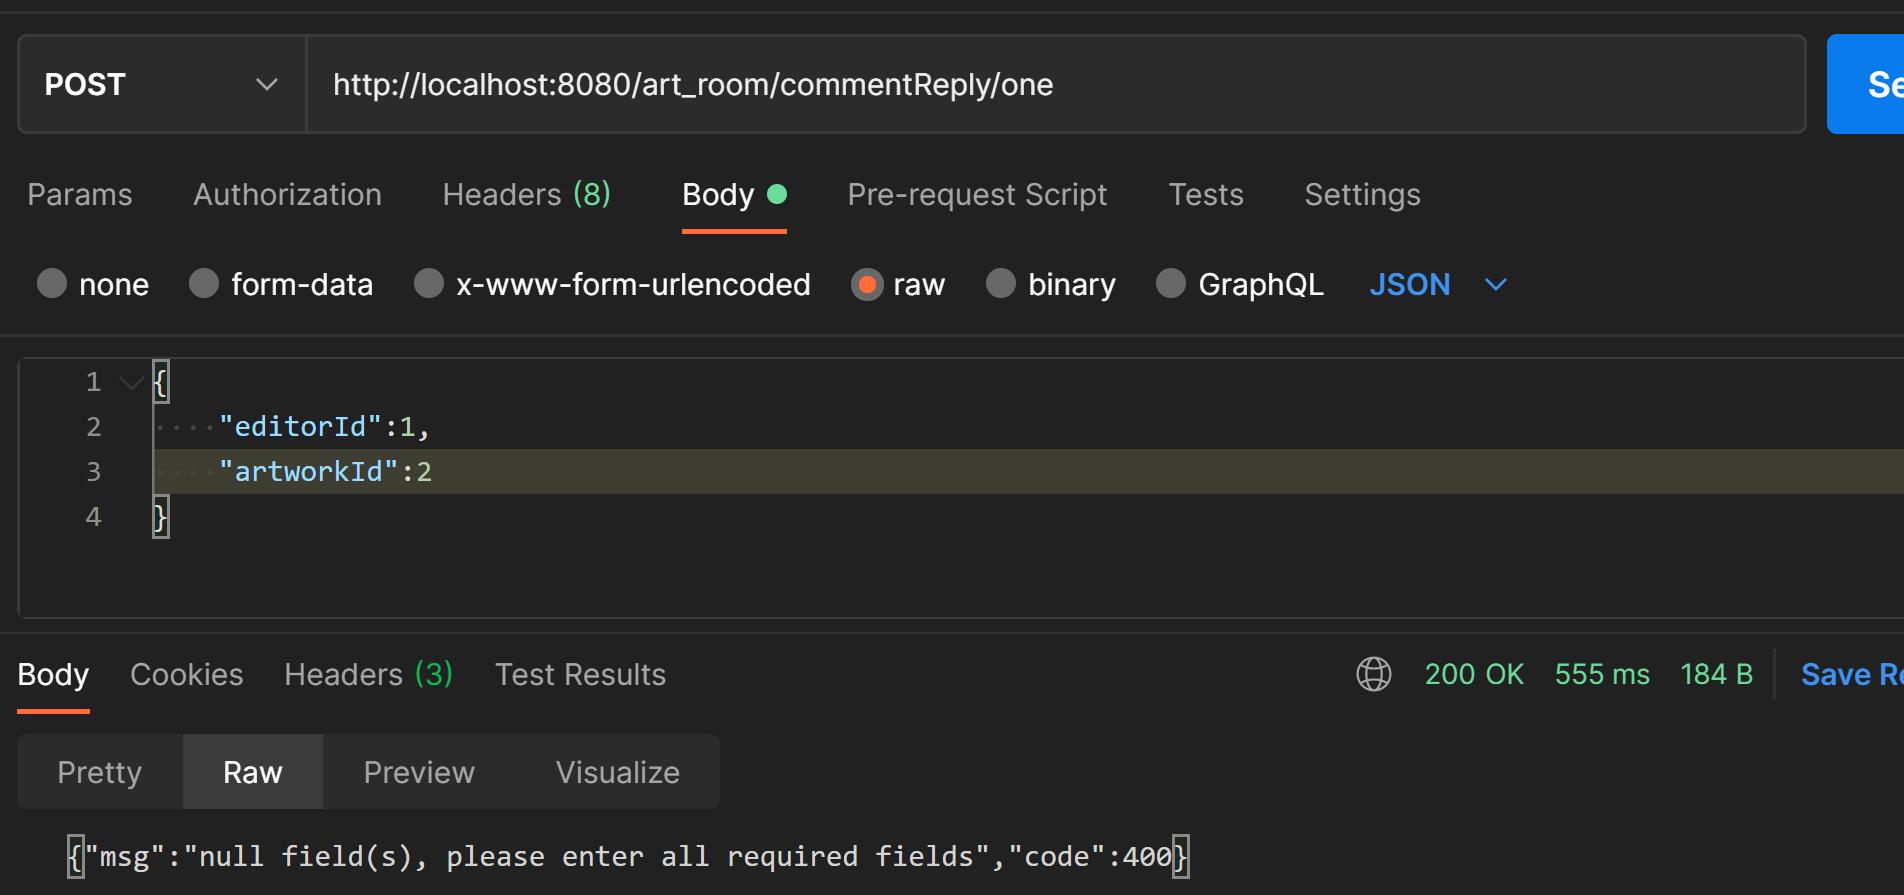
测试插入一条评论或者回复,写好了判空判不正常
@RequestMapping (value = "/", method = RequestMethod.POST)
@ResponseBody
public Map<String,Object> insertOneCommentReply(@RequestBody CommentReply commentReply) {
    if( null == commentReply ){
        return Restful.set(404, "null comments replies");
    }

    if( null == commentReply.getArtworkId() || StringUtils.isBlank( commentReply.getContent()) ||
            null == commentReply.getEditorId() || null == commentReply.getParentId() ||
            null ==commentReply.getStatus()){
        return Restful.set(400, "null field(s), please enter all required fields");
    }

    commentReply.setCreatedAt( System.currentTimeMillis() );
    commentReply.setUpdatedAt( System.currentTimeMillis() );

    CommentReply insert= this.commentReplyService.insert(commentReply);


    return Restful.set(200, "insert comments replies successfully", insert);
}
如果填入字段不足,拒绝,给出原因。此接口默认不用填写id,id自动生成
插入前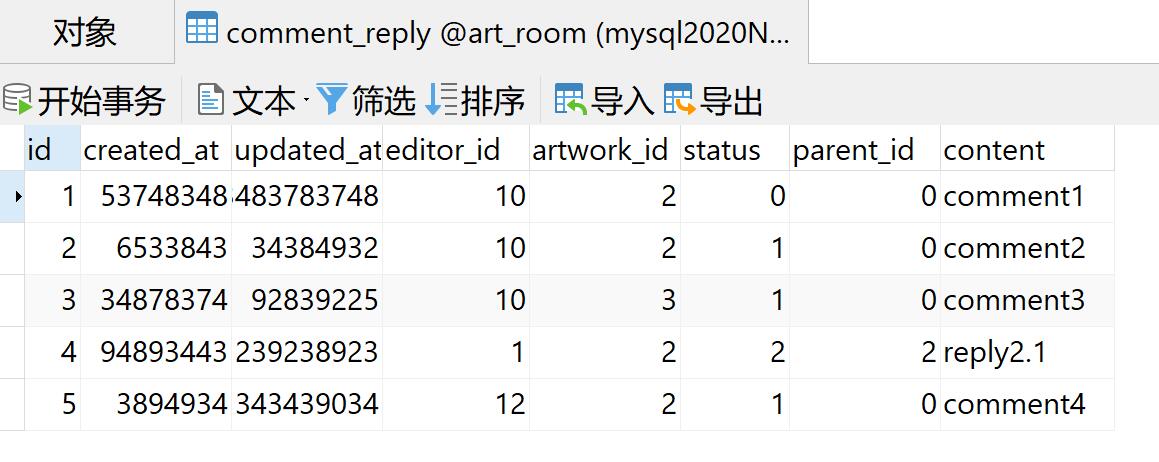
插入数据

插入后
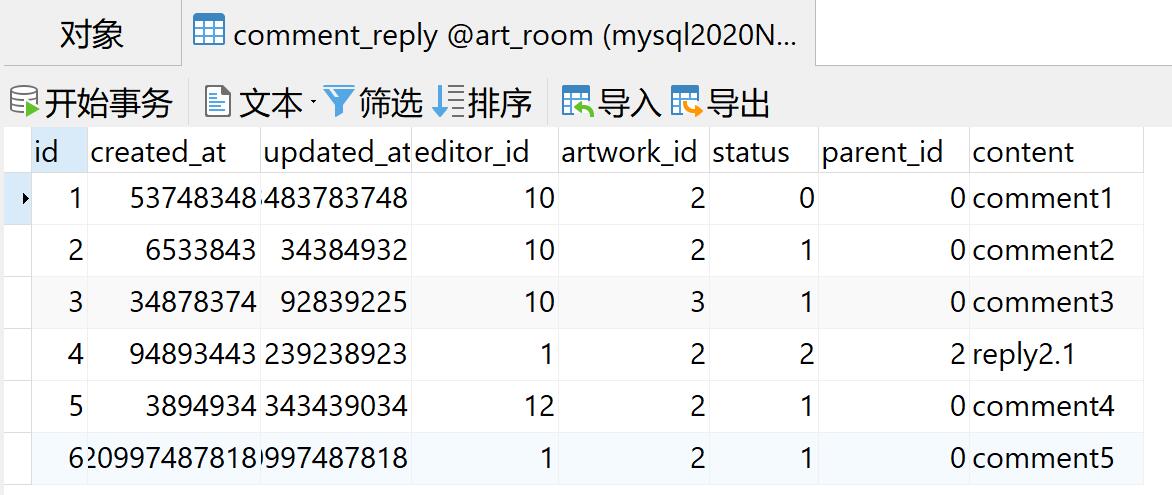
展示某个作品的所有显示的评论(限制最多50条),展示相应作者回复。其实因为有parent_id,0代表是评论,不用找父。大于0表示是作者管理员对评论的回复。而且先新后旧。50条是数据库取出后再在代码中处理的。
对于前端,其实平板列表展示结果就可以了,因为有parent_id。不是被query的作品不展示,status为0(不展示)的不展示
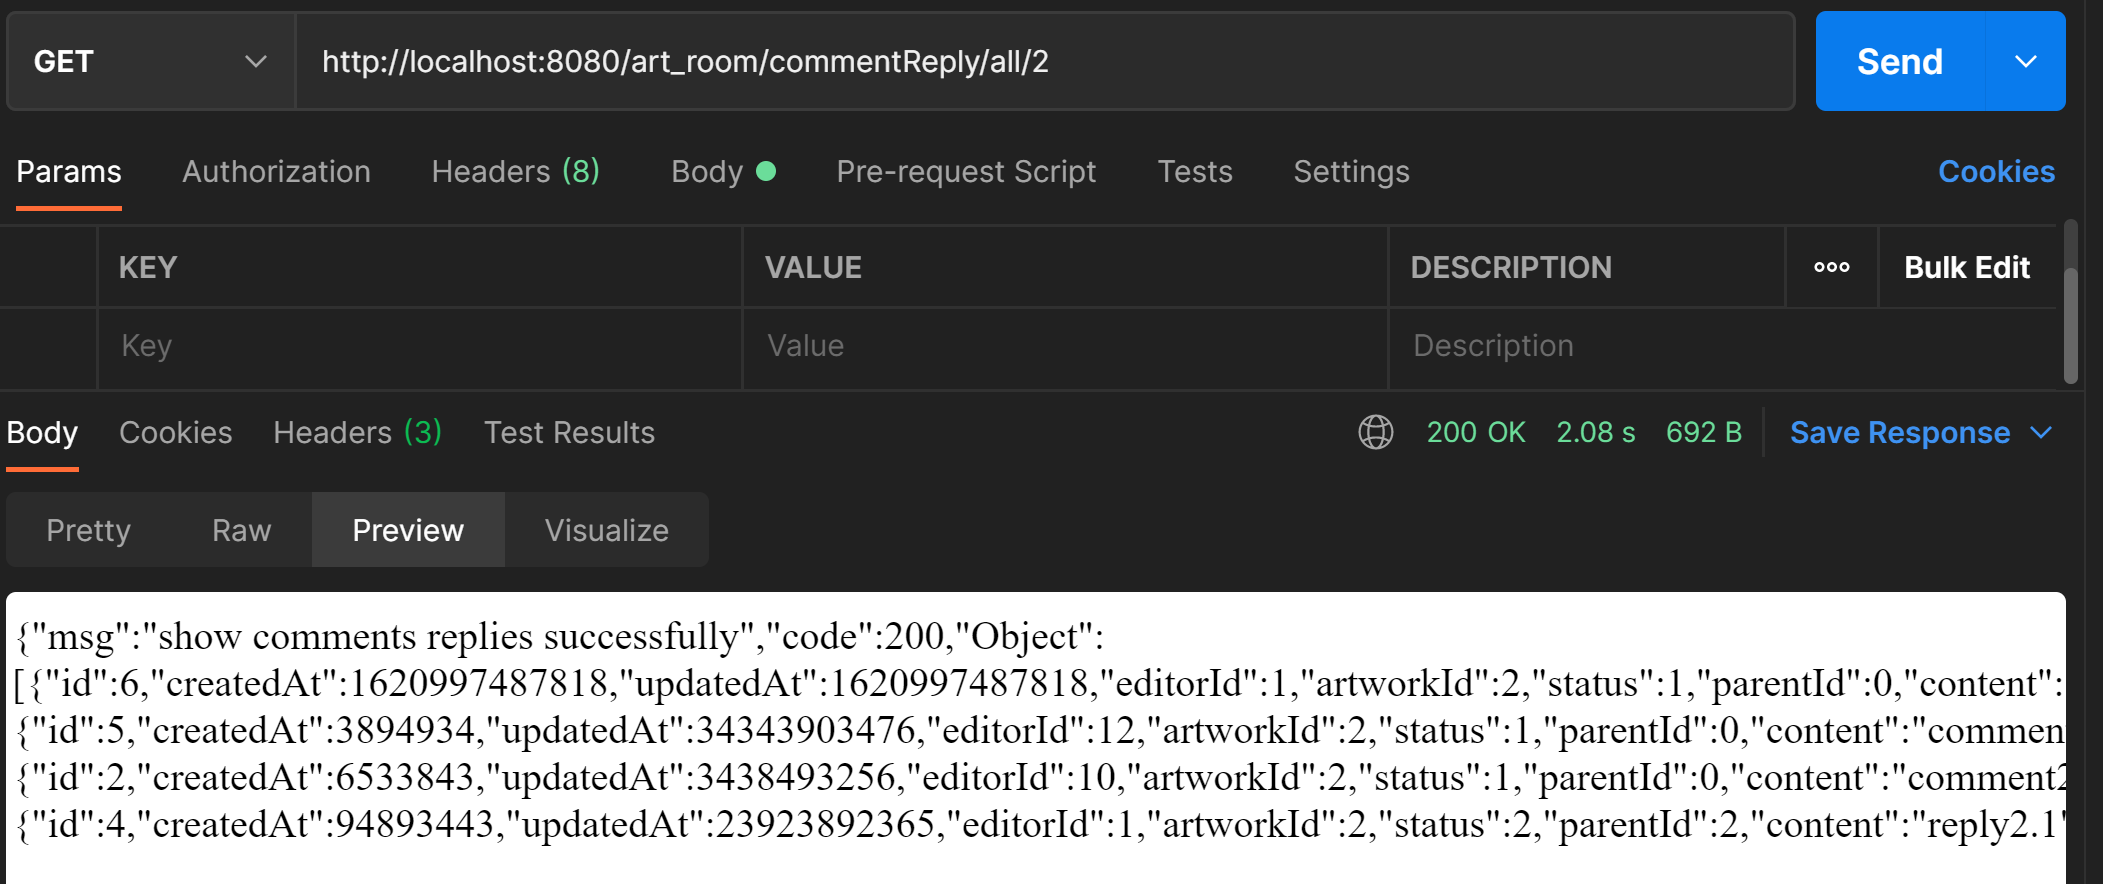
前端喜欢处理成层级展示,所以我写了层级展示列表的方法
/**
 * 通过id查询能被显示评论,组装留言。排序
 *
 * @param artworkId
 * @return 回复,层级显示留言
 */
public List<CommentReplyVo> queryArtworkIdCommentAndReply( long artworkId ) {
    int status1 = 1;
    int status2 = 2;
    //数据库排序。可以用集合的某个元素按规则排序。留言限制不多,这个项目就数据库排序了
    String orderBy = "DESC";
    int limit = 50 ;//limit comment to 50

    List<CommentReply> comments = commentReplyDao.queryByArtworkIdStatusOrder(
            artworkId, status1, orderBy );
    List<CommentReply> replies = commentReplyDao.queryByArtworkIdStatusOrder(
            artworkId, status2, orderBy );

    List<CommentReplyVo> commentVos = commentReplyToVo( comments) ;
    List<CommentReplyVo> replyVos = commentReplyToVo( replies) ;

    if( comments.size() > limit ) {
        comments.subList( 0, limit + 1);
    }

    //如果comment有作者管理员等回复,组装到replies列表中
    addReplies( commentVos, replyVos);

    return commentVos;
}

/**
 * 如果comment有作者管理员等回复,组装到replies列表中
 *
 * @param commentVos, replyVos
 * @return
 */
private void addReplies(List<CommentReplyVo> commentVos, List<CommentReplyVo> replyVos) {
    for (CommentReplyVo commentVo : commentVos) {
        for (CommentReplyVo replyVo : replyVos) {
            if ( commentVo.getId() == replyVo.getParentId()){
                if( null == commentVo.getReplies() ){
                    commentVo.setReplies( new ArrayList<>());
                }
                commentVo.getReplies().add( replyVo );
            }
        }
    }
}

/**
 * 把commentReply组装成commentReplyVo。时间ms修改成人容易读的模式
 *
 * @param crs
 * @return 列表
 */
private List<CommentReplyVo> commentReplyToVo(List<CommentReply> crs) {
    List<CommentReplyVo> commentReplyVos = new ArrayList<>();
    //不反射
    for (CommentReply cr : crs) {
        CommentReplyVo commentReplyVo = new CommentReplyVo();
        commentReplyVo.setId( cr.getId() );
        //我看到的原型图时间是用小短线分割年月日
        commentReplyVo.setCreatedAt( transferLongToDate(
                "yyyy-MM-dd  hh:mm:ss", cr.getCreatedAt() ) );
        commentReplyVo.setUpdatedAt( transferLongToDate(
                "yyyy-MM-dd  hh:mm:ss", cr.getUpdatedAt() ));
        commentReplyVo.setEditorId( cr.getEditorId() );
        commentReplyVo.setArtworkId( cr.getArtworkId() );
        commentReplyVo.setStatus( cr.getStatus() );
        commentReplyVo.setParentId( cr.getParentId() );
        commentReplyVo.setContent( cr.getContent() );
        commentReplyVos.add(commentReplyVo);
    }

    return  commentReplyVos;
}


private static String transferLongToDate(String dateFormat, Long millSecond) {
    Date time = new Date(millSecond);
    SimpleDateFormat formats = new SimpleDateFormat(dateFormat);
    return formats.format(time);
}
成功完成所有条件,而且把日期转换成短线时间,前端不用再处理。展示结果是:
ManuController
manu就是自身,可以做一个没有实际值的tree,id就是0,level在0。从root开始展示,层级清楚。递归如果希望理解,看树的前中后序遍历好。我的代码就是前序遍历。层数不多,所以用递归。导航栏不多,递归次数不多,能用递归。
name填一级二级三级,方便看
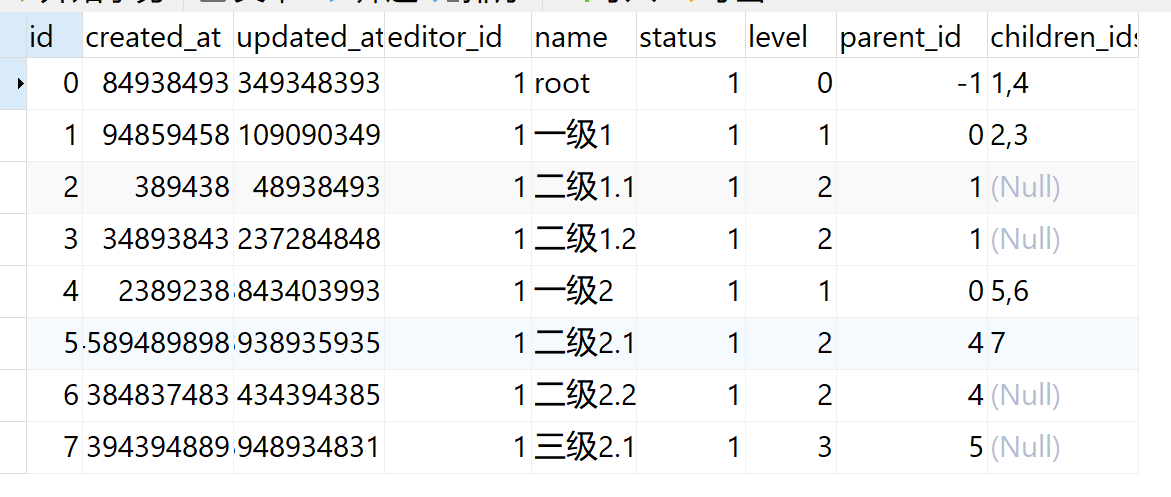
列表展示正常,因为有parent_id,而且把下级已经排好在上级的后面,已经可用。

递归tree。可以用vo把pojo展示成前端想看的对象。递归一定要写好返回条件,层数超过1000一般不要用。stack overflow
/**
 * 通过ID查找此级别下所有manu,并用ManuVo更容易分层展示
 *
 * @param id 主键
 * @return ManuVo
 */
@Override
public ManuVo queryAllChildrenManuVos(Long id) {
    Manu manu = manuDao.queryById( id );
    return queryAllChildrenManuVosHelper( manu );
}

private ManuVo queryAllChildrenManuVosHelper(Manu manu) {
    if( manu == null ){
        return null;
    }

    if( manu.getStatus() < 1 ) {
        return null;
    }

    String childrenIds = manu.getChildrenIds();

    if ( StringUtils.isBlank( childrenIds ) ){
        return manuToManuVo( manu );
    }

    ManuVo manuVo = manuToManuVo( manu );

    List<ManuVo> manuVoChildren = new ArrayList<>();
    String[] childrenIdList = childrenIds.split(",");
    for (String id : childrenIdList) {
        long childId = Long.parseLong( id );
        ManuVo child = queryAllChildrenManuVosHelper( manuDao.queryById(childId) );
        manuVoChildren.add(child);
    }
    if( null != manuVoChildren && manuVoChildren.size() > 0){
        manuVo.setChildren( manuVoChildren );
    }
    return manuVo;
}

private ManuVo manuToManuVo(Manu manu) {
    if( manu == null ){
        return null;
    }
    ManuVo manuVo = new ManuVo();

    manuVo.setId( manu.getId() );
    manuVo.setCreatedAt( manu.getCreatedAt() );
    manuVo.setUpdatedAt( manu.getUpdatedAt() );
    manuVo.setName( manu.getName() );
    manuVo.setStatus( manu.getStatus() );
    manuVo.setLevel( manu.getLevel() );
    manuVo.setParentId( manu.getParentId() );
    return manuVo;
}
递归成功
二,今天问题
“组建团队,遵从敏捷开发流程;从需求评审开始,随后的方案评审、项目研发、测试用例、DEMO、发布测试环境;到最终项目正式上线”
敏捷开发流程有改进的地方其实不算简单,不是一下子能说清楚的。
三,今天的收获
谢谢况师兄在20210519日报的回答。有机会给你们点赞。
复盘做完了可以接着做真实项目,也看到了。
今天又被HR打电话。好好交流。如果某公司面试的人多,有的需要针对性的准备。就算是算法,都要针对性的看一眼。
四,明天的计划
任务三深度思考


评论