今天完成的事情:
oAuth2认证服务端改成JWT
oAuth2授权码模式
明天计划的事情:
结束报错
任务9总结
遇到的问题:
之前一直没能区分这个两个单词,经常弄混,我说为什么看着晕。。。
认证(Authentication)
通俗地讲就是验证当前用户的身份
互联网中的认证:
用户名密码登录
邮箱发送登录链接
手机号接收验证码
只要你能收到邮箱/验证码,就默认你是账号的主人
授权(Authorization)
用户授予第三方应用访问该用户某些资源的权限
你在安装手机应用的时候,APP 会询问是否允许授予权限(访问相册、地理位置等权限)
你在访问微信小程序时,当登录时,小程序会询问是否允许授予权限(获取昵称、头像、地区、性别等个人信息)
实现授权的方式有:cookie、session、token、OAuth
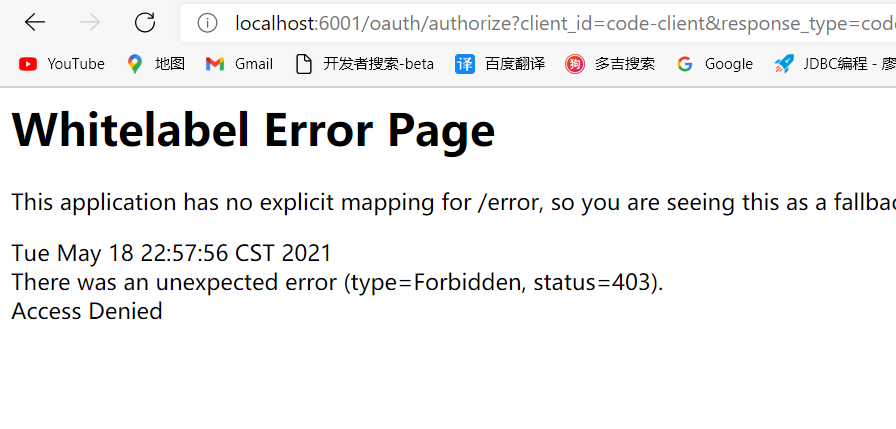
OAuth2 授权码模式访问/oauth/authorize返回403提示
403一般表示 禁止访问或者没有权限
解决办法:
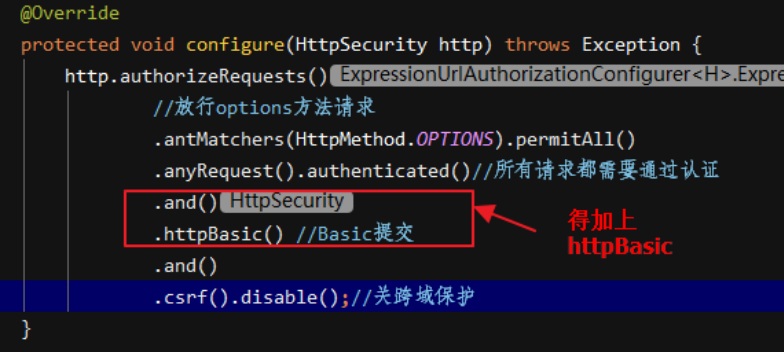
还是不行
收获:
刷新token
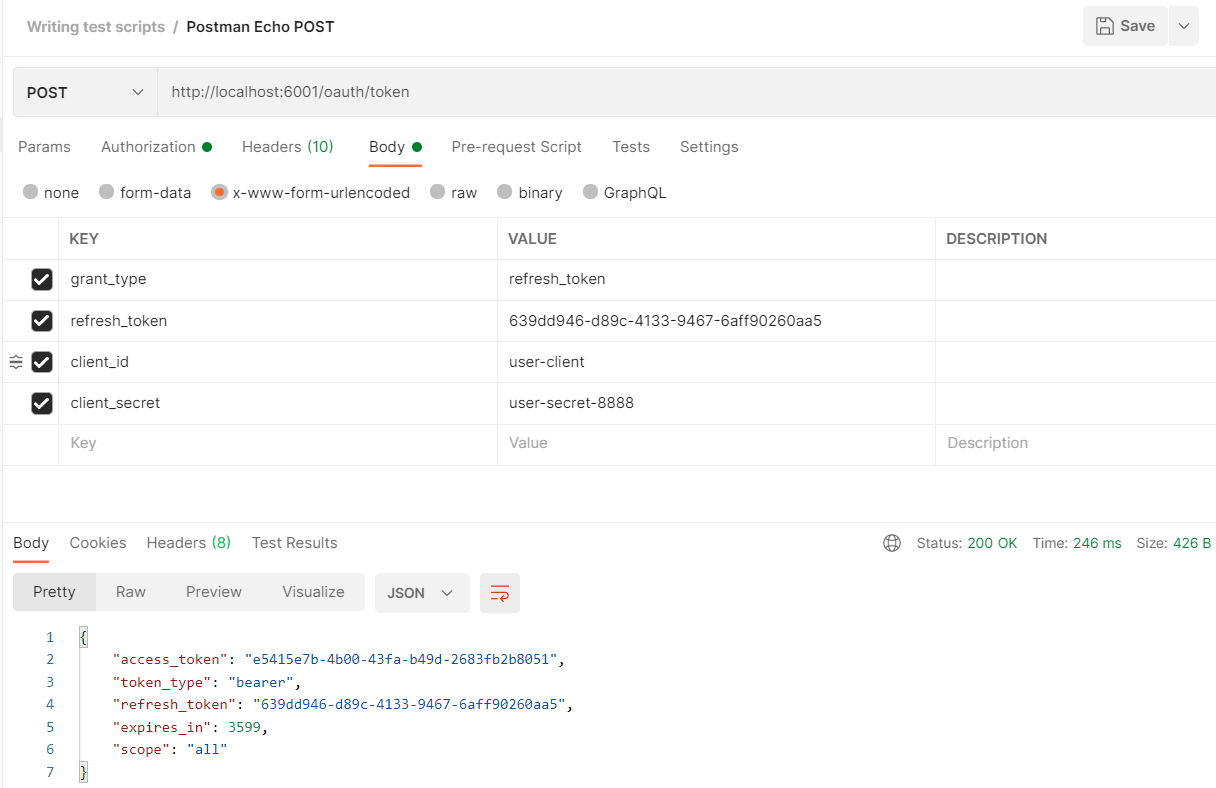
用 JWT 替换 redisToken
JWT是什么?
全称是 JSON Web Token,简单来说就是 Token+Payload(用于存放用户信息)
为什么使用JWT 替换 redisToken?
因为每次访问用户服务请求都要先去认证服务对token进行认证,并且查询token对应的用户权限,虽然使用了redisToken,已经优化部分性能。
但是采用JWT的方式的话,能够避免每次请求都需要远程调度认证中心的服务,因为JWT中包含了用户的权限信息
使用JWT的运行逻辑:
登录认证中心,认证中心返回一个JWT(这个一般采用localStorage进行存储,因为存放在cookie中无法跨域)给浏览器,在Header请求头+JWT访问用户服务,中间不需要调用认证中心的服务,因为JWT中包含了用户信息和用户的权限信息,最好返回用户数据
1.认证服务端修改
先把 redis 的配置去掉。
1.添加 JwtConfig 配置类
@Configuration
public class JwtTokenConfig {
@Bean
public TokenStore jwtTokenStore() {
return new JwtTokenStore(jwtAccessTokenConverter());
}
@Bean
public JwtAccessTokenConverter jwtAccessTokenConverter() {
JwtAccessTokenConverter accessTokenConverter = new JwtAccessTokenConverter();
accessTokenConverter.setSigningKey("dev");
return accessTokenConverter;
}
@Bean
public TokenEnhancer jwtTokenEnhancer(){
return new JWTokenEnhancer();
}
}
2.更改 OAuthConfig 配置类
@Autowired
private TokenStore jwtTokenStore;
@Autowired
private JwtAccessTokenConverter jwtAccessTokenConverter;
@Autowired
private TokenEnhancer jwtTokenEnhancer;
@Override
public void configure(final AuthorizationServerEndpointsConfigurer endpoints) throws Exception {
/**
* 普通 jwt 模式
*/
endpoints.tokenStore(jwtTokenStore)
.accessTokenConverter(jwtAccessTokenConverter)
.userDetailsService(kiteUserDetailsService)
/**
* 支持 password 模式
*/
.authenticationManager(authenticationManager);
2.修改用户服务:
1.修改 application.yml 配置文件
security:
oauth2:
client:
client-id: user-client
client-secret: user-secret-8888
# resource:
# id: user-client
# user-info-uri: user-info
# authorization:
resource:
jwt:
key-value: dev
注意:认证服务端 JwtAccessTokenConverter设置的 SigningKey 要和配置文件中的 key-value 相同,不然会导致无法正常解码 JWT ,导致验证不通过。
2.ResourceServerConfig 配置
@Configuration
@EnableResourceServer
@EnableGlobalMethodSecurity(prePostEnabled = true)
public class ResourceServerConfig extends ResourceServerConfigurerAdapter {
@Bean
public TokenStore jwtTokenStore() {
return new JwtTokenStore(jwtAccessTokenConverter());
}
@Bean
public JwtAccessTokenConverter jwtAccessTokenConverter() {
JwtAccessTokenConverter accessTokenConverter = new JwtAccessTokenConverter();
accessTokenConverter.setSigningKey("dev");
accessTokenConverter.setVerifierKey("dev");
return accessTokenConverter;
}
@Autowired
private TokenStore jwtTokenStore;
@Override
public void configure(ResourceServerSecurityConfigurer resources) throws Exception {
resources.tokenStore(jwtTokenStore);
}
}
运行:
Basic dXNlci1jbGllbnQ6dXNlci1zZWNyZXQtODg4OA== 这个值是 user-client:user-secret-8888 经过 base64 编码实现的值

返回的值,对token进行解析
![]()
{
"access_token": "eyJhbGciOiJIUzI1NiIsInR5cCI6IkpXVCJ9.eyJleHAiOjE2MjEzNDU5OTEsInVzZXJfbmFtZSI6ImFkbWluIiwiYXV0aG9yaXRpZXMiOlsiUk9MRV9BRE1JTiJdLCJqdGkiOiJjNmEzMzM3ZS0zM2JhLTRlNDgtYjY4Mi1lZWVhMGRlM2FkY2IiLCJjbGllbnRfaWQiOiJ1c2VyLWNsaWVudCIsInNjb3BlIjpbImFsbCJdfQ.qWqG9k51PtJDcEuaiLlQgL4hzxYUvVwrhA2QdKsIGu4",
"token_type": "bearer",
"refresh_token": "eyJhbGciOiJIUzI1NiIsInR5cCI6IkpXVCJ9.eyJ1c2VyX25hbWUiOiJhZG1pbiIsInNjb3BlIjpbImFsbCJdLCJhdGkiOiJjNmEzMzM3ZS0zM2JhLTRlNDgtYjY4Mi1lZWVhMGRlM2FkY2IiLCJleHAiOjE2MjM5MzQzOTEsImF1dGhvcml0aWVzIjpbIlJPTEVfQURNSU4iXSwianRpIjoiZGU3OGEzMjItZDYwZS00MzJkLWE3MGUtM2QzZGViZDRiOTY0IiwiY2xpZW50X2lkIjoidXNlci1jbGllbnQifQ.w2G1ibEQ_URJuIHfrMkWXyEwfGCCfm92UqOippmMRjk",
"expires_in": 3599,
"scope": "all",
"jti": "c6a3337e-33ba-4e48-b682-eeea0de3adcb"
}
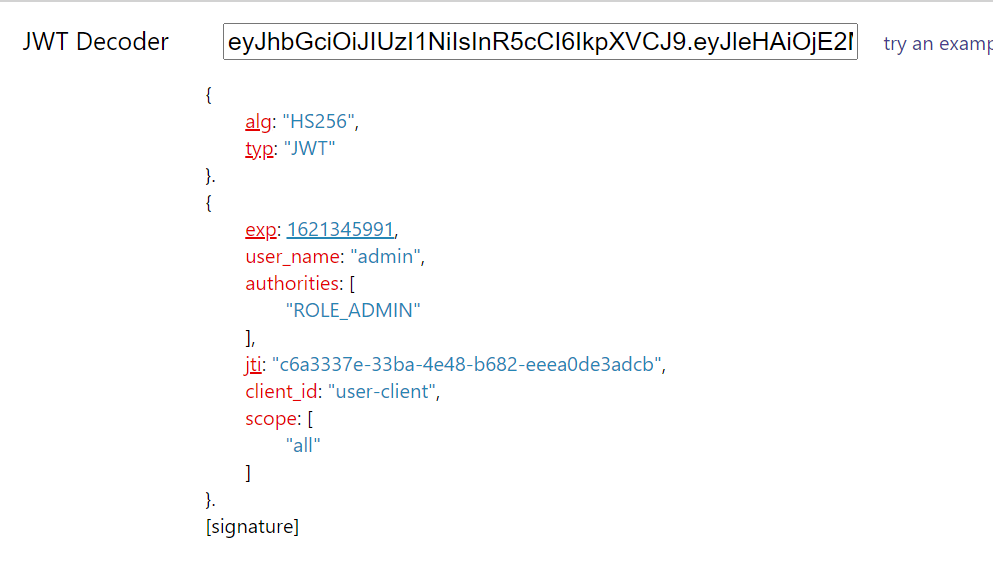
可以看到user_name,authorities(权限),client_id 等信息都在其中。
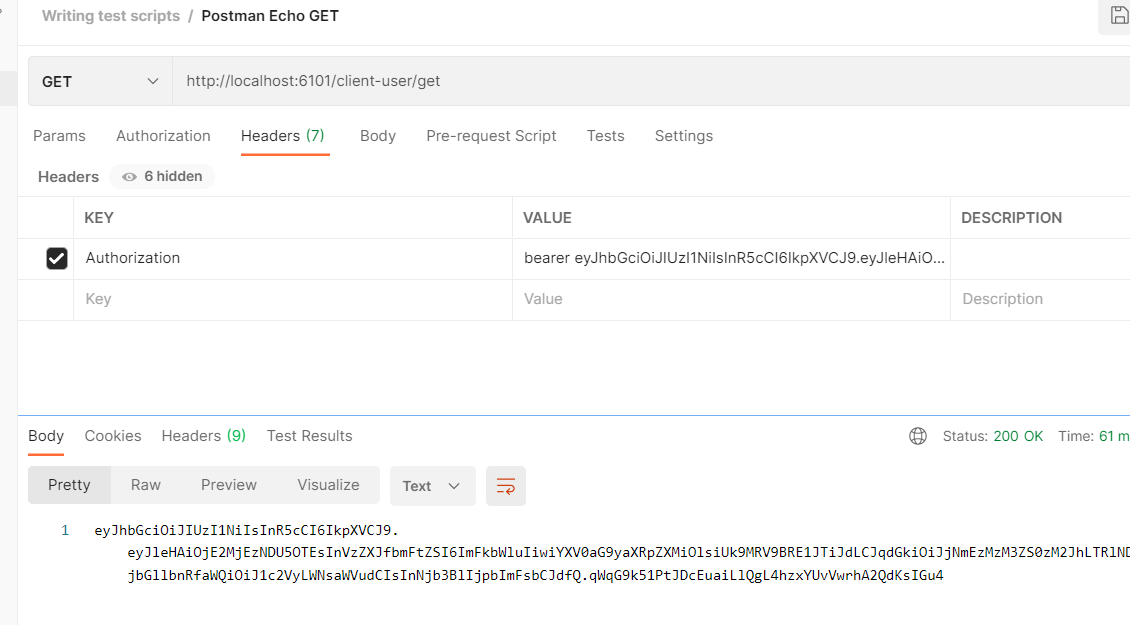
==============
==============
Spring Cloud OAuth2 授权码模式
这个授权码模式就是 我经常使用qq或者微信对一些网址进行登录操作,而不用注册,采用的模式就是授权码模式。一个很常用的模式
实现逻辑:
1.在gitee登录网址上点击qq图片,会传到QQ的认证服务器,会加上回调地址(就是认证成功后返回的页面,现在一般还要注册,授权也没用)
2.认证服务器接受请求后回到自己的登录页面,输入qq号和密码,点击确认授权,或者点击拒绝
3.点击确认后跳到回调地址的页面,并传入参数code
4.回调地址一般是一个 RESTful 接口,此接口拿到 code 参数后,再次请求认证服务器的 token 获取接口,用来换取 access_token 等信息
5.获取到 access_token 后,拿着 token 去请求各个微服务客户端的接口
1.认证服务端配置
先使用BCryptPasswordEncoder()对code-secret-8888进行加密
加密后的值:$2a$10$jttqqj4aVTj90I1YhIYEKe7tUtNBantP1oBP4RINbczIwYBihN5BC
数据库添加
INSERT INTO oauth_client_details
(client_id, client_secret, scope, authorized_grant_types,
web_server_redirect_uri, authorities, access_token_validity,
refresh_token_validity, additional_information, autoapprove)
VALUES
('code-client', '$2a$10$jttqqj4aVTj90I1YhIYEKe7tUtNBantP1oBP4RINbczIwYBihN5BC', 'all',
'authorization_code,refresh_token', 'http://localhost:6102/client-authcode/login', null, 3600, 36000, null, true);
2.创建授权模式的微服务
1.导入依赖:
<dependencies>
<dependency>
<groupId>org.springframework.boot</groupId>
<artifactId>spring-boot-starter-web</artifactId>
</dependency>
<dependency>
<groupId>org.springframework.cloud</groupId>
<artifactId>spring-cloud-starter-oauth2</artifactId>
</dependency>
<dependency>
<groupId>org.springframework.boot</groupId>
<artifactId>spring-boot-starter-data-redis</artifactId>
</dependency>
<dependency>
<groupId>io.jsonwebtoken</groupId>
<artifactId>jjwt</artifactId>
<version>0.9.1</version>
</dependency>
<dependency>
<groupId>com.squareup.okhttp3</groupId>
<artifactId>okhttp</artifactId>
<version>3.14.2</version>
</dependency>
<dependency>
<groupId>org.springframework.boot</groupId>
<artifactId>spring-boot-starter-thymeleaf</artifactId>
</dependency>
</dependencies>
2.配置
spring:
application:
name: client-authcode
server:
port: 6102
servlet:
context-path: /client-authcode
security:
oauth2:
client:
client-id: code-client
client-secret: code-secret-8888
resource:
jwt:
key-value: dev
authorization:
3.创建ResourceServerConfig
@Configuration
@EnableResourceServer
@EnableGlobalMethodSecurity(prePostEnabled = true)
public class ResourceServerConfig extends ResourceServerConfigurerAdapter {
@Bean
public TokenStore jwtTokenStore() {
return new JwtTokenStore(jwtAccessTokenConverter());
}
@Bean
public JwtAccessTokenConverter jwtAccessTokenConverter() {
JwtAccessTokenConverter accessTokenConverter = new JwtAccessTokenConverter();
accessTokenConverter.setSigningKey("dev");
accessTokenConverter.setVerifierKey("dev");
return accessTokenConverter;
}
@Autowired
private TokenStore jwtTokenStore;
@Override
public void configure(ResourceServerSecurityConfigurer resources) throws Exception {
resources.tokenStore(jwtTokenStore);
}
@Override
public void configure(HttpSecurity http) throws Exception {
http
.authorizeRequests()
.antMatchers("/login")
.permitAll()
.and()
.httpBasic()
;
}
运行,报错:


评论