发表于: 2021-04-22 20:51:09
3 2270
一,今天完成的事情
任务二16-18
1,Post时,对比用Http Body接收参数,用param接收参数的区别,分别描述两种方式的使用场景
@RequestBody和@RequestParam 一般和@Controller一起使用。虽然不是区别,但是提醒在同一个方法里,@RequestBody只能有一个,@RequestParam可以有多个。
1-1,@RequestParam 接收参数
注解@RequestParam接收的参数是来自requestHeader中,即请求头。通常用于GET请求,但是不限于GET。
@RequestParam有三个配置参数:
required 表示是否必须,默认为 true,必须。
defaultValue 可设置请求参数的默认值。
value 为接收url的参数名(相当于key值)。
格式是 url?id=num&name=your_name
比如只有一个,我项目中用的url:
http://localhost:8080/ssmstudent/student/delete?id=10
@RequestParam也可用于其它类型的请求,例如:POST、DELETE等请求。比如我的是删除,用它接收需要的数据。POST也可以用它。
对应我的代码是
//@RequestParam gets id。获取查询参数。即url?id=num&name=your_name这种形式. return restful
@RequestMapping(value = "/delete", method = RequestMethod.DELETE)
@ResponseBody
public Map<String, Object> deleteStudent(@RequestParam(value = "id", defaultValue="0") long id) {
//logic
}
以上url .如果不带参数,id是有值的-0
如果有2个或者以上的参数,如以下例子:
url?dept=IT&state=NC
@RequestMapping
    public String handleEmployeeRequestByDept (@RequestParam("dept") String deptName,
                                            @RequestParam("state") String stateCode,
                                            Model map) {//logic
    }
required: The default is true. That means the status code 400 will be returned if the parameter is missing in the request. We can switch this to false if we prefer a null value if the parameter is not present in the request.
@RequestParam(value = "project", required = false) String projectName
这里 ?project在发送浏览的那端不一定需要写
@RequestParam用来处理 Content-Type 为 application/x-www-form-urlencoded 编码的内容,Content-Type默认为该属性。
由于@RequestParam是用来处理 Content-Type 为 application/x-www-form-urlencoded 编码的内容的,所以在postman中,要选择body的类型为 x-www-form-urlencoded,这样在headers中就自动变为了 Content-Type : application/x-www-form-urlencoded 编码格式

注意下图postman 使用的选项x-www-form-urlencoded。成功delete
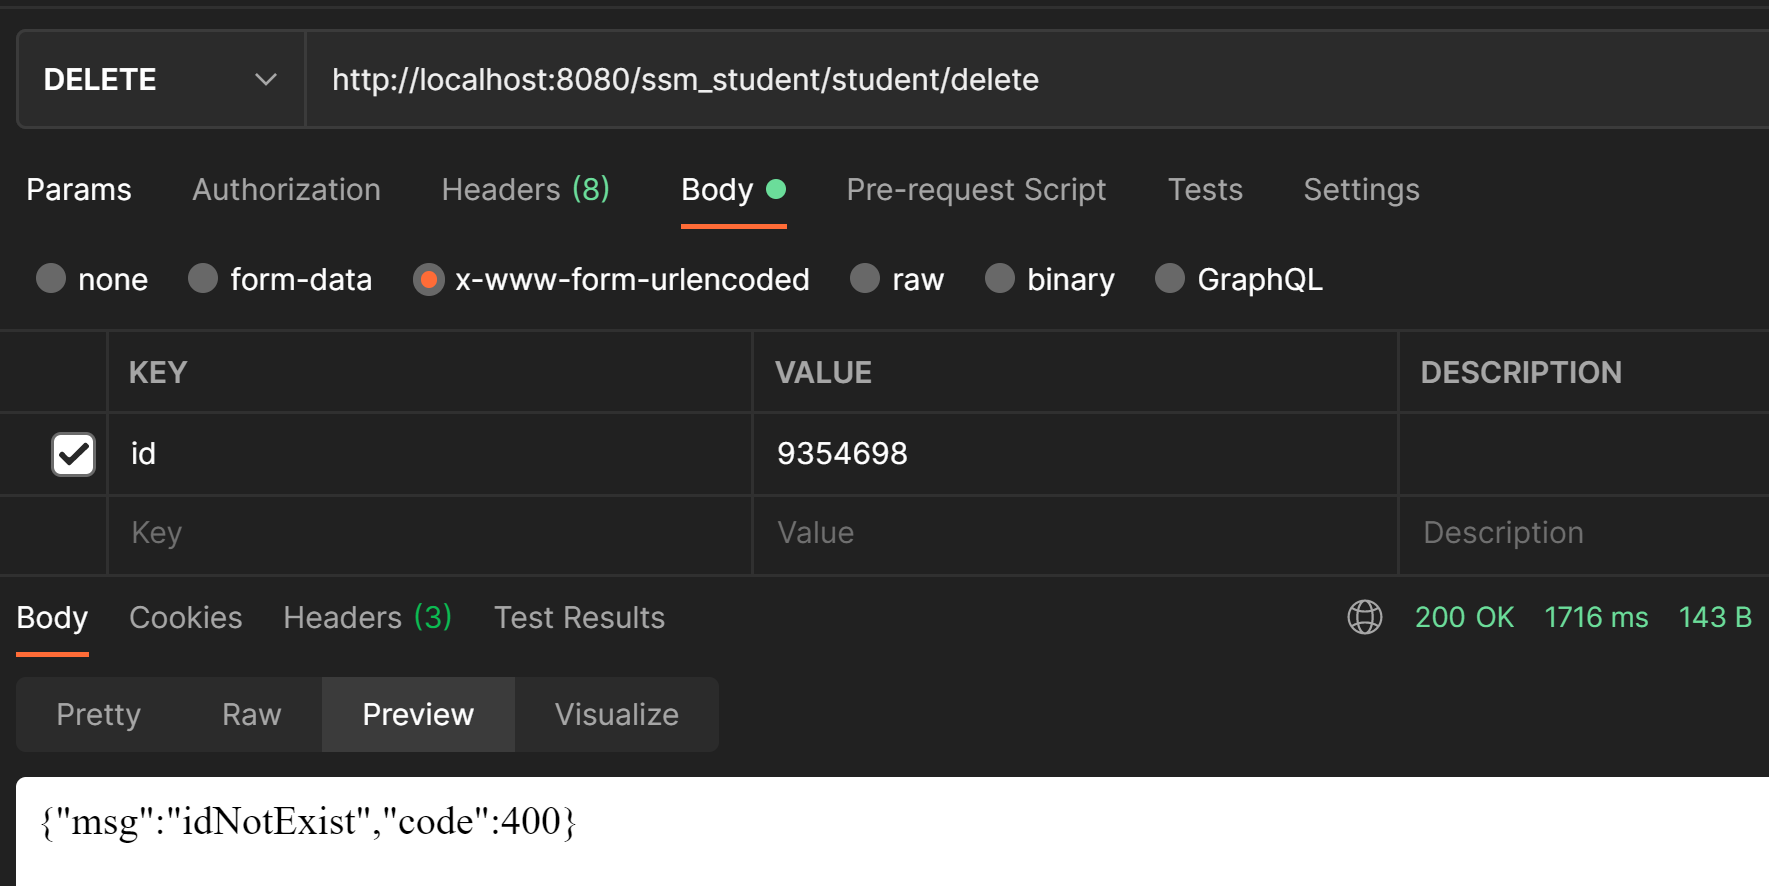
缺点是x-www-form-urlencoded格式每次只能写一个对象,add的时候就无法批量添加。
1-2,@RequestBody
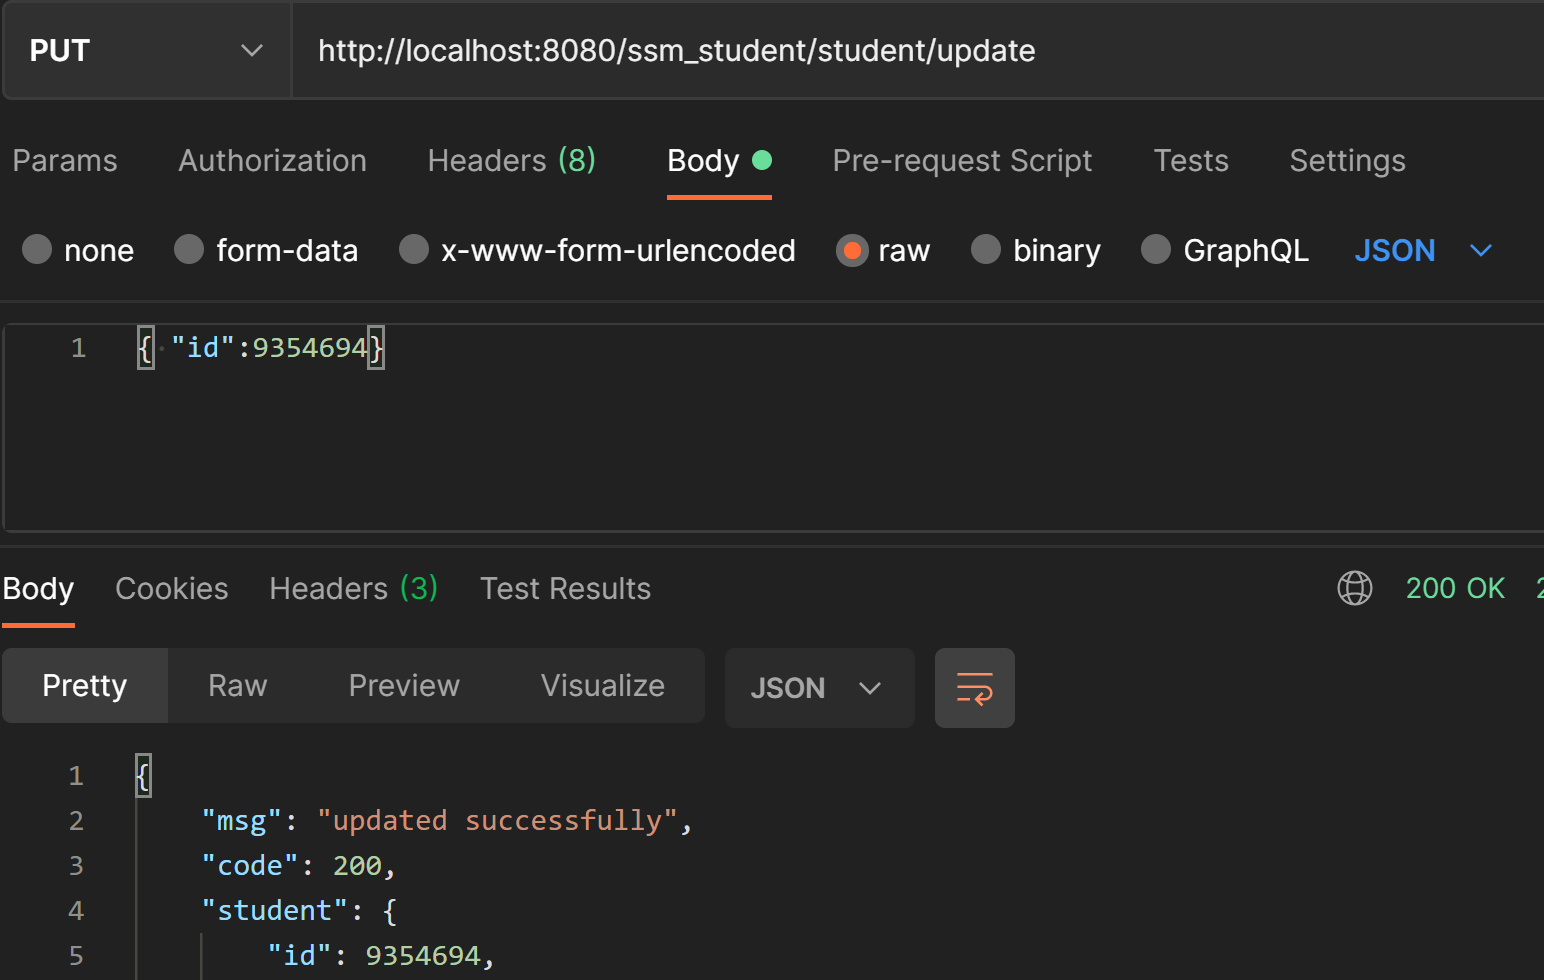
由于@RequestBody可用来处理 Content-Type 为 application/json 编码的内容,所以在postman中,选择body的类型为row -> JSON(application/json),这样在 Headers 中也会自动变为 Content-Type : application/json 编码格式。
url还是url,在请求体中添加数据。我的代码中是接收了一个student,用post做Body的json传入数据
public Map<String, Object> updateStudent(@RequestBody Student student) {
    //logic

}
成功更新
可以接收一个String类型参数
public String oneString(@RequestBody String uid)
接收数组
public String array(@RequestBody String[] ids)
接收List等
public String listMap(@RequestBody List<Map<String,Object>> mapList)
1-3,区别
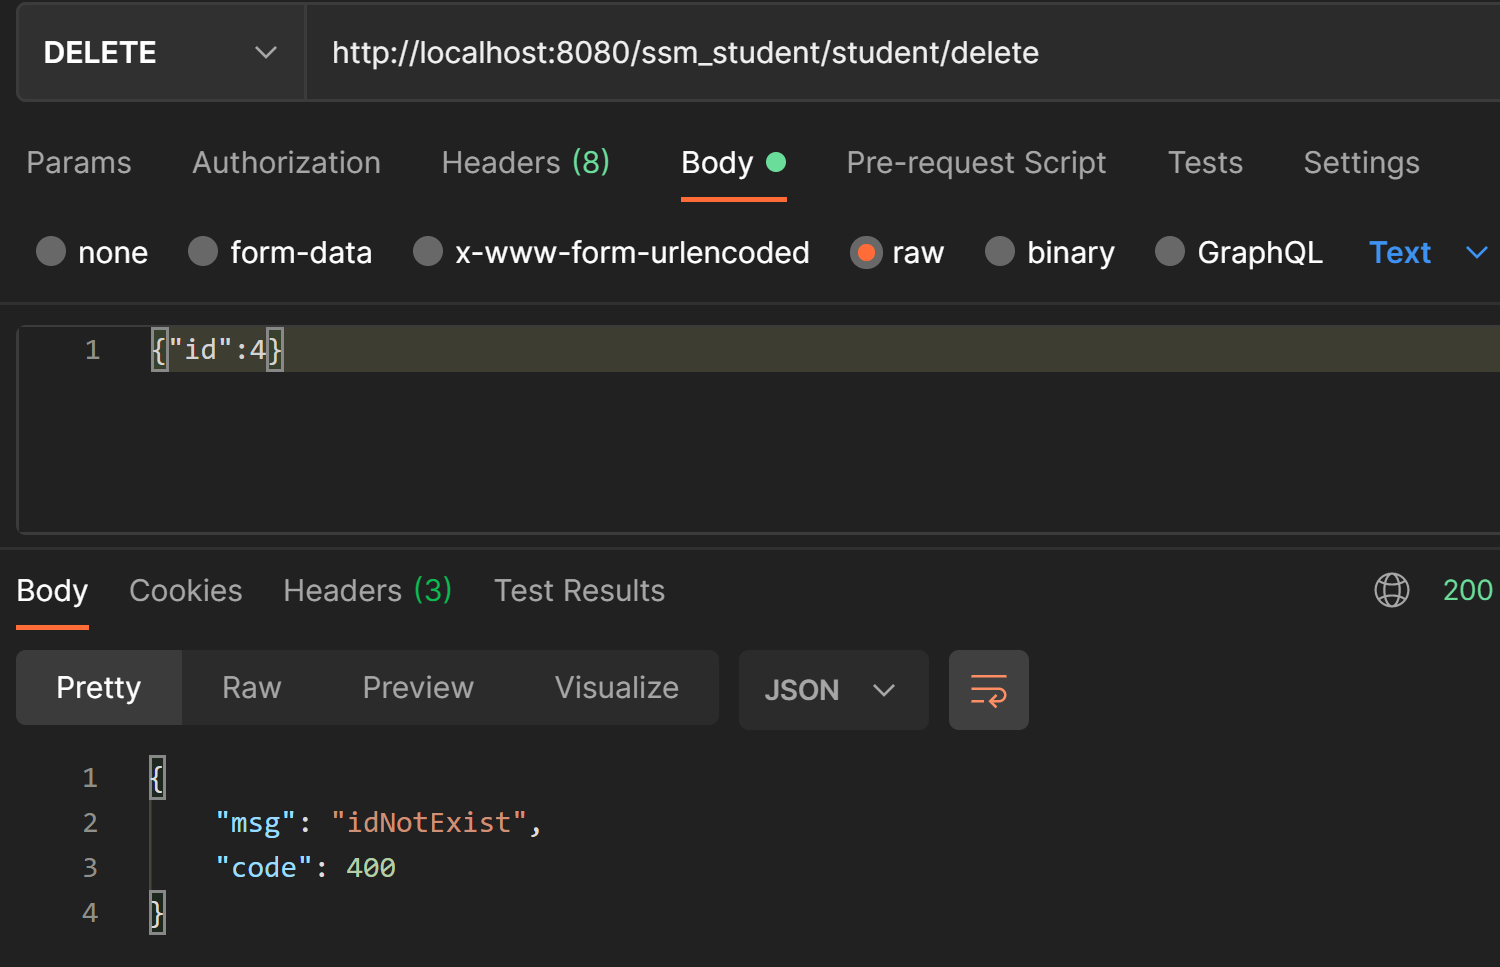
param接收参数不支持request批量传入参数。用 json 字符串来传值的话,当把类型设置为 application/json,点击发送的话,会报错,后台接收不到值,为 null。明明我的4号存在,却不能删除,id被@RequestParam判定为null,如下图。
而Http Body接收参数可以传入参数,多参数封装为定义的pojo,数组,list等。
@RequestParam接收的参数是来自requestHeader中,即请求头。通常用于GET请求,像POST、DELETE等其它类型的请求也可以使用。
@RequestBody接收的参数是来自请求体requestBody中。一般用于处理非 Content-Type: application/x-www-form-urlencoded编码格式的数据,比如:application/json、application/xml等类型的数据。通常用于接收POST、DELETE等类型的请求数据,GET类型也可以适用。
2,用Spring messageSource 配置错误信息,在接口处做校验,根据错误的类型返回对应的错误信息
检查intellij settings,配置UTF-8

MessageSource接口,以用于支持信息的国际化和包含参数的信息的替换。The ApplicationContext interface extends an interface called MessageSource, and therefore provides internationalization (i18n) functionality.
因为一般basename: i18n/messages
为了使用messageSource,我在resources建立了i18n文件夹
建立label.properties,我起的名字是message.properties
然后加入可能用的信息。key = value
key如果超过一个单词,用“.”隔开

需要加入
<beans> <bean id="messageSource" class="org.springframework.context.support.ResourceBundleMessageSource"> <property name="basenames"> <list> <value>format</value> <value>exceptions</value> <value>windows</value> </list> </property> </bean> </beans>在我的环境下,我的是

使用方法
messageSource.getMessage("operation.success",
        null, null

s:部分填入message.properties设置的相应的key
因为是REST风格的,我设置了2种类型的
REST风格,我至少会给出code 和 msg 2个属性。另外一个就是目前controller控制的唯一对象student。rest下的Restful类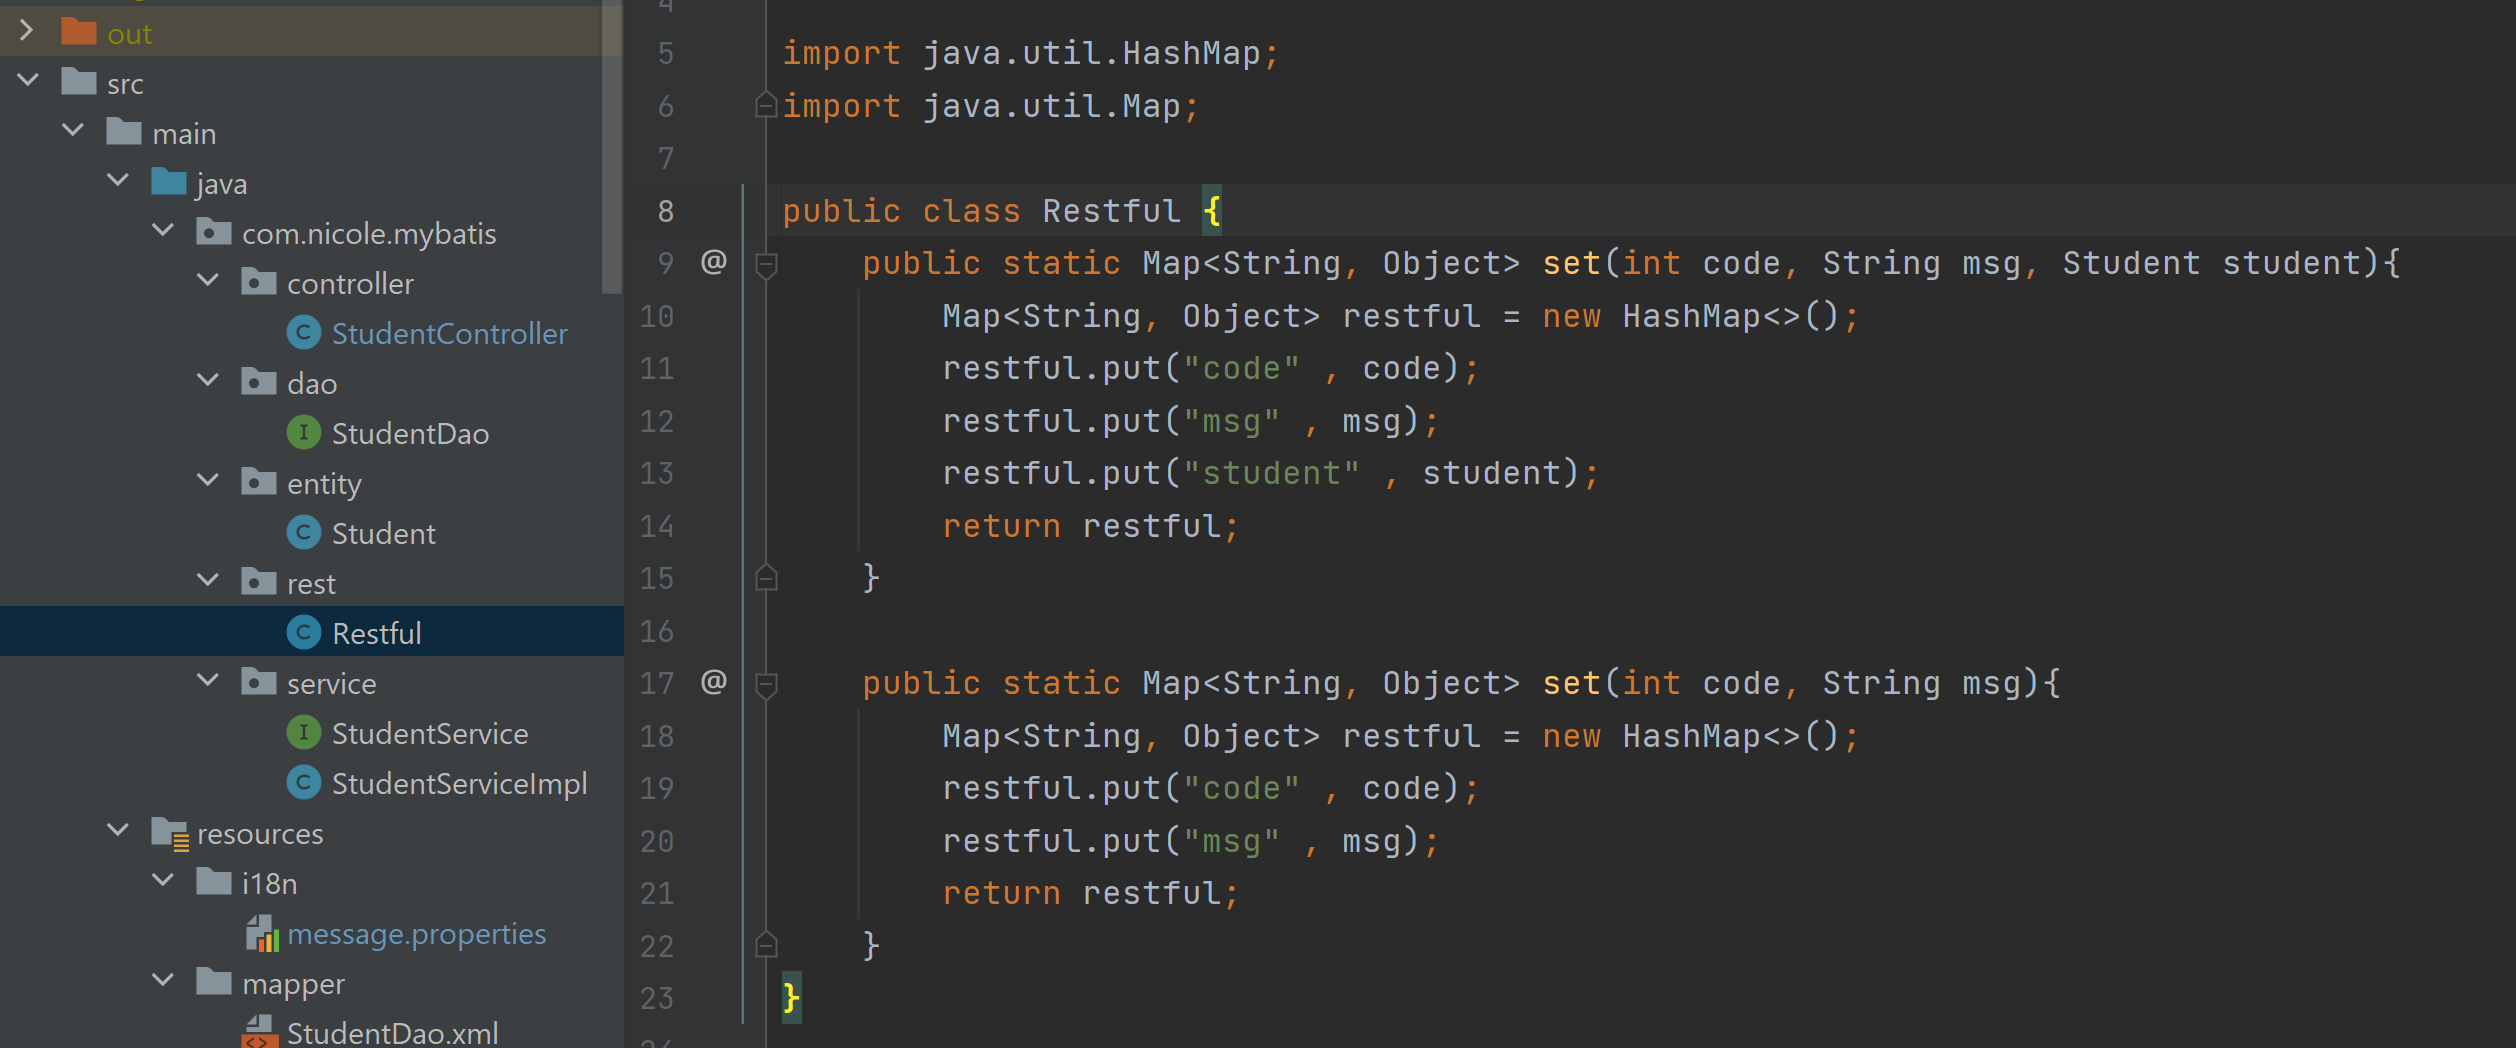
使用方法:
return Restful.set(400, messageSource.getMessage("id.null", null, null));
所以StudentController的代码是
package com.nicole.mybatis.controller;

import com.nicole.mybatis.entity.Student;
import com.nicole.mybatis.rest.Restful;
import com.nicole.mybatis.service.StudentService;

import org.springframework.beans.factory.annotation.Autowired;
import org.springframework.context.MessageSource;
import org.springframework.stereotype.Controller;

import org.springframework.ui.Model;
import org.springframework.web.bind.annotation.*;
import org.springframework.web.servlet.ModelAndView;
import org.apache.commons.lang3.StringUtils;
import javax.servlet.http.HttpServletRequest;
import javax.servlet.http.HttpServletResponse;
import java.text.ParseException;
import java.text.SimpleDateFormat;
import java.util.*;


/**
 * Student 控制器
 *
 */
@Controller
@RequestMapping("/student")
public class StudentController {

    @Autowired
    private StudentService studentService;
    @Autowired
    private MessageSource messageSource;

    // request来保存数据
    @RequestMapping("/jsontaglib")
    public String testJsonTaglib(HttpServletRequest request, HttpServletResponse response) {
        List<Student> students = new ArrayList<>();
        Student student = new Student();
        //Only get one id this time, not much judge
        long id = 0L;
        if( request.getParameter("id") != null )
            id = Long.parseLong(request.getParameter("id"));
        student.setId(id);
        student.setName("testingJsonTaglib");
        student.setCreateAt(1289808L);
        student.setUpdateAt(23979237923L);
        student.setStudentId("stu"+id);
        Student student2 = new Student();
        id = 222L;
        student2.setId(id);
        student2.setName("testingJsonTaglib2");
        student2.setCreateAt(12898082L);
        student2.setUpdateAt(239792379232L);
        student2.setStudentId("stu"+id);
        students.add(student);
        students.add(student2);
        request.setAttribute("students", students);

        return "jsontaglib";
    }

    //@ResponseBody回复。@RequestBody接收
    @RequestMapping(value = "/add", method = RequestMethod.POST)
    @ResponseBody
    public Map<String, Object> addStudent(@RequestBody Student student){
        //StringUtils judge blank
        if (StringUtils.isBlank(student.getName())) {
            return Restful.set(400, messageSource.getMessage("name.null", null, null));
        } else {
            //auto increased id
            studentService.addStudent2(student);
            return Restful.set(200,  messageSource.getMessage("operation.success",
                    null, null), student);
        }
    }

    //使用model来保存数据到前台.@PathVariable获取路径参数。即url/{id}这种形式
    @RequestMapping (value = "/getbyid/{id}", method = RequestMethod.GET)
    public String getStudentById(Model model, @PathVariable(name = "id") long id){
        Student student = studentService.getStudent( id );
        model.addAttribute("student", student);
        return "model";
    }

    //@RequestParam gets id。获取查询参数。即url?id=num&name=your_name这种形式. return restful
    @RequestMapping(value = "/delete", method = RequestMethod.DELETE)
    @ResponseBody
    public Map<String, Object> deleteStudent(@RequestParam(value = "id", defaultValue="0") long id) {
        if (null == studentService.getStudent( id )) {
            return Restful.set(400, messageSource.getMessage("id.null", null, null));
        } else {
            studentService.deleteStudent( id );
            return Restful.set(200, "deletedSuccessfully");
        }
    }

    @RequestMapping("/mav")
    public ModelAndView mav(Long id) {
        ModelAndView mav = new ModelAndView("model");
        id = 1L;
        Student student = studentService.getStudent(id);
        mav.addObject("student", student);
        return mav;
    }

    //@ResponseBody返回数据。@RequestBody接收
    @RequestMapping(value = "/update", method = RequestMethod.PUT)
    @ResponseBody
    public Map<String, Object> updateStudent(@RequestBody Student student) {
        //student cannot be null
        if (null == studentService.getStudent(student.getId())) {
            return Restful.set(400, messageSource.getMessage("id.null", null, null));
        } else {
            studentService.updateStudentById(student.getId());
            return Restful.set(200, "updated successfully", student);
        }
    }
}
成功,返回类似如下代码

代码测试如前,都返回了理想的Restful值
3,配置Nginx,配置域名指向Resin,本地配置Host,通过域名在浏览器,Postman等测试数据
[root@iZbp1hm15518u4xqkii7dzZ ~]# nginx -V
-bash: nginx: command not found
确认目前没有nginx
注意,先确认yum以下环境已经好
yum -y install gcc-c++
yum -y install pcre pcre-devel
yum -y install zlib zlib-devel
yum -y install openssl openssl-devel
https://nginx.org/en/download.html
新建文件夹nginx,wget下载tar.gz包等方式下载到文件夹,tar 解压,cd到解压文件夹
指定./configure --prefix或者直接./configure,
./configure --prefix=/usr/local/nginx --with-http_stub_status_module --with-http_ssl_module --with-debug
先把--with-http_stub_status_module(SSL需要),--with-http_ssl_module,--with-debug自定义
make
make install
来一套
第二次启动,80端口被占用,启动成功


阿里云加入80端口安全组

成功,默认80端口
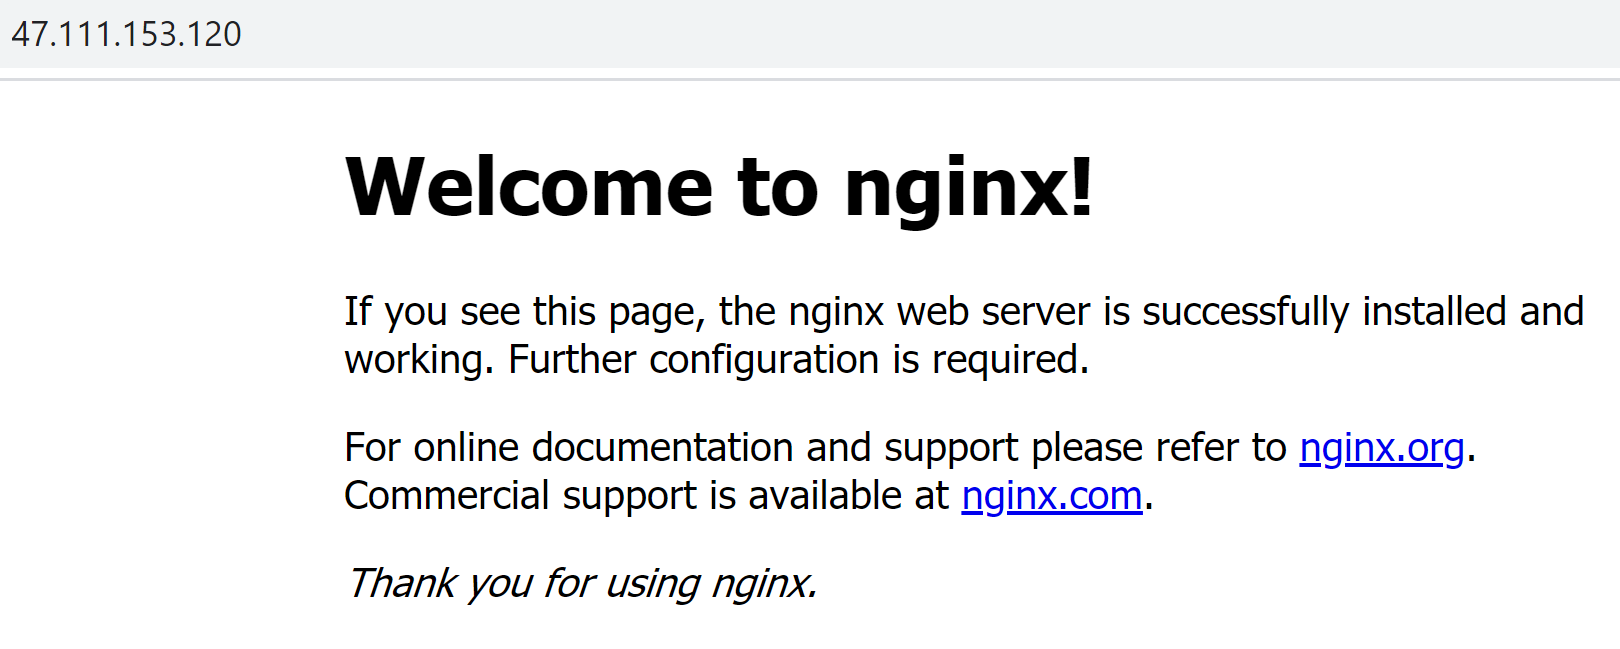
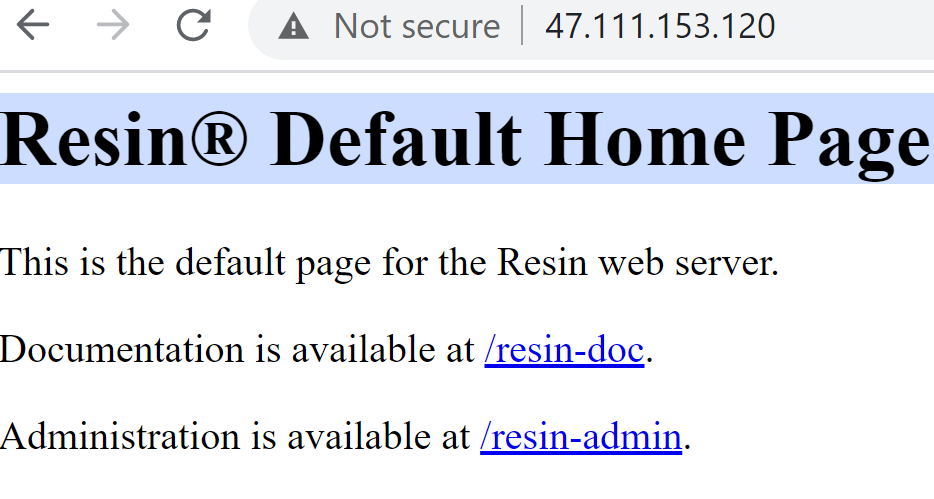
配置Nginx和Resin,反向代理
vim /usr/local/nginx/conf/nginx.conf
既然是双核服务器,从1改成了2

改的区域是这个位置,原文是

要改
root /usr/local/resin/webapps/ROOT; #设定网站的资源存放路径,根据resin的上层路径指定
proxy_pass http://localhost:8070; #转向Resin处理,我给我的resin改了端口是8070
如果127.0.0.1使用localhost,可能需要修改 /etc/hosts
修改后,这部分配置变成

字母的域名暂时没买,已经不想再看godaddy各种续费广告,所以在/usr/local/nginx/conf/nginx.conf 的配置还是:server_name localhost;Resin成功被反向代理
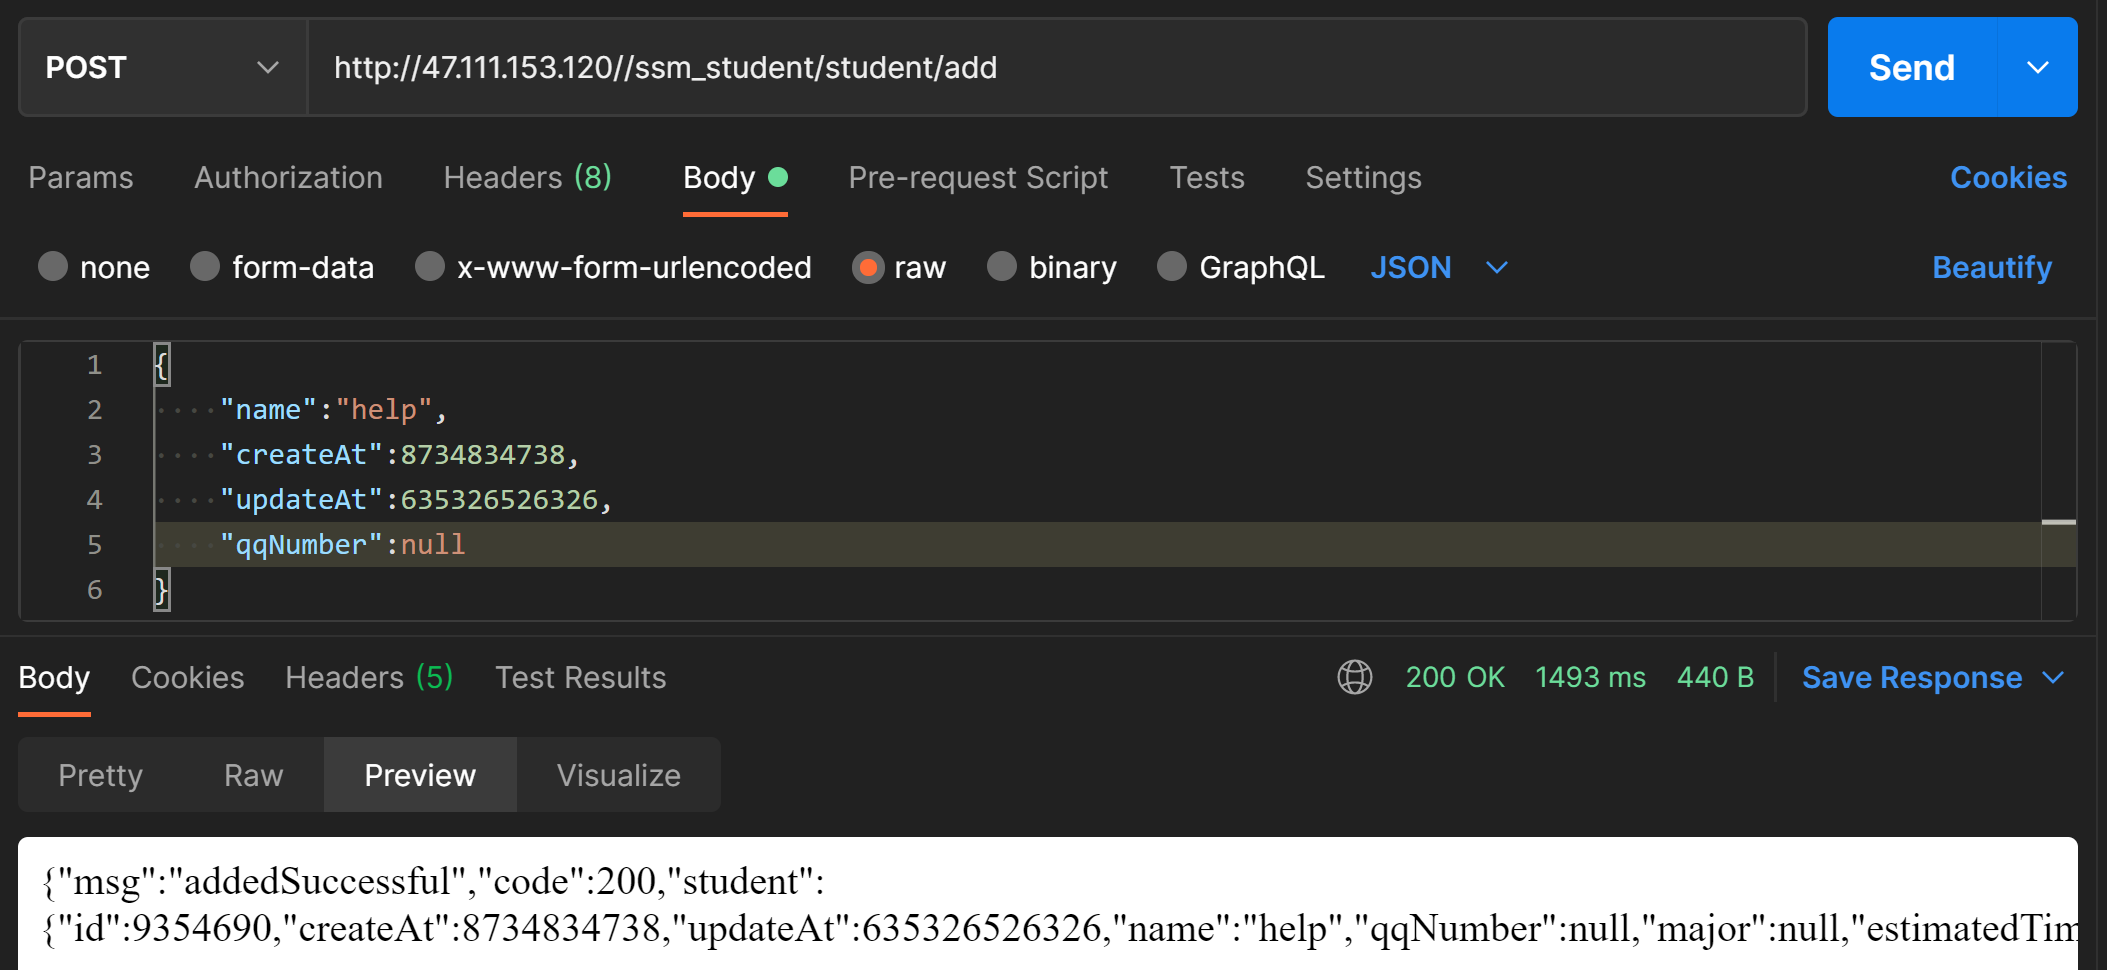
Postman测试,不用端口号,默认80,正常add数据
get成功
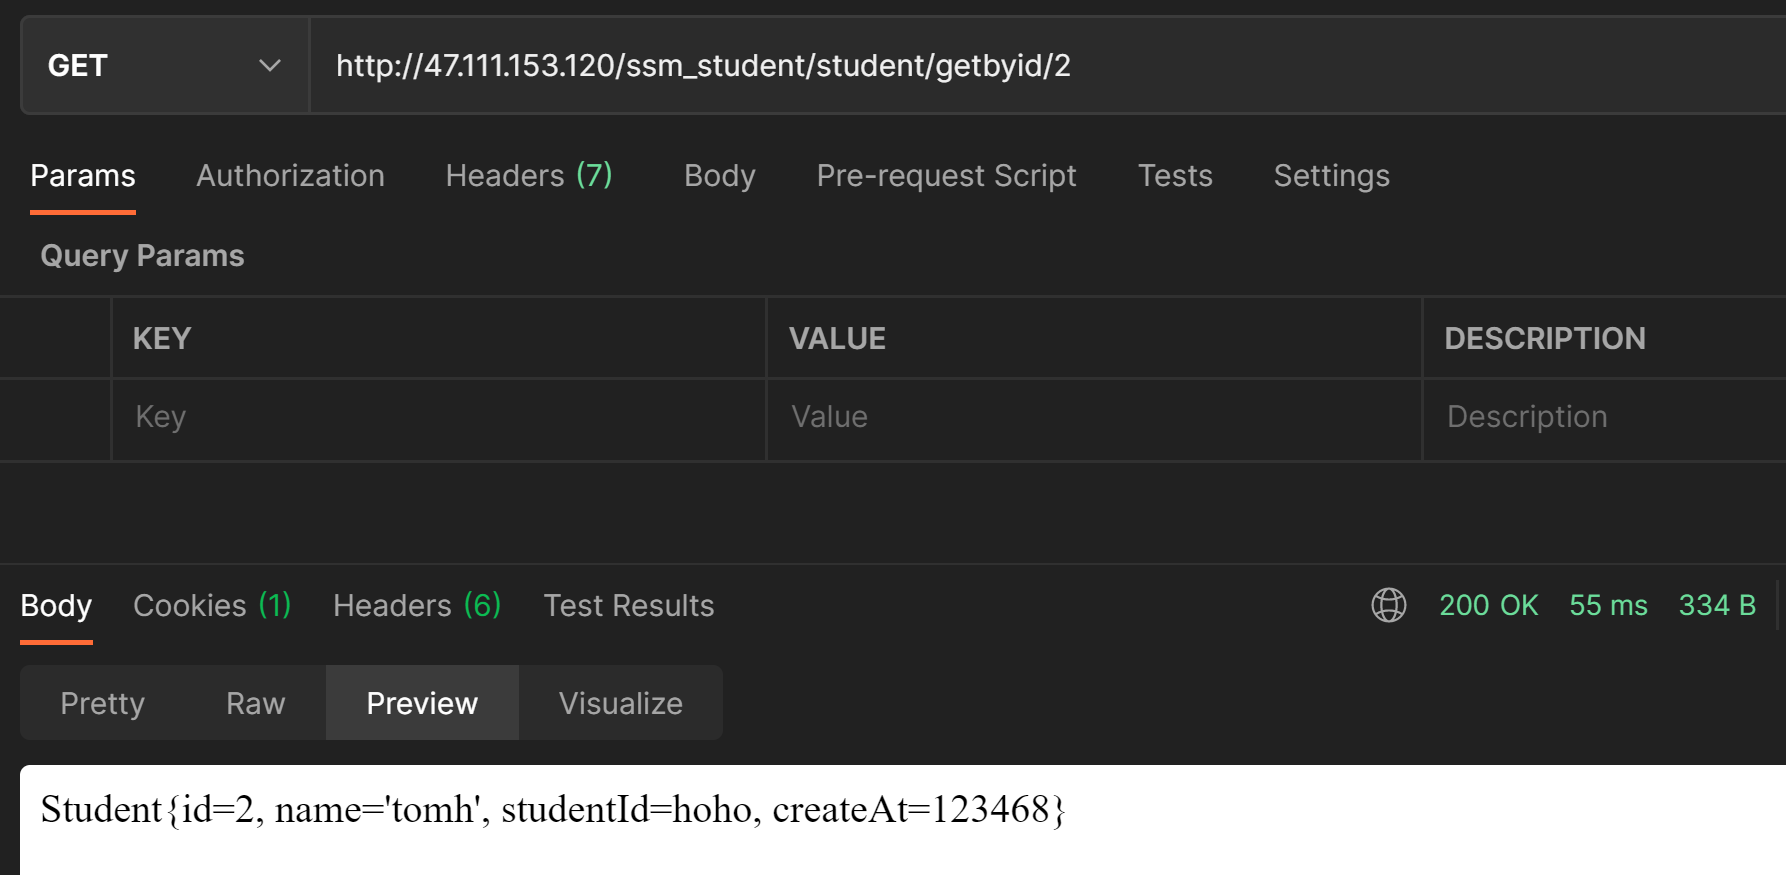
今天的日报测了get post delete put 四种方法,都成功了
4,代码由SVN或者是Git管理。已经push到GitHub
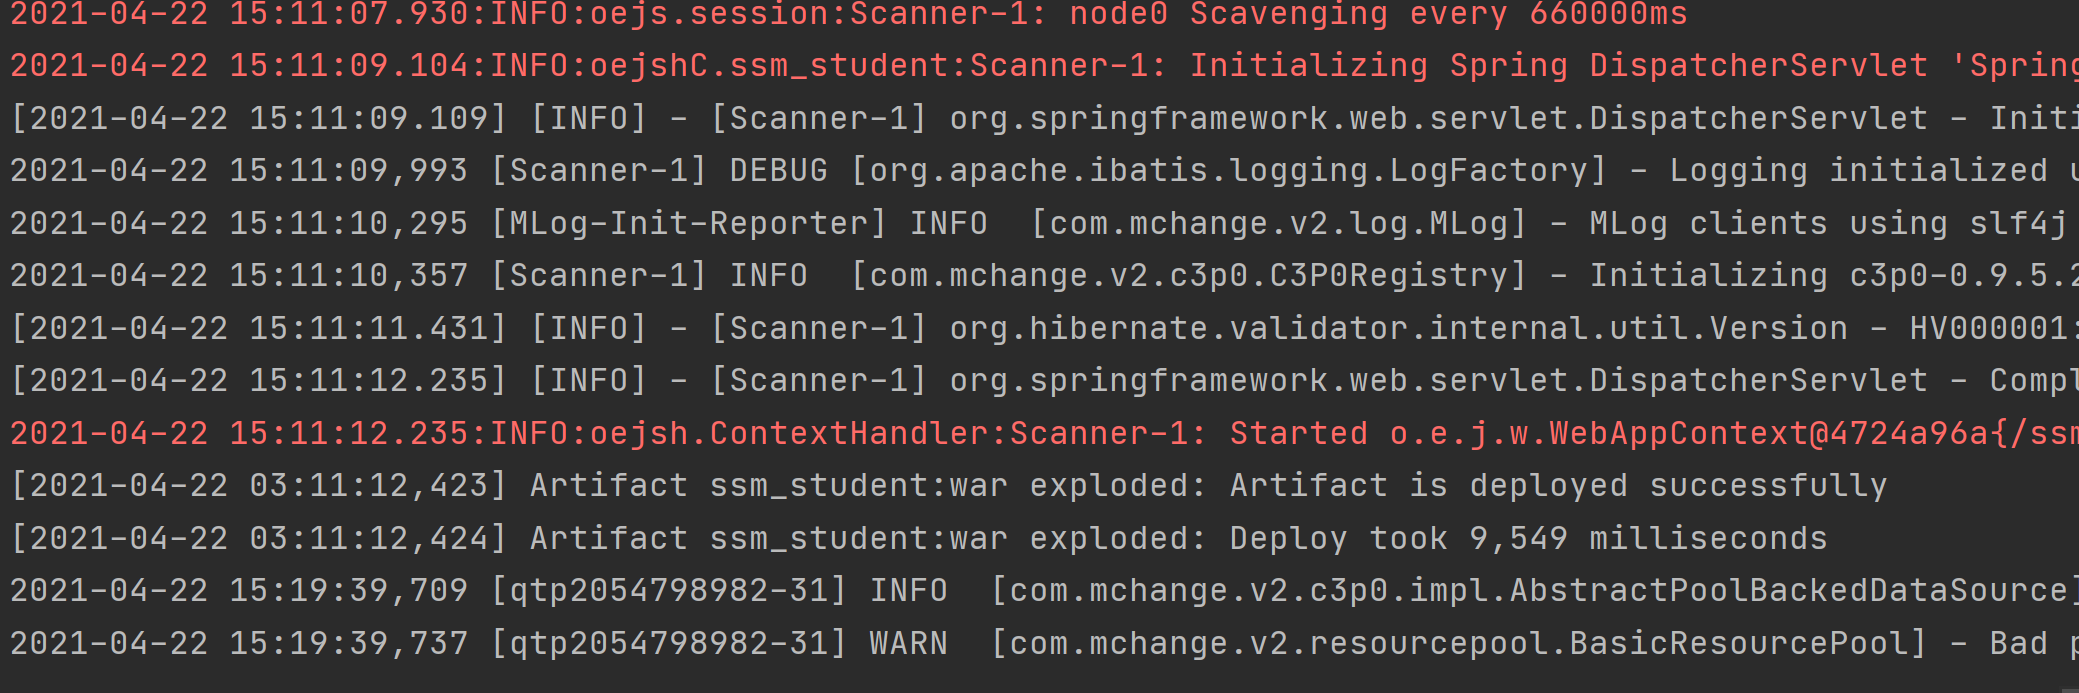
使用Log4j记录日志
二,今天问题
用过什么方法,什么方式,突然提高了效率?包括写代码,做项目的效率
三,今天的收获
@RequestBody和@RequestParam 使用和比较
Spring messageSource 和REST配合使用给出json格式的response
Nginx配置和Resin一起使用
四,明天的计划
任务二深度思考


评论