发表于: 2020-07-01 21:36:18
1 2323
今天完成的事情:今天看了不同的请求的方法区别
明天计划的事情:继续后效的任务
遇到的问题: angular的请求还是不太熟练写法也不够简练
收获:通过angular自身的代理转发功能
创建json文件
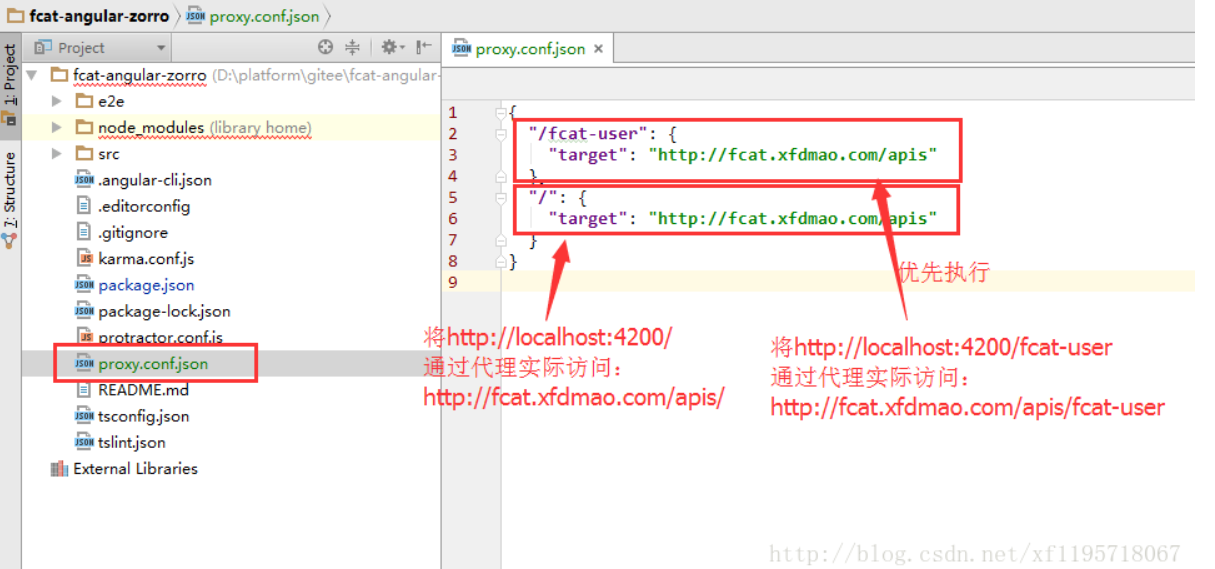
配置package.json
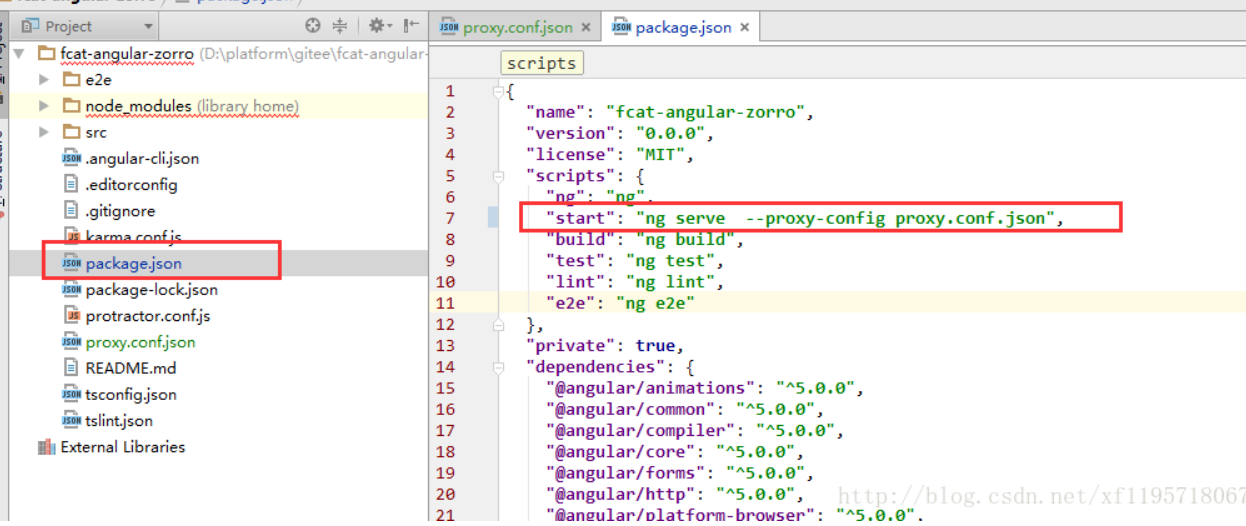
启动项目通过npm start启动,会自动启动代理服务npm start
npm安装json-server,代替api server提供API服务。(windows命令行提示符(管理员))
npm install -g json-server
新建一各 JSON 文件,扮演我们的服务器上的数据库。
启动服务。现在可像用Rest service进行查询
json-server --watch E:\db.json
HttpClient Get请求。
- 导入HttpClient , @angular/common/http
- component 构造函数中注入HttpClient
- 使用.get(端点)方法创建HTTP GET请求
订阅(Subscribe )返回的observable并显示结果
HTTP GET 请求参数: HttpParams
请求第1页,最大条数2:
- url方式
http://127.0.0.1:3000/customers?_page=1&_limit=1
使用httpClient实现
- 导入HttpParams
import {HttpParams} from "@angular/common/http";
2. 构建一个 HttpParams 对象const params = new HttpParams().set('_page', "1").set('_limit', "1");
呼叫 .get() 方法并携带参数,然后将返回的 Observable 对象分配给customersObservable。(params 要与get在同一个方法中)
this.customersObservable = this.httpClient.get("http://127.0.0.1:3000/customers", {params});
使用更简单的方法新建HttpParams对象:【fromString】
const params = new HttpParams({fromString: '_page=1&_limit=1'});
添加 HTTP Headers
导入HttpHeadersimport { HttpHeaders } from '@angular/common/http';
新建客制的HttpHeader对象const headers = new HttpHeaders().set("X-CustomHttpHeader", "CUSTOM_VALUE");
送带httpHeader的请求
const headers = new HttpHeaders().set("X-CustomHttpHeader", "CUSTOM_VALUE");
this.customersObservable = this.httpClient.get("http://127.0.0.1:3000/customers", {headers});
携带httpHeader,会出现重复请求的状况,第一次Option请求 204状态(Firefox 为Option请求方法),第二次为返回的结果。
发送HTTP PUT 请求
HTTP PUT 方法用来完全替换 API server上的资源。用HttpClient 发送PUT 请求替换Customers上id为1的资源:


评论