发表于: 2020-06-22 23:28:13
1 1668
今天完成的事情:
1. 完成了 本地 memcached 的安装与测试
收获:
1. memcached 的安装
Memcached 支持许多平台:Linux、FreeBSD、Solaris、Mac OS,也可以安装在Windows上。
Linux系统安装memcached,首先要先安装libevent库。
sudo apt-get install libevent ibevent-dev 自动下载安装(Ubuntu/Debian)
yum install libevent libevent-devel 自动下载安装(Redhat/Fedora/Centos)
Memcached 测试
a,参数化启动
sudo service memcached start -m 512 -p 11211 -vv
b,使用telnet测试Memcached
使用如下的命令连接上面刚启动的Memcached。
telnet localhost 11211
在控制台会看到如下的信息:
Trying 127.0.0.1...
Connected to localhost.
Escape character is '^]'.
保存数据的命令格式如下
set foo 0 0 3
bar
如果保存成功,控制台会输出:STORED
获取数据的命令格式如下:
get foo
在控制台的输出信息为:
VALUE foo 0 3
bar
END
2. springmvc 内配置 memcached
添加配置文件
memcached.xml
<?xml version="1.0" encoding="UTF-8"?>
<beans xmlns="http://www.springframework.org/schema/beans"
       xmlns:xsi="http://www.w3.org/2001/XMLSchema-instance"
       xmlns:context="http://www.springframework.org/schema/context"
       xsi:schemaLocation="http://www.springframework.org/schema/beans http://www.springframework.org/schema/beans/spring-beans.xsd http://www.springframework.org/schema/context https://www.springframework.org/schema/context/spring-context.xsd">

    <!--两种配置 properties 的方法都可以-->
    <!--<bean class="org.springframework.beans.factory.config.PropertiesFactoryBean">
        <property name="locations">
            <list>
                <value>classpath:memcached.properties</value>
            </list>
        </property>
    </bean>-->
    <context:property-placeholder location="memcached.properties"/>

    <bean id="memcachedPool" class="com.whalin.MemCached.SockIOPool" factory-method="getInstance"
          init-method="initialize" destroy-method="shutDown">
        <constructor-arg>
            <!--这个值随意但是要与下方的 memcachedClient 相同-->
            <value>pool</value>
        </constructor-arg>
        <property name="servers">
            <!--可以配置多个 server-->
            <list>
                <value>${memcached.server}</value>
            </list>
        </property>

        <property name="failover" value="${memcached.failover}"/>
        <property name="initConn" value="${memcached.initConn}"/>
        <property name="minConn" value="${memcached.minConn}"/>
        <property name="maxConn" value="${memcached.maxConn}"/>
        <property name="maintSleep" value="${memcached.maintSleep}"/>
        <property name="nagle" value="${memcached.nagle}"/>
        <property name="socketTO" value="${memcached.socketTO}"/>
    </bean>

    <bean id="memcachedClient" class="com.whalin.MemCached.MemCachedClient" lazy-init="false">
        <constructor-arg>
            <value>pool</value>
        </constructor-arg>
    </bean>
</beans>
memcached.properties
memcached.server = 127.0.0.1:11211
memcached.failover = true
memcached.initConn = 20
memcached.minConn = 10
memcached.maxConn = 40
memcached.maintSleep = 3000
memcached.nagle = false
memcached.socketTO = 3000
然后就可以测试一下 memcached 了
MemcachedTest.java
package cn.mogeek.jsptiles.util;

import com.whalin.MemCached.MemCachedClient;
import org.junit.Assert;
import org.junit.Test;
import org.junit.runner.RunWith;
import org.springframework.test.context.ContextConfiguration;
import org.springframework.test.context.junit4.SpringJUnit4ClassRunner;

import javax.annotation.Resource;
import java.util.ArrayList;
import java.util.List;

/**
 * @ClassName MemcachedTest
 * @Description memcached 测试
 * @Author owlwinter
 * @Date 2020/6/22 22:44
 * @Version 1.0
 **/
@RunWith(SpringJUnit4ClassRunner.class)
@ContextConfiguration(locations = {"classpath:memcached.xml"})
public class MemcachedTest {

    @Resource(name = "memcachedClient")
    private MemCachedClient memCachedClient;

    @Test
    @SuppressWarnings("unchecked")
    public void testSerAndGet(){
        Assert.assertNotNull(memCachedClient);
        List<String> list = new ArrayList<>();
        list.add("a");
        list.add("b");

        memCachedClient.set("strList", list);

        List<String> result = (List<String>) memCachedClient.get("strList");
        Assert.assertNotNull(result);
        if (result != null && result.size() > 0){
            for (String str :
                    result) {
                System.out.println(str);
            }
        }
    }
}
遇到的问题:
1. win 下安装 memcached
memcached 是没有提供二进制安装包的,只有源码,在 linux 下编译安装很方便,win 下就没这么友好了。
解决的方法:
在 wsl 中配置环境,参照 linux 下的 memcached 的部署方式。
顺便把数据库也移到 wsl 了,没搞懂怎么在 wsl 里使用宿主机的数据库,只能这么干了,反正在 win 下用起来和原来的一样的,navicat 和项目里的数据库链接都不要改,只要改一下不让 win 下的数据库自启动就好了,毕竟端口冲突了。
win 下不太好部署 memcached,现在的 wsl 2 用起来已经很方便了。
2. mysql 数据库报错(不影响使用)
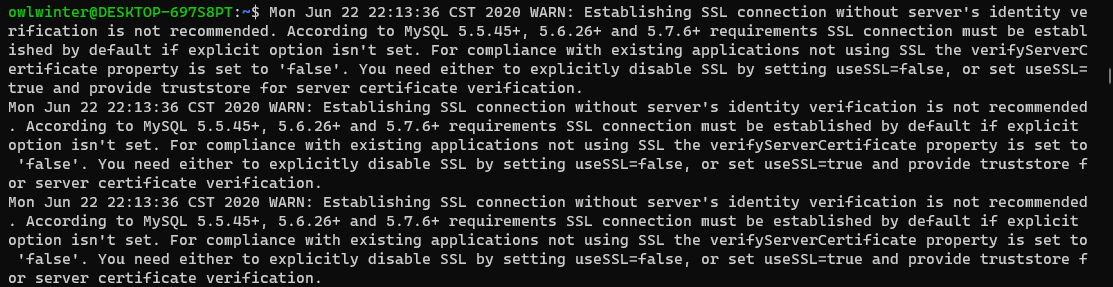
WARN: Establishing SSL connection without server's identity verification is not recommended. According to MySQL 5.5.45+, 5.6.26+ and 5.7.6+ requirements SSL connection must be established by default if explicit option isn't set. For compliance with existing applications not using SSL the verifyServerCertificate property is set to 'false'. You need either to explicitly disable SSL by setting useSSL=false, or set useSSL=true and provide truststore for server certificate verification.
解决的方法:
已经写在报错信息里了,在数据库连接后面添加 useSSL=false
3. 日志报错
这个报错一直都有,但是也不影响使用就一直没管
SLF4J: Failed to load class "org.slf4j.impl.StaticLoggerBinder".
SLF4J: Defaulting to no-operation (NOP) logger implementation
SLF4J: See http://www.slf4j.org/codes.html#StaticLoggerBinder for further details.
解决的方法:
添加依赖文件
<!-- https://mvnrepository.com/artifact/org.apache.logging.log4j/log4j-slf4j-impl -->
<dependency>
  <groupId>org.apache.logging.log4j</groupId>
  <artifactId>log4j-slf4j-impl</artifactId>
  <version>2.12.1</version>
  <scope>test</scope>
</dependency>
明天的计划:
1. 完成 spring 与 memcached 的整合
每次开始新任务总要懵逼几天,加上最近有一些其他的事情干扰,日报着实有点水····


评论