发表于: 2020-06-02 23:46:04
1 1342
今天完成的事情:今天做了剩下的任务,还剩下一点和深度思考
明天计划的事情:明天做剩下的部分
遇到的问题:git出错,要找找怎么上传war项目,方便自动化部署,总git上pull 下来
收获:
resin内存配置
1.配置JVM参数
修改Resin的内存配置,给当前的WEB程序分别设置1G内存,512兆内存,32兆内存,测试最小启动的大小。
32M测试不行
1)Java Servlet运行于Web服务器中,与Web服务器融为一体运行在同一个Java虚拟机(JVM)当中。Web服务器加载类需要占用JVM内存中的持久代(Perm Generation),java应用程序执行报表获取的数据,运算的中间数据等都需要占用JVM内存中的堆(Heap),当没有内存可用时,就会出现内存溢出错误:java.lang.OutOfMemoryError:PermGen space 或者 java.lang.OutOfMemoryError:Java heap space。
根据服务器实际内存容量以及具体是Perm溢出还是heap溢出,调整相应的JVM参数。如果是heap溢出,调整-Xms参数和-Xmx参数,建议二者配成相同数值。如果是PermGen内存溢出,调整-XX:PermSize参数和-XX:MaxPermSize参数,建议二者配成相同数值。
Resin 4.x安装目录下\conf\下的配置文件分成了resin.xml和resin.properties,两个文件都可以调整内存。如果两个文件都进行了调整,由于resin.xml文件里的JVM参数加载在后,会以resin.xml文件里的配置生效。
修改resin.properties文件,增加一行jvm_args : -Xms1024m -Xmx1024m -XX:PermSize=256m -XX:MaxPermSize=256m
-Xms 初始化 jvm 的时候从系统内存划分的 heap 内存数量
-Xmx jvm 最大能使用的 heap 内存数量
-XX:PermSize / -XX:MaxPermSize 持久代占用的系统内存数量

注意:修改完成后,需要重启Resin。
2)对上面的java.lang.OutOfmemoryError: PermGen Space 的错误进行扩展
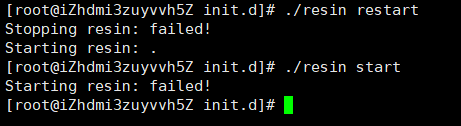
这也回答了任务二的重新启动服务,用Resin自带的停止脚本,并停止服务,思考Kill命令和停止脚本的区别
发生的原因:
PermGen Space:指的是内存的永久保存区,该块内存主要是被JVM用来存放 class 和 mete 信息的,当 class 被加载 loader 的时候就会被存储到该内存区中,与存放类的实例的heap区不同,java中的 垃圾回收器GC 不会在主程序运行期对 PermGen space 进行清理。
- 当我们的应用中有很多的class时,很可能就会出现PermGen space的错误。
- 我们的 ,resin,tomcat 在重启的时候,不是使用的 自带的停止脚本和tomcat中./bin/shutdown.sh 而是使用 kill -9 xxx 直接杀掉,这样的话,存在 PermGen space 里面的内存不会被释放的,这样多长进行 kill 之后,就会导致系统的内存被渐渐吃完了,直到最后 tomcat 报错。
编写service,本地测试插入和查询数据
1.service接口及其实现类
public interface StudentService {
    List<Student> find();
    int insert(Student student);
}
@Service
public class StudentServiceImpl implements StudentService {
@Override
public List<Student> find() {
Student stu = new Student();
List<Student> list = new ArrayList<Student>();
for(int i=1;i<4;i++){
stu.setId(i);
stu.setNumber(i);
stu.setName("孙晓曼");
stu.setJob("PM工程师");
stu.setQq("12389451");
stu.setUniversity("四川大学");
stu.setLink("www.jnshu.sichuan.cn");
stu.setBrother("帝君师兄");
stu.setTarget("有敢掀桌子的勇气,才能稳定桌子");
stu.setCreateTime(20200602L+i);
stu.setUpdateTime(20200602L+i);
list.add(stu);
}
return list;
}
@Override
public int insert(Student student) {
if(student != null){
System.out.println(200);
return 200;
}
return -1;
}
}2. Controller
@Controller
public class StudentController {
    @Resource
    private StudentService studentService;
    @GetMapping("/students")
    public ModelAndView find(){
        ModelAndView model = new ModelAndView("/students.jsp");
        List<Student> list = studentService.find();
        model.addObject("student",list);
        return model;
    }
    @PostMapping("/student")
    @ResponseBody
    public ModelAndView insert(Student student){
        ModelAndView model = new ModelAndView("/student.jsp");
        int data = studentService.insert(student);
        if(data == 200){
           model.addObject("message","插入成功");
           model.addObject("stu",student);
        }
        return model;
    }
}
3.页面的返回
新增表单,用了bootstrap套了个页面
<%@ page contentType="text/html;charset=UTF-8" language="java" %>
<html>
<head>
    <title>学生页面</title>
    <link rel="stylesheet" href="lib/bootstrap-3.3.7-dist/css/bootstrap.min.css">
    <script src="lib/2.2.4/jquery-2.2.4.min.js"></script>
    <script src="lib/bootstrap-3.3.7-dist/js/bootstrap.min.js"></script>
</head>
<body>

<form action="/student" method="post">
    <div class="form-group">
        <label >id</label>
        <input type="text" name="id" class="form-control"  >
    </div>
    <div class="form-group">
        <label >number</label>
        <input type="text" name="number" class="form-control"  >
    </div>
    <div class="form-group">
        <label >name</label>
        <input type="text" name="name" class="form-control"  >
    </div>
    <div class="form-group">
        <label >qq</label>
        <input type="text" name="qq" class="form-control"  >
    </div>
    <div class="form-group">
        <label >职业</label>
        <input type="text" name="job" class="form-control"  >
    </div>
    <div class="form-group">
        <label >院校</label>
        <input type="text" name="university" class="form-control"  >
    </div>
    <div class="form-group">
        <label >师兄</label>
        <input type="text" name="brother" class="form-control"  >
    </div>
    <div class="form-group">
        <label >链接</label>
        <input type="text" name="link" class="form-control"  >
    </div>
    <div class="form-group">
        <label >立志</label>
        <input type="text" name="target" class="form-control">
    </div>
    <button type="submit" class="btn btn-default">Submit</button>
</form>
</body>
</html>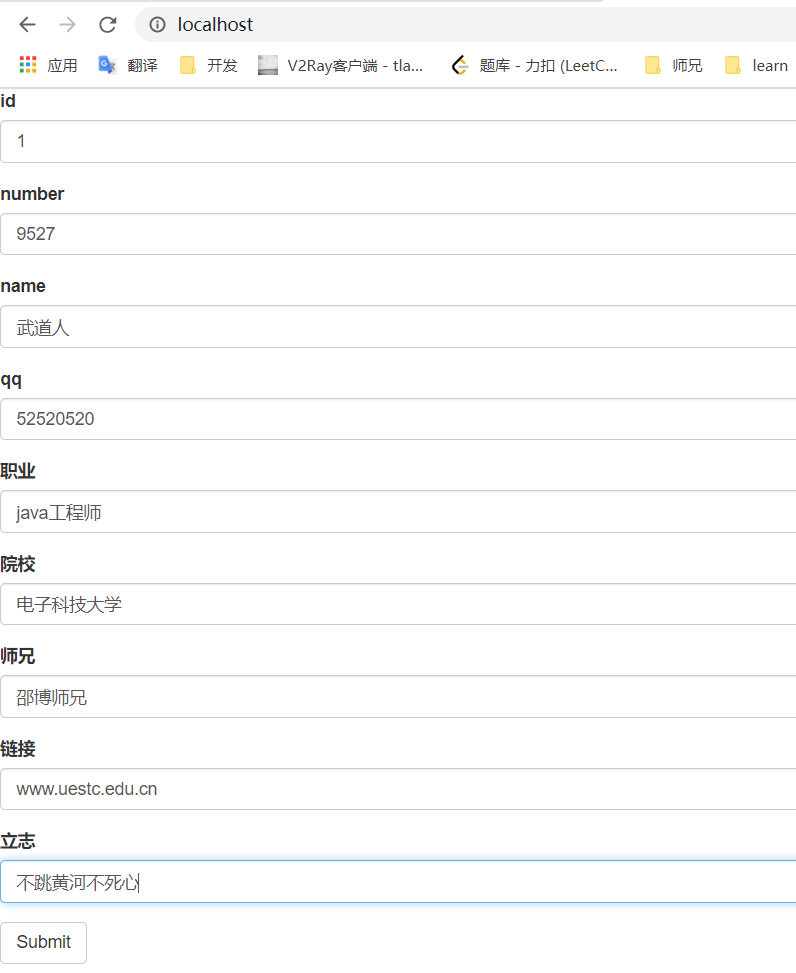
提交表单返回,PostMan一样的
<%@ page contentType="text/html;charset=UTF-8" language="java" %>
<%@ taglib prefix="json" uri="http://www.atg.com/taglibs/json" %>
<json:object name="student">

    <json:property name="message" value="${message}" />
    <json:property name="id" value="${stu.id}" />
    <json:property name="number" value="${stu.number}" />
    <json:property name="name" value="${stu.name}" />
    <json:property name="qq" value="${stu.qq}" />
    <json:property name="job" value="${stu.job}" />
    <json:property name="university" value="${stu.university}" />
    <json:property name="brother" value="${stu.brother}" />
    <json:property name="link" value="${stu.link}" />
    <json:property name="target" value="${stu.target}" />
    <json:property name="createTime" value="${stu.createTime}" />
    <json:property name="updateTime" value="${stu.updateTime}" />
</json:object>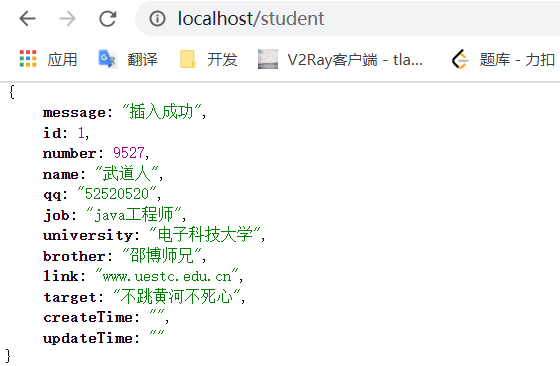
4.查询接口
返回的students.jsp页面
<%@ page contentType="text/html;charset=UTF-8" language="java" %>
<%@ taglib prefix="c" uri="http://java.sun.com/jsp/jstl/core"  %>

<div class="container">
<div class="row">
    <table class="table table-hover table-striped">
        <tr>
            <th>id</th>
            <th>number</th>
            <th>姓名</th>
            <th>职业</th>
            <th>qq</th>
            <th>院校</th>
            <th>链接</th>
            <th>师兄</th>
            <th>立志</th>
            <th>创建时间</th>
            <th>修改时间</th>
        </tr>
        <c:forEach var="stu" items="${student}">
        <tr>
            <th>${stu.id}</th>
            <th>${stu.number}</th>
            <th>${stu.name}</th>
            <th>${stu.job}</th>
            <th>${stu.qq}</th>
            <th>${stu.university}</th>
            <th>${stu.link}</th>
            <th>${stu.brother}</th>
            <th>${stu.target}</th>
            <th>${stu.createTime}</th>
            <th>${stu.updateTime}</th>
        </tr>
        </c:forEach>
    </table>
</div>
</div>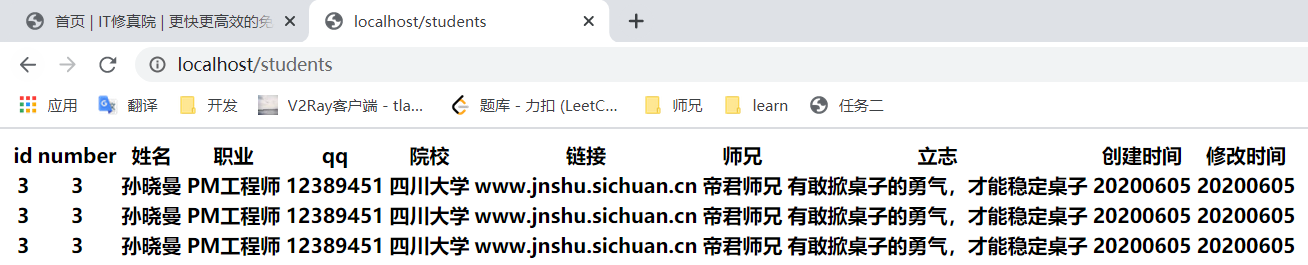
上传到git,准备用部署的自动化脚本跑一跑。
有点问题,明天要再搞搞
部署脚本(学习一位师兄的部署)
#!/bin/bash
source /etc/profile
tomcatPath=/usr/local/tomcat_cluster/tomcat1/apache-tomcat-7.0.94
backPath=/usr/local/jnshu/workspace/backup
echo =================================
echo 自动化部署脚本启动
echo =================================
#echo 进入/data/interactive
cd /local/jnshu/workspace
echo 开始pull版本
git pull
echo 开始编译文件
mvn clean package -Dmaven.test.skip=true
echo 编译完成
sleep 2 #休眠2s

echo 关闭tomcat服务器
sh service.sh stop
sleep 2 #休眠2s

echo 备份并删除原项目
cp $tomcatPath/webapps/JnshuTask2.war $backPath/JnshuTask2.war.$(date +%Y%m%d)
rm -rf $tomcatPath/webapps/JnshuTask2*

echo 部署新文件
cp target/JnshuTask2.war $tomcatPath/webapps/
sleep 5 #休眠5s

echo 重启服务器
sh service.sh start


评论