发表于: 2020-05-30 11:52:26
1 1470
第二次启动tomcat时突然报错
错误信息:
SEVERE: Could not contact localhost:8005. Tomcat may not be running.
Jul 20, 2018 3:17:45 PM org.apache.catalina.startup.Catalina stopServer
SEVERE: Catalina.stop:
java.net.ConnectException: Connection refused (Connection refused)
at java.net.PlainSocketImpl.socketConnect(Native Method)
at java.net.AbstractPlainSocketImpl.doConnect(AbstractPlainSocketImpl
at java.net.AbstractPlainSocketImpl.connectToAddress(AbstractPlainSoc
at java.net.AbstractPlainSocketImpl.connect(AbstractPlainSocketImpl.j
...
解决:
[root@VM_0_11_centos ~]# netstat -tunlp|grep 8005
[root@VM_0_11_centos ~]# netstat -tunlp|grep 8080
[root@VM_0_11_centos ~]#
结果显示8080和8005端口都没有启动
java -verbose #首先找到java地址
vim /usr/lib/jvm/java-1.8.0-openjdk-1.8.0.252.b09-2.el7_8.x86_64/jre/lib/security/java.security
:/securerandom(检索关键字securerandom)
securerandom.source=file:/dev/random
改为:
securerandom.source=file:/dev/urandom
启动成功!
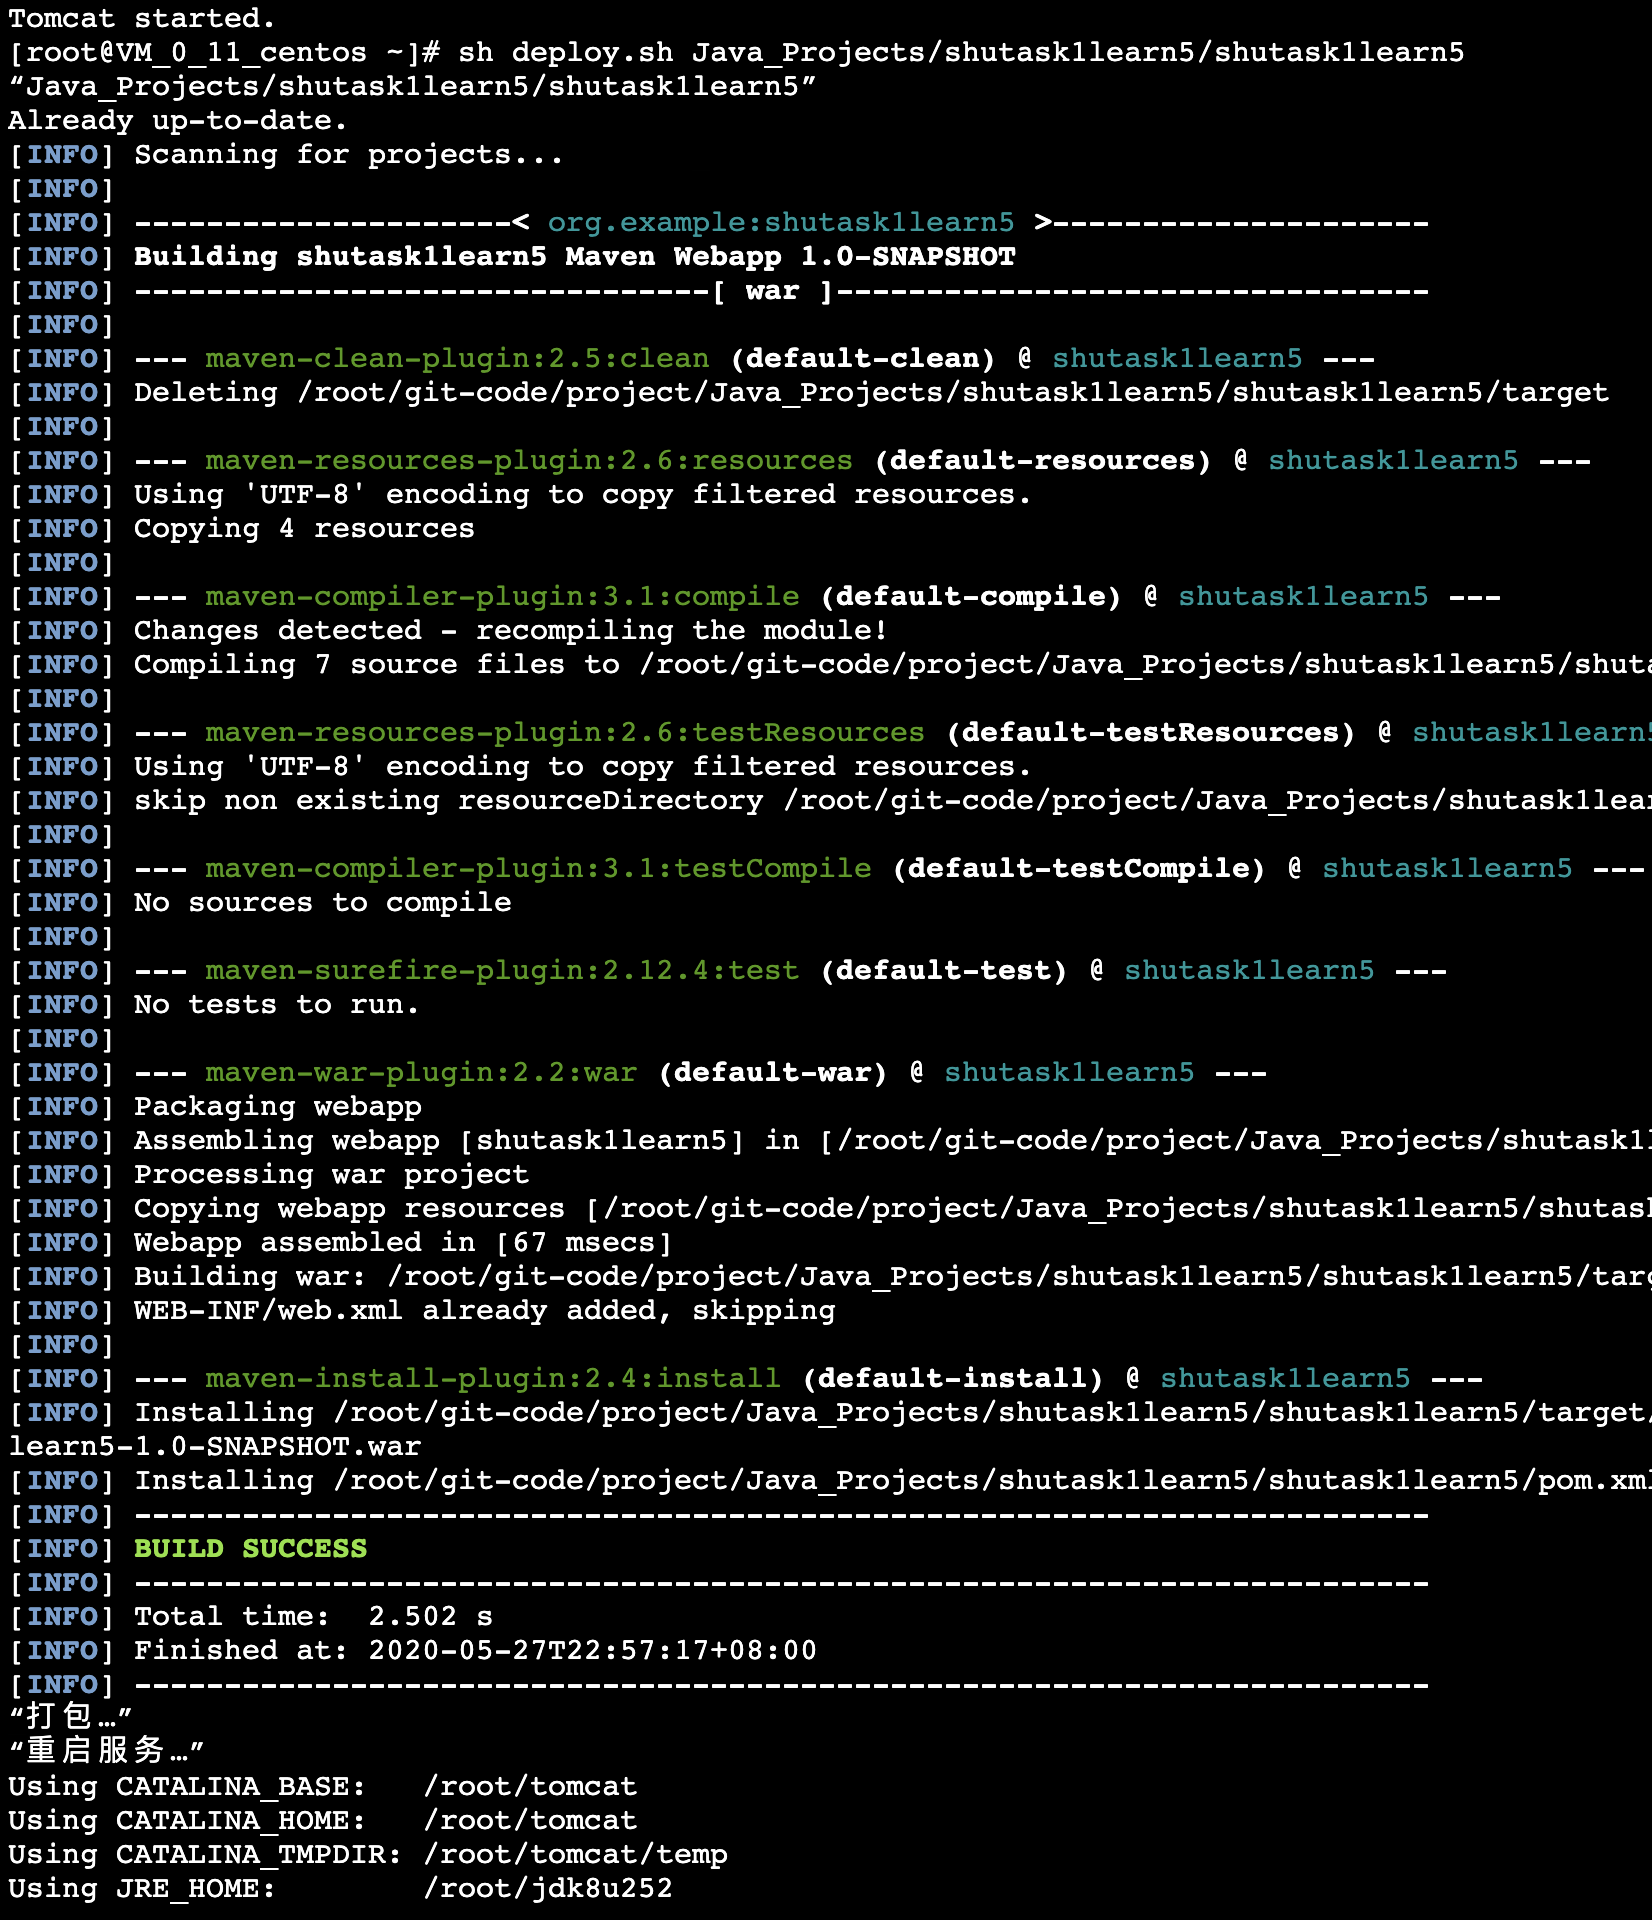
 成功运行脚本deploy.sh进行部署shutask2learn5: sh deploy.sh Java_Projects/shutask1learn5/shutask1learn5
deploy.sh
#!/bin/bash
tag=$1
echo “$1”
cd /root/git-code/project/$tag/
git pull
mvn clean install
echo “打包…”
rm -rf /root/tomcat/webapps/project/*
cp /root/git-code/project/$tag/target/*.war /root/tomcat/webapps/project/
rm -rf /root/tomcat/webapps/ROOT/*
unzip -oq /root/tomcat/webapps/project/*.war -d /root/tomcat/webapps/ROOT/
echo “重启服务…”
sh /root/tomcat/bin/shutdown.sh
sh /root/tomcat/bin/startup.sh
通过navicat连接远程数据库插入数据,然后将db.properties修改成远程服务器的url和密码之后gitpush,然后运行deploy.sh文件,就可以访问服务器上的数据库。
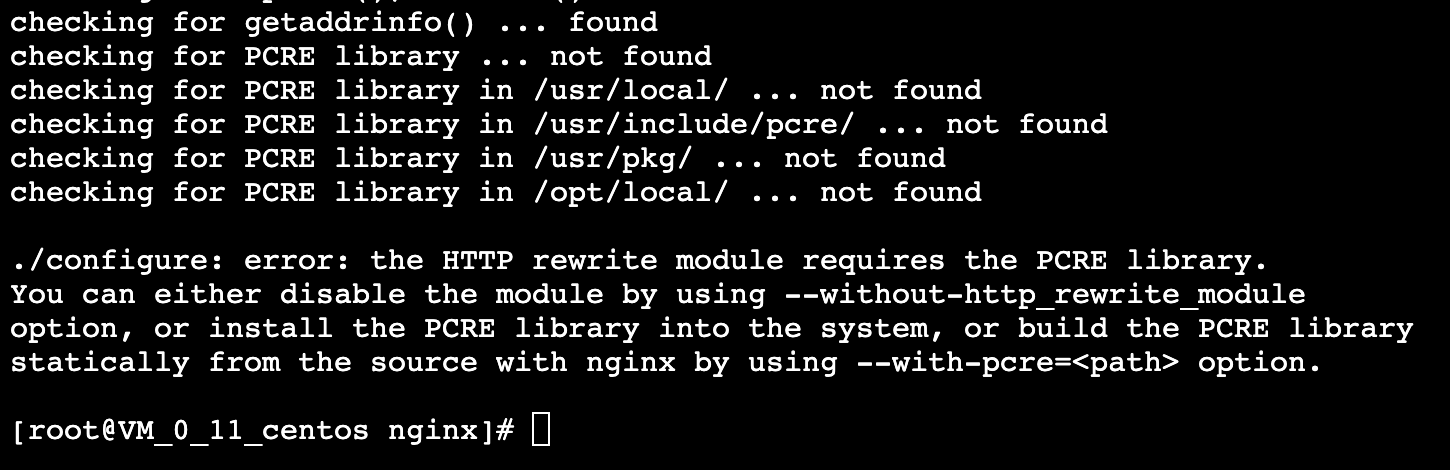
进入解压后的nginx目录然后运行第一次启动的编译安装
./configure --prefix=/root/nginx
make
make intall编译
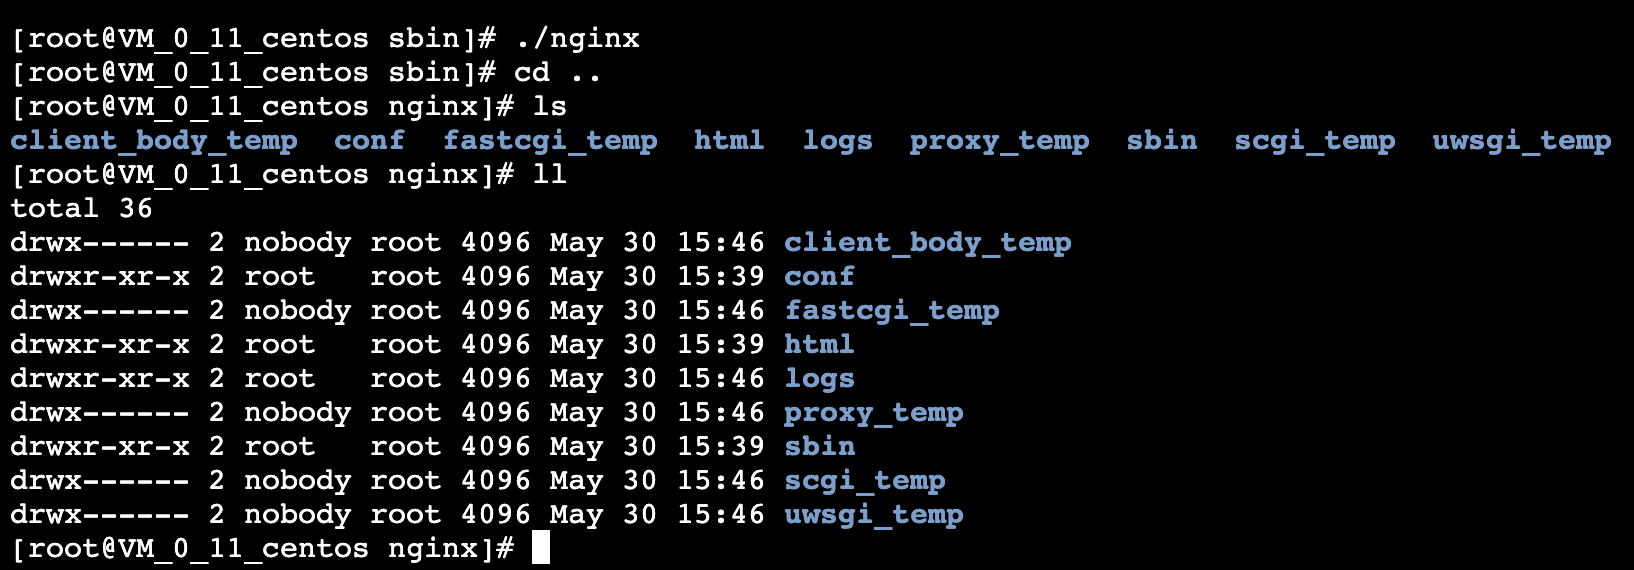
缺少包的时候根据报错安装包
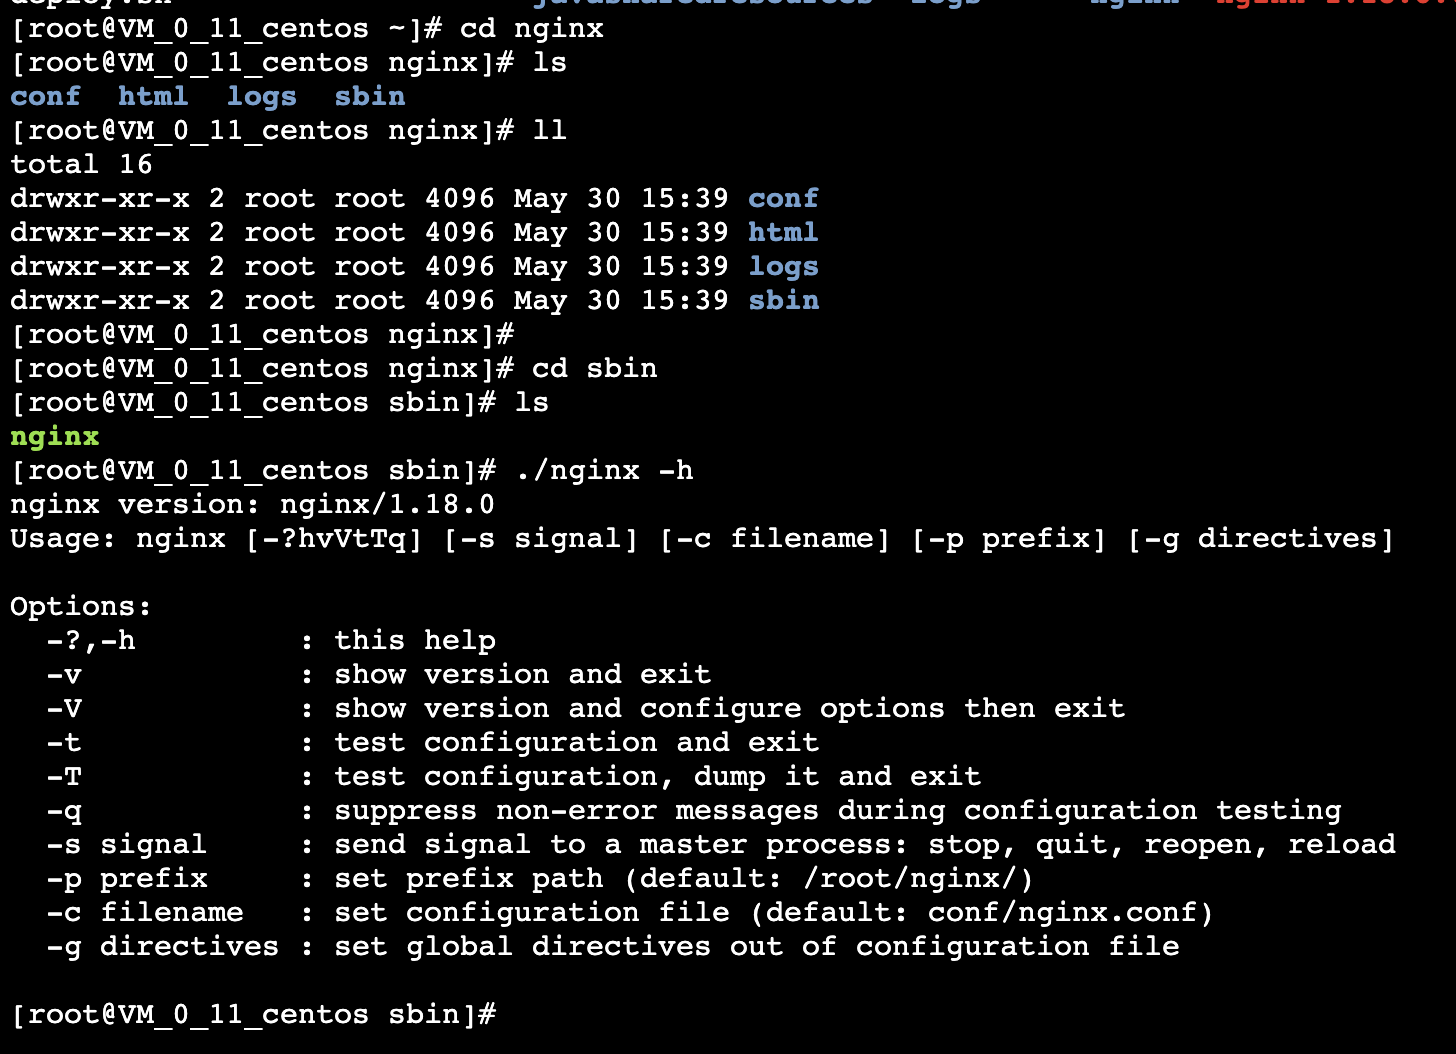
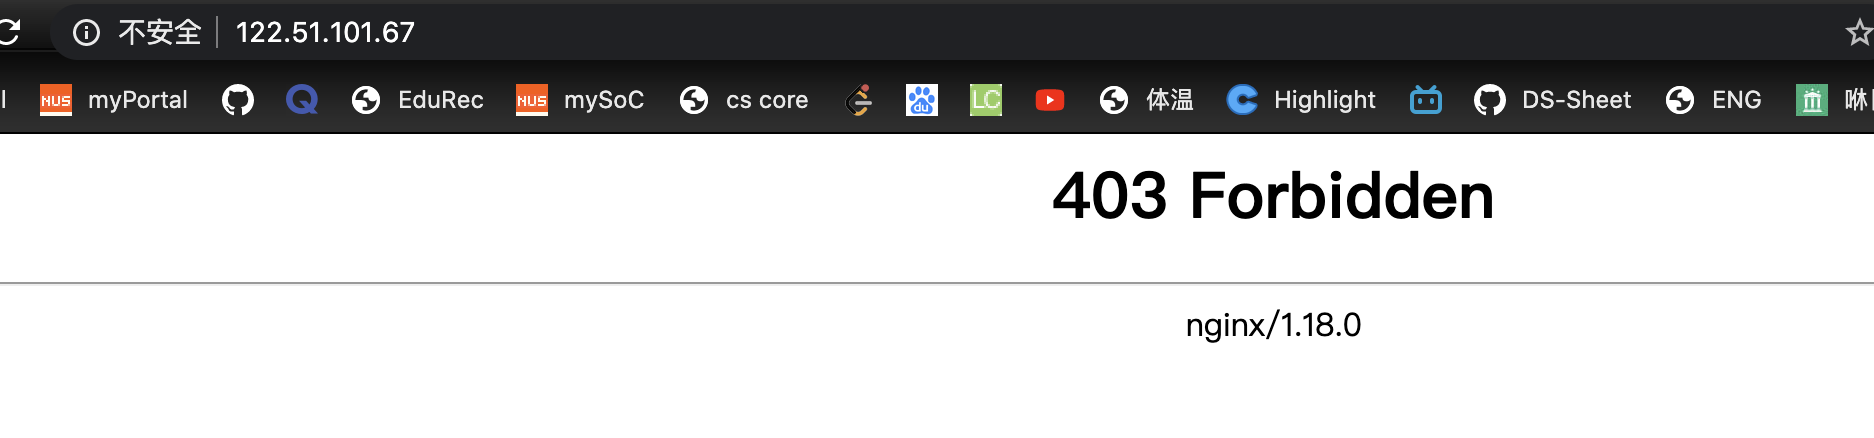
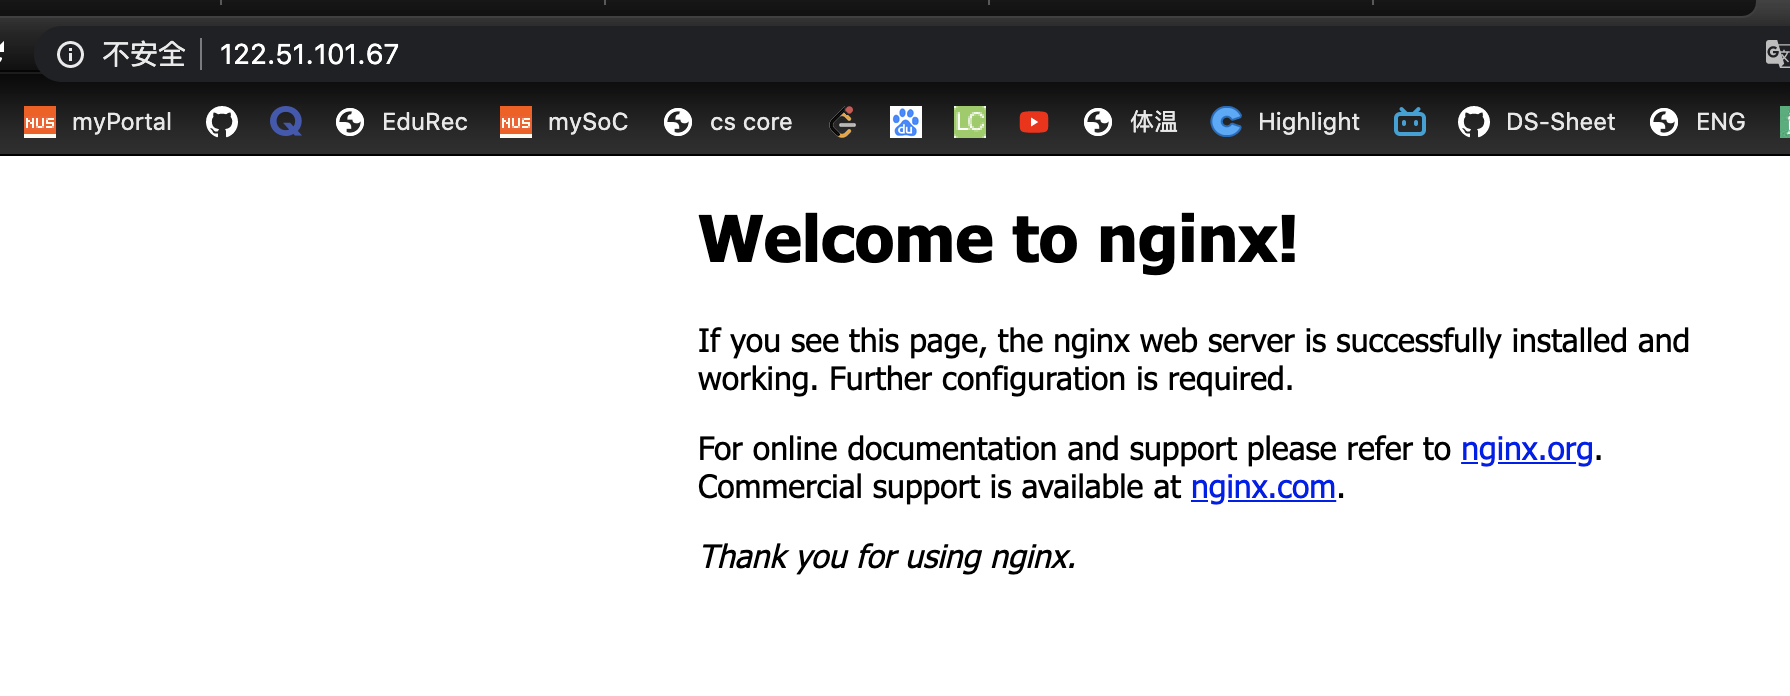
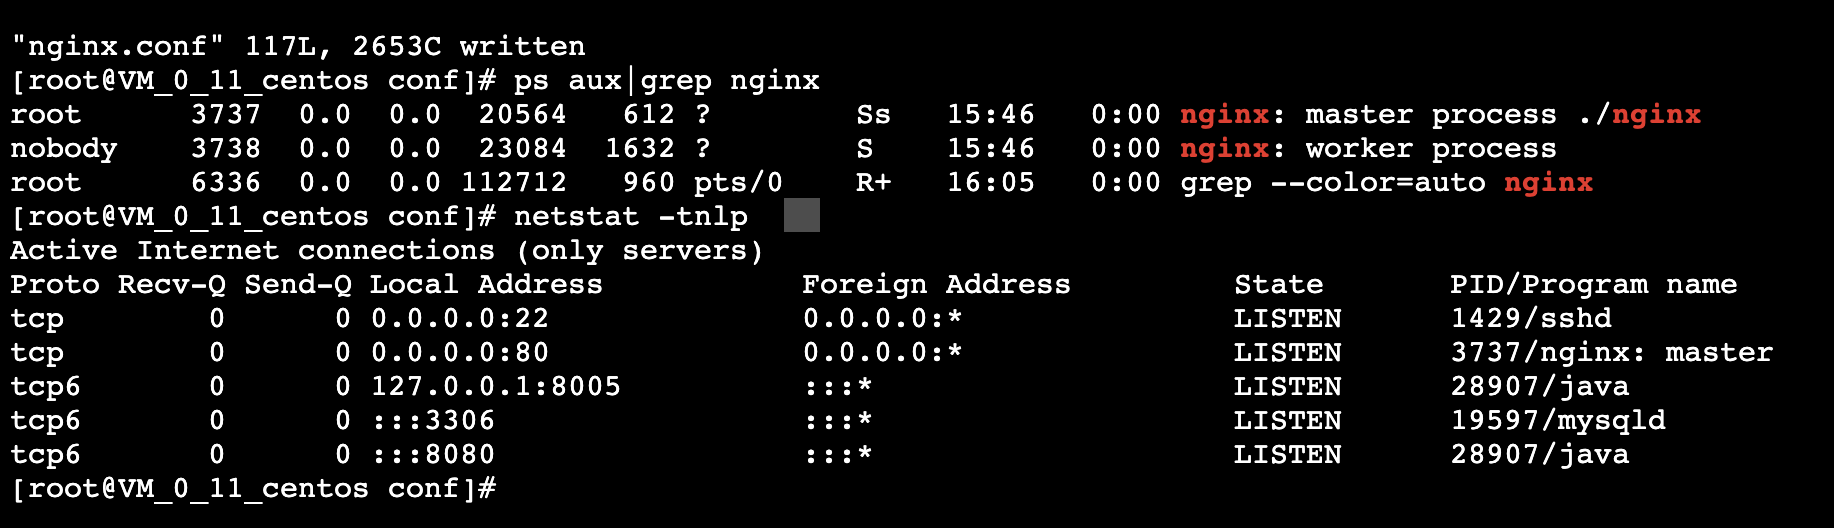
将conf里nginx.conf的user改成常用的root,检查一下有没有配置错,./nginx -t 然后重启生效./nginx -s reload, 重启前是403Forbidden,重启后是niginx
[root@VM_0_11_centos nginx]# cd sbin
[root@VM_0_11_centos nginx]# ./nginx -t
[root@VM_0_11_centos sbin]# ./nginx -s reload
ps aux|grep nginx看看nginx有没有启动, 或者用netstat -tnlp
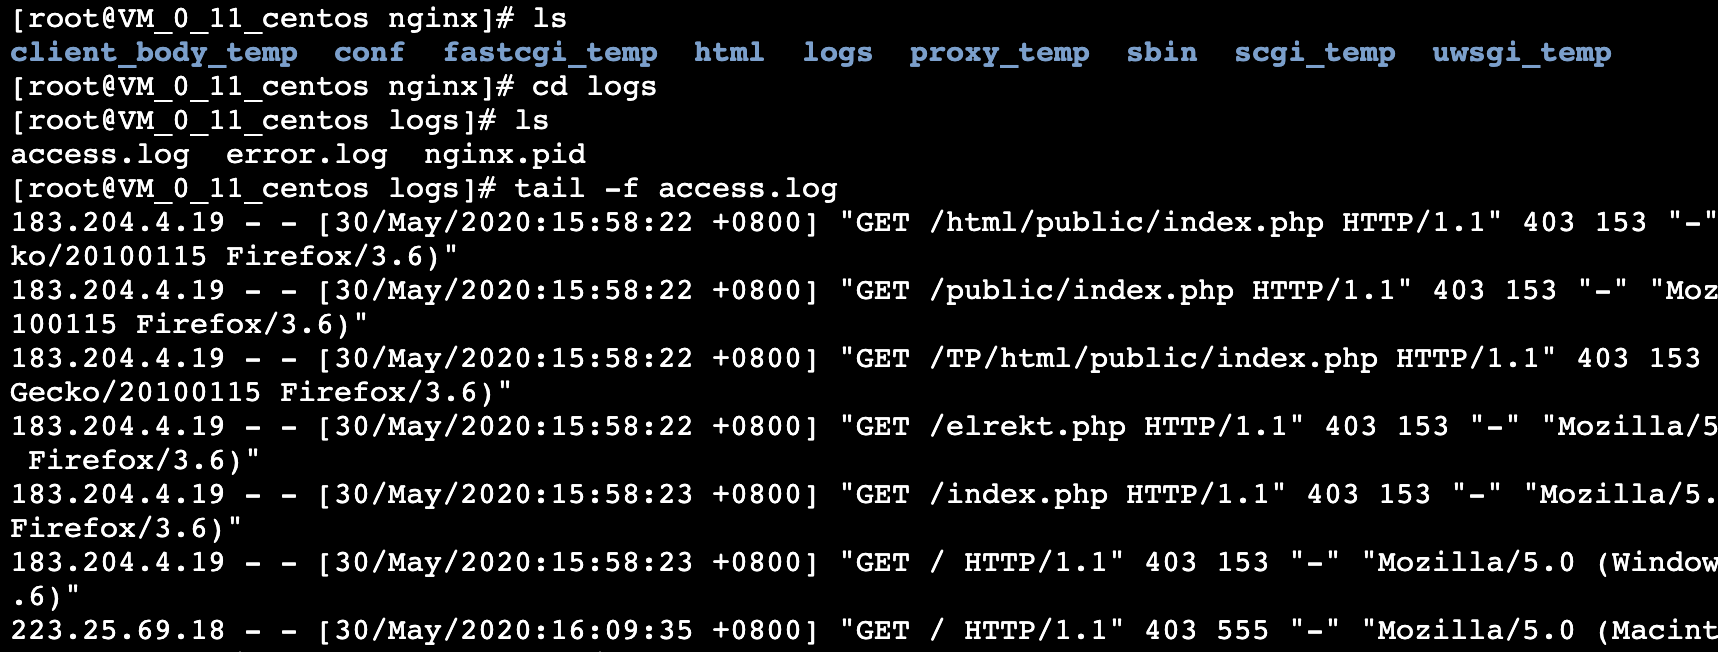
查看请求的logs,进入logs目录
tail -f access.log
刷新一次上述网页就会实时打印一行log,会记录包括浏览器类型
more:nginx配置文件详解
nginx的upstream目前支持4种方式的分配
1、轮询(默认)
每个请求按时间顺序逐一分配到不同的后端服务器,如果后端服务器down掉,能自动剔除。
2、weight
指定轮询几率,weight和访问比率成正比,用于后端服务器性能不均的情况。
例如:
upstream bakend {
server 192.168.0.14 weight=10;
server 192.168.0.15 weight=10;
}
2、ip_hash
每个请求按访问ip的hash结果分配,这样每个访客固定访问一个后端服务器,可以解决session的问题。
例如:
upstream bakend {
ip_hash;
server 192.168.0.14:88;
server 192.168.0.15:80;
}
3、fair(第三方)
按后端服务器的响应时间来分配请求,响应时间短的优先分配。
upstream backend {
server server1;
server server2;
fair;
}
4、url_hash(第三方)
按访问url的hash结果来分配请求,使每个url定向到同一个后端服务器,后端服务器为缓存时比较有效。
例:在upstream中加入hash语句,server语句中不能写入weight等其他的参数,hash_method是使用的hash算法
upstream backend {
server squid1:3128;
server squid2:3128;
hash $request_uri;
hash_method crc32;
}
————————————————
参考链接:https://blog.csdn.net/tjcyjd/article/details/50695922
负载均衡:当部署两个tomcat时,eg一个是原本的8080helloindex网页,另一个是8081会显示原本的tomcat页面,两个网页在刷新http://122.51.101.67/时会以随机概率出现
在conf的nginx配置文件里面
upstream bakend{
server 127.0.0.1:8080 weight=3;
server 127.0.0.1:8081;
}
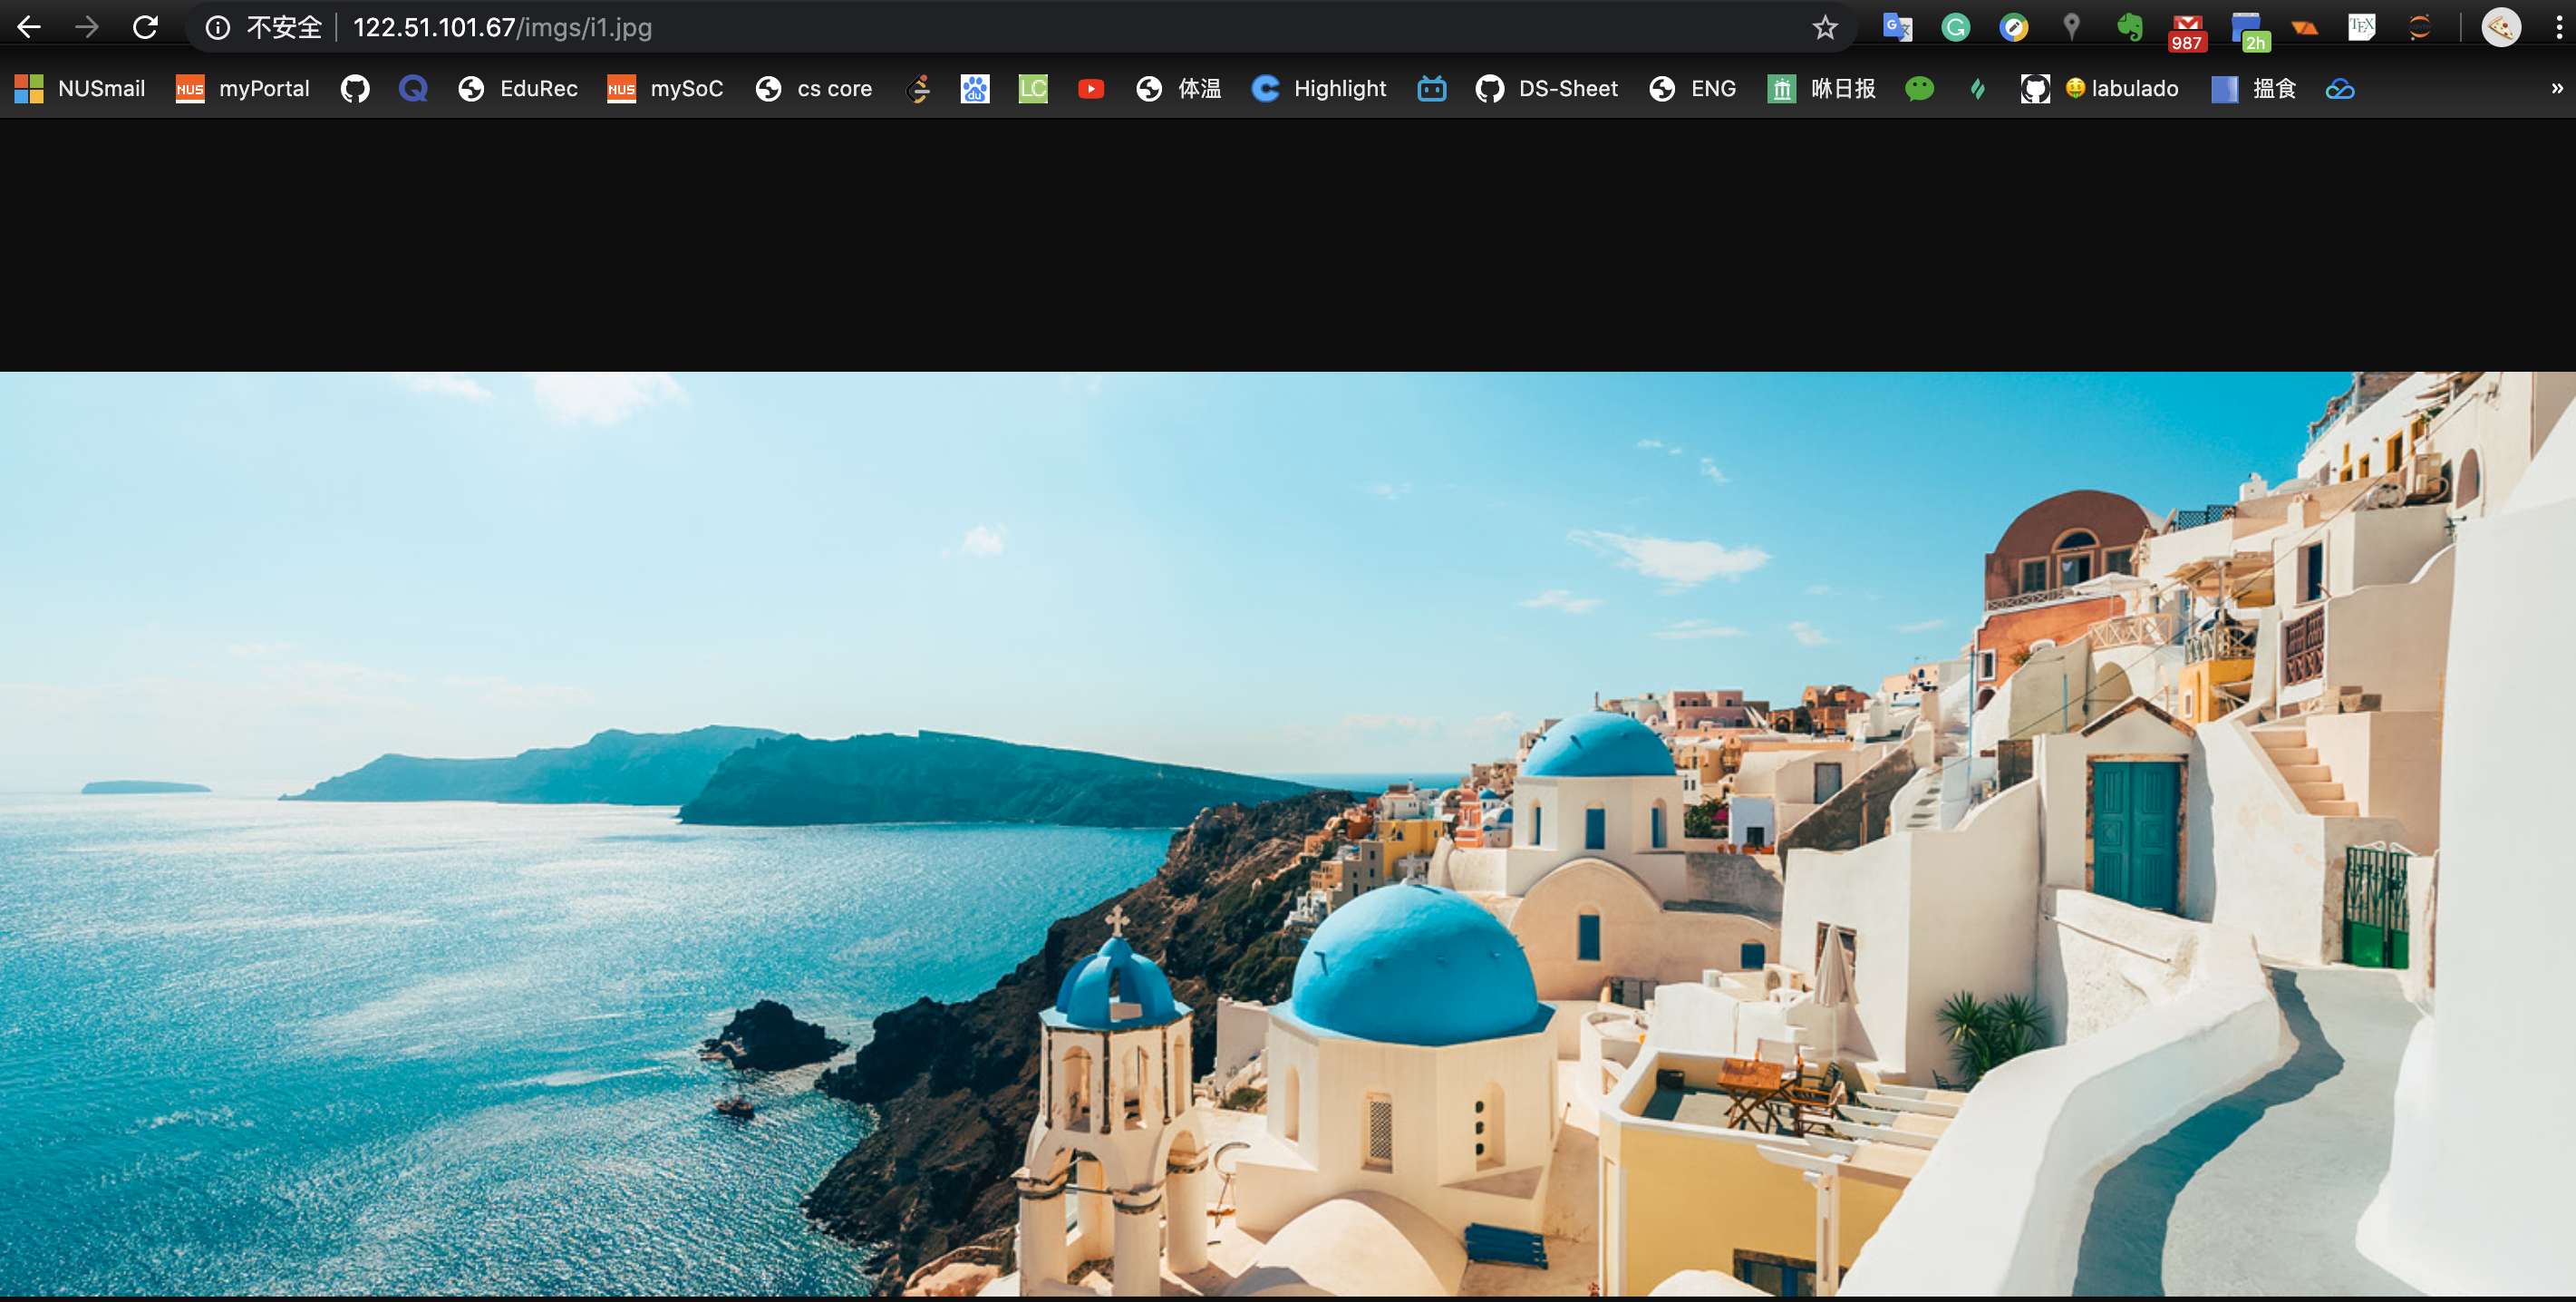
Nginx访问静态资源
首先上传图片:
1.复制服务器上放img的地址:
[root@VM_0_11_centos ~]# cd nginx
[root@VM_0_11_centos nginx]# cd html
[root@VM_0_11_centos html]# ls
50x.html index.html
[root@VM_0_11_centos html]# mkdir imgs
[root@VM_0_11_centos html]# pwd
/root/nginx/html
2.本地上传图片到服务器
scp /Users/rongrongfu/Desktop/i1.jpg root@122.51.101.67:/root/nginx/html/i1.jpg
[root@VM_0_11_centos html]# ls
50x.html i1.jpg imgs index.html
2.修改nignx
cd conf
vim nginx.conf
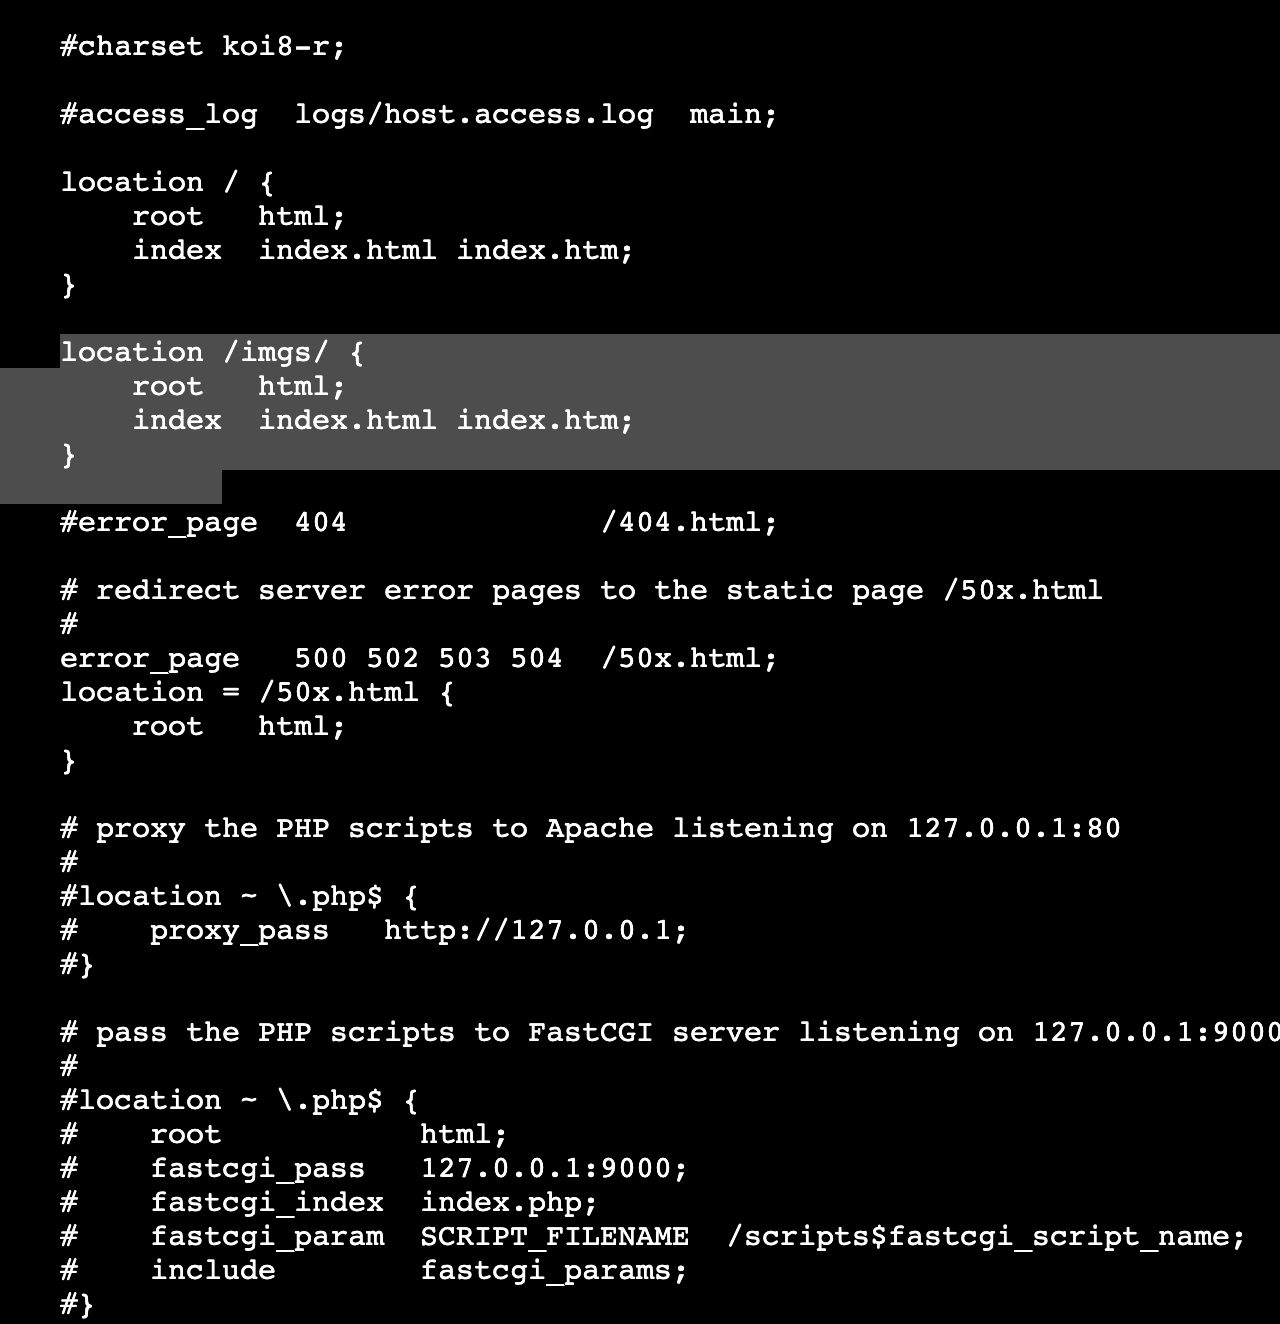
[root@VM_0_11_centos conf]# ../sbin/nginx -t
nginx: the configuration file /root/nginx/conf/nginx.conf syntax is ok
nginx: configuration file /root/nginx/conf/nginx.conf test is successful
[root@VM_0_11_centos conf]# ../sbin/nginx -s reload
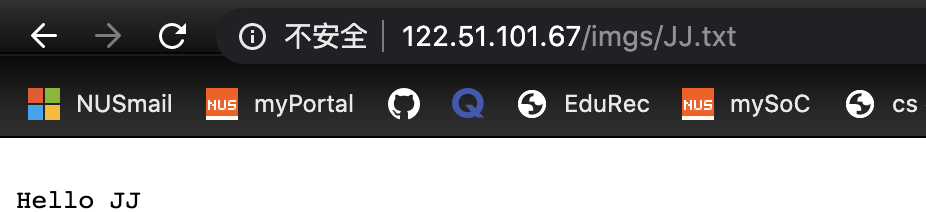
或者打开文本,随便写一个txt
touch jj.txt
vim jj.txt


评论