发表于: 2020-05-29 21:08:42
1 1567
今天完成的事情:
继续学习springmvc
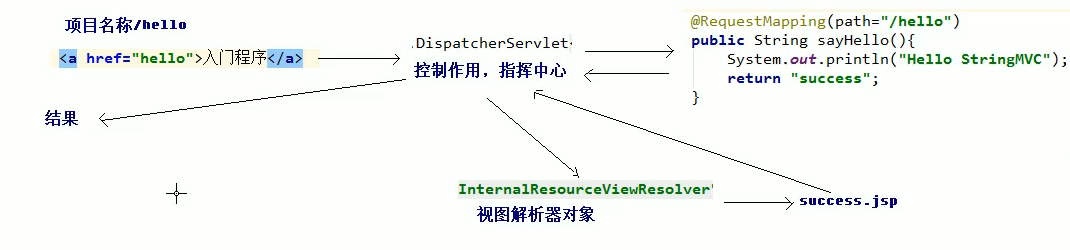
springmvc工作流程:
配置web.xml:
<web-app>
  <!-- 注册springmvc框架核心控制器 -->
  <servlet>
    <servlet-name>DispatcherServlet</servlet-name>
    <servlet-class>org.springframework.web.servlet.DispatcherServlet</servlet-class>

    <load-on-startup>1</load-on-startup>

    <init-param>
      <param-name>contextConfigLocation</param-name>
      <param-value>classpath:springmvc.xml</param-value>
    </init-param>
  </servlet>
  <servlet-mapping>
    <servlet-name>DispatcherServlet</servlet-name>
    <url-pattern>/</url-pattern>
  </servlet-mapping>
 </web-app>
创建一个HelloController控制器:
package controller;

import org.springframework.stereotype.Controller;
import org.springframework.web.bind.annotation.RequestMapping;

@Controller
public class HelloController {

    @RequestMapping(path="/hello")
    public String sayHello(){
        System.out.println("Hello SpringMVC");
        return "success";
    }
创建springmvc.xml配置文件:
<beans xmlns="http://www.springframework.org/schema/beans"
       xmlns:xsi="http://www.w3.org/2001/XMLSchema-instance"
       xmlns:context="http://www.springframework.org/schema/context"
       xmlns:mvc="http://www.springframework.org/schema/mvc"
       xsi:schemaLocation="http://www.springframework.org/schema/beans http://www.springframework.org/schema/beans/spring-beans.xsd http://www.springframework.org/schema/context https://www.springframework.org/schema/context/spring-context.xsd http://www.springframework.org/schema/mvc https://www.springframework.org/schema/mvc/spring-mvc.xsd">

    <!--开启注解扫描-->
    <context:component-scan base-package="controller"></context:component-scan>

    <!-- 配置视图解析器-->
    <bean id="internalResourceViewResolver" class="org.springframework.web.servlet.view.InternalResourceViewResolver">
        <property name="prefix" value="/WEB-INF/pages/"/>
        <property name="suffix" value=".jsp"/>
    </bean>

    <!-- 开启springmvc框架注解支持 -->
    <mvc:annotation-driven/>
</beans>
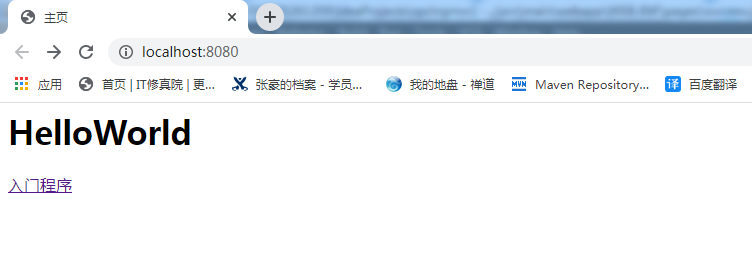
配置主页index.jsp:
<%@ page contentType="text/html;charset=UTF-8" language="java" %>
<html>
<head>
    <title>主页</title>
</head>
<body>
<h1>HelloWorld</h1>
<a href="/hello">入门程序</a>
</body>
</html>
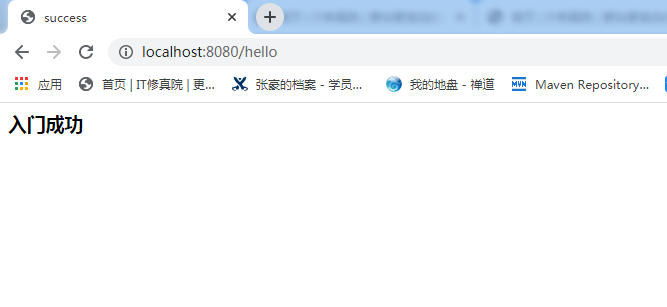
配置跳转页面success.jsp:
<%@ page contentType="text/html;charset=UTF-8" language="java" %>
<html>
<head>
    <title>success</title>
</head>
<body>
<h3>入门成功</h3>
</body>
</html>
运行成功:
我理解的流程大概就是:客户端收到请求,首先加载一些配置文件,将请求传给前端控制器,生成DispatcherServlet对象,加载springmvc.xml,进而创建控制器HelloController类和视图解析器类InternalResourceViewResolver,调用HelloController中的方法,并将返回值(success)再返回给前端控制器,然后前端控制器再将其传给视图解析器,视图解析器收到请求就跳转到success.jsp页面,最后再将请求响应给客户端。
初步尝试整合SSM进行增删改查:
SSM就是Spring+SpringMVC+MyBatis,在任务一中已经将Spring+Mybatis整合在一起了,只需要将它再与SpringMVC整合起来就可以了。
由于中途换过电脑,环境什么的全部重新装了一遍,干脆全部重新写了一遍,顺便优化了一遍,之前任务一我没有用注解注入,正好现在改过来:
首先创建一个Student实体类:
package com.jnshu.Model;

public class Student {

    private Long ID ;
    private String Name;
    private Long QQ ;
    private String Type ;
    private Long Time ;
    private String School ;
    private Long Num ;
    private String Link ;
    private String Wish ;
    private String Leader ;
    private Long Create_at ;
    private Long Update_at ;

    public Long getID() {
        return ID;
    }

    public void setID(Long ID) {
        this.ID = ID;
    }

    public String getName() {
        return Name;
    }

    public void setName(String name) {
        Name = name;
    }

    public Long getQQ() {
        return QQ;
    }

    public void setQQ(Long QQ) {
        this.QQ = QQ;
    }

    public String getType() {
        return Type;
    }

    public void setType(String type) {
        Type = type;
    }

    public Long getTime() {
        return Time;
    }

    public void setTime(Long time) {
        Time = time;
    }

    public String getSchool() {
        return School;
    }

    public void setSchool(String school) {
        School = school;
    }

    public Long getNum() {
        return Num;
    }

    public void setNum(Long num) {
        Num = num;
    }

    public String getLink() {
        return Link;
    }

    public void setLink(String link) {
        Link = link;
    }

    public String getWish() {
        return Wish;
    }

    public void setWish(String wish) {
        Wish = wish;
    }

    public String getLeader() {
        return Leader;
    }

    public void setLeader(String leader) {
        Leader = leader;
    }

    public Long getCreate_at() {
        return Create_at;
    }

    public void setCreate_at(Long create_at) {
        Create_at = create_at;
    }

    public Long getUpdate_at() {
        return Update_at;
    }

    public void setUpdate_at(Long update_at) {
        Update_at = update_at;
    }

    public Student(Long ID, String name) {
        this.ID = ID;
        Name = name;
    }

    public Student() {
    }

    @Override
    public String toString() {
        return "Student{" +
                "ID=" + ID +
                ", Name='" + Name + '\'' +
                ", QQ=" + QQ +
                ", Type='" + Type + '\'' +
                ", Time=" + Time +
                ", School='" + School + '\'' +
                ", Num=" + Num +
                ", Link='" + Link + '\'' +
                ", Wish='" + Wish + '\'' +
                ", Leader='" + Leader + '\'' +
                ", Create_at=" + Create_at +
                ", Update_at=" + Update_at +
                '}';
    }
}
然后编写Dao层:
package com.jnshu.Dao;

import com.jnshu.Model.Student;
import java.util.List;

public interface StudentMapper {
    void Insert(Student student);
    void Delete(Long ID);
    void Update(Student student);
    Student SelectById(Long ID);
    List<Student> GetAllStudent();
}
编写Mybatis的接口映射文件:
<?xml version="1.0" encoding="UTF-8"?>
<!DOCTYPE mapper
        PUBLIC "-//mybatis.org//DTD Mapper 3.0//EN"
        "http://mybatis.org/dtd/mybatis-3-mapper.dtd">

<!-- mybatis的实体类映射对象 -->
<mapper namespace="com.jnshu.Dao.StudentMapper">
    <!-- 根据ID查询 -->
    <select id="SelectById" parameterType="Long" resultType="com.jnshu.Model.Student">
      select * from studentlist where ID=#{ID}
   </select>

    <!-- 查询所有 -->
    <select id="GetAllStudent" resultType="com.jnshu.Model.Student">
      select * from studentlist
   </select>

    <!-- 删除 -->
    <delete id="Delete" parameterType="Long">
        delete from studentlist where ID= #{ID}
    </delete>

    <!-- 修改 -->
    <update id="Update" parameterType="com.jnshu.Model.Student">
        update studentlist set name = #{name} where ID = #{ID}
    </update>

    <!-- 添加 -->
    <insert id="Insert" parameterType="com.jnshu.Model.Student">
        insert into studentlist (ID,Name,QQ,Type,Time,School,Num,Link,Wish,Leader,Create_at,Update_at)values (#{ID},#{Name},#{QQ},#{Type},#{Time},#{School},#{Num},#{Link},#{Wish},#{Leader},#{Create_at},#{Update_at})
    </insert>

</mapper>
然后编写Service层接口:
package com.jnshu.Service;

import com.jnshu.Model.Student;
import java.util.List;

public interface StudentService {
    void Insert(Student student);
    void Delete(Long ID);
    void Update(Student student);
    Student SelectById(Long ID);
    List<Student> GetAllStudent();
}
以及其实现类:
package com.jnshu.Service;

import com.jnshu.Dao.StudentMapper;
import com.jnshu.Model.Student;
import org.springframework.beans.factory.annotation.Autowired;
import org.springframework.stereotype.Service;

import java.util.List;

@Service("studentService")
public class StudentServiceImpl implements StudentService {

    @Autowired
    private StudentMapper studentMapper;

    public void Insert(Student student){
        studentMapper.Insert(student);
    }

    public void Delete(Long ID){
        studentMapper.Delete(ID);
    }

    public void Update(Student student){
        studentMapper.Update(student);
    }

    public Student SelectById(Long ID){
        return studentMapper.SelectById(ID);
    }

    public List<Student> GetAllStudent(){
        return studentMapper.GetAllStudent();
    }
}
配置Spring的applicationContext.xml文件:
<?xml version="1.0" encoding="UTF-8"?>
<beans xmlns="http://www.springframework.org/schema/beans"
       xmlns:xsi="http://www.w3.org/2001/XMLSchema-instance"
       xmlns:context="http://www.springframework.org/schema/context"
       xsi:schemaLocation="http://www.springframework.org/schema/beans http://www.springframework.org/schema/beans/spring-beans.xsd http://www.springframework.org/schema/context https://www.springframework.org/schema/context/spring-context.xsd">


    <context:property-placeholder location="db.properties" />

    <!--开启注解-->
    <context:annotation-config/>

    <!--开启注解自动扫描-->
    <context:component-scan base-package="com.jnshu.Service"/>

    <!-- 配置连接数据库的数据源-->
    <bean id="dataSource" class="org.apache.commons.dbcp.BasicDataSource">
        <property name="driverClassName" value="${driver}"/>
        <property name="username" value="${user}"/>
        <property name="password" value="${password}"/>
        <property name="url" value="${url}"/>
    </bean>

    <!-- 引入数据源和mybatis全局配置文件-->
    <bean id="sqlSessionFactory" class="org.mybatis.spring.SqlSessionFactoryBean">
        <property name="dataSource" ref="dataSource"/>
        <property name="configLocation" value="classpath:Mybatis-config.xml"/>
    </bean>

    <bean class="org.mybatis.spring.mapper.MapperScannerConfigurer">
        <property name="basePackage" value="com.jnshu.Dao"/>
        <property name="sqlSessionFactoryBeanName" value="sqlSessionFactory"/>
    </bean>

</beans>
测试类:
import com.jnshu.Model.Student;
import com.jnshu.Service.StudentService;
import org.springframework.context.ApplicationContext;
import org.springframework.context.support.ClassPathXmlApplicationContext;

import java.util.List;

public class Test {

    @org.junit.Test
    public void InsertTest(){
        ApplicationContext applicationContext = new ClassPathXmlApplicationContext("applicationContext.xml");
        StudentService studentService = (StudentService)applicationContext.getBean("studentService");
        Student student = new Student(0L,"测试");
        studentService.Insert(student);
    }

    @org.junit.Test
    public void DeleteTest(){
        ApplicationContext applicationContext = new ClassPathXmlApplicationContext("applicationContext.xml");
        StudentService studentService = (StudentService)applicationContext.getBean("studentService");
        studentService.Delete(8L);

    }

    @org.junit.Test
    public void UpdateTest(){
        ApplicationContext applicationContext = new ClassPathXmlApplicationContext("applicationContext.xml");
        StudentService studentService = (StudentService)applicationContext.getBean("studentService");
        Student student = new Student(7L,"修改测试");
        studentService.Update(student);
    }

    @org.junit.Test
    public void SelectByIdTest(){
        ApplicationContext applicationContext = new ClassPathXmlApplicationContext("applicationContext.xml");
        StudentService studentService = (StudentService)applicationContext.getBean("studentService");
        System.out.println(studentService.SelectById(1L));
    }

    @org.junit.Test
    public void GetAllStudentTest(){
        ApplicationContext applicationContext = new ClassPathXmlApplicationContext("applicationContext.xml");
        StudentService studentService = (StudentService)applicationContext.getBean("studentService");
        List<Student> list = studentService.GetAllStudent();
        for(int i =0;i<list.size();i++){
            Student student = list.get(i);
            System.out.println(student);
        }
    }
}
测试了一下没问题,可以发现使用注解注入简便了许多。
明天计划完成的事情:编写Controller层,以及将SpringMVC整合进去。
收获:基本理解了SpringMVC。


评论