发表于: 2020-05-21 21:16:19
1 1404
加油!!!
今天完成的事:
这两天搞Xshell和Xftp破解版十分难受,害我又重装系统,哎。。。
这两天上面两个软件安装好后,就开始了步骤22和23,下面
1、记录下关于云服务器上安装MySQL的过程
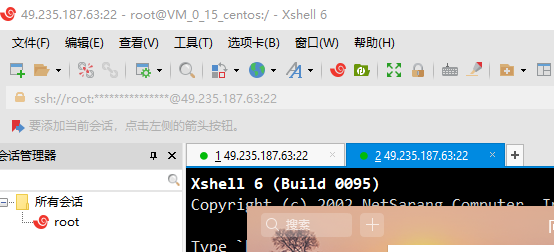
首先安装好Xshell,并创建云服务器的连接
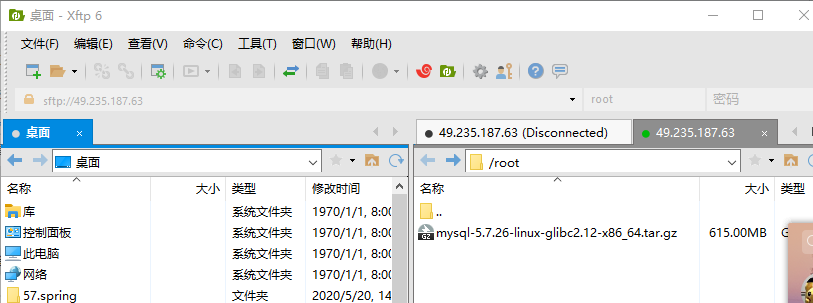
下载好mysql的linux版,并用Xftp将其传入云服务器中
对mysql压缩包进行解压
tar xzvf mysql-5.7.26-linux-glibc2.12-x86_64.tar.gz
解压完成后,可以看到当前目录下多了一个解压文件
ls
mysql-5.7.26-linux-glibc2.12-x86_64
mysql-5.7.26-linux-glibc2.12-x86_64.tar.gz
移动mysql文件夹到/usr/local目录下并更名为mysql
mv mysql-5.7.24-linux-glibc2.12-x86_64 /usr/local/mysql
闯将一个mysql用户并更改/usr/local/mysql目录权限及文件夹所属的用户组和用户,以及权限
useradd -r -s /sbin/nologin mysql
chown -R mysql.mysql /usr/local/mysql
chmod -R 755 /usr/local/mysql
在/usr/local/mysql目录下创建data目录
mkdir /usr/local/mysql/data
编译安装并初始化mysql,务必记住初始化输出日志末尾的密码(数据库管理员临时密码)
cd /usr/local/mysql/bin
./mysqld --initialize --user=mysql --datadir=/usr/local/mysql/data --basedir=/usr/local/mysql
这一步可能会报错
./mysqld: error while loading shared libraries: libnuma.so.1: cannot open shared object file: No such file or directory
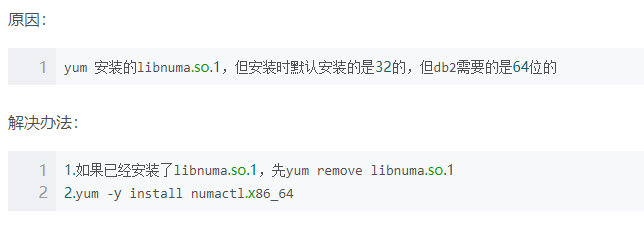
安装成功后继续运行数据库的初始化命令
[root@VM_0_15_centos mysql]# cd /usr/local/mysql/bin
[root@VM_0_15_centos bin]# ./mysqld --initialize --user=mysql --datadir=/usr/local/mysql/data --basedir=/usr/local/mysql
编辑配置文件my.cnf,添加配置如下
[root@VM_0_15_centos bin]# vi /etc/my.cnf
[mysqld]
datadir=/usr/local/mysql/data
port = 3306
sql_mode=NO_ENGINE_SUBSTITUTION,STRICT_TRANS_TABLES
symbolic-links=0
max_connections=400
innodb_file_per_table=1
lower_case_table_names=1
启动mysql服务器
[root@VM_0_15_centos /]# /usr/local/mysql/support-files/mysql.server start
此时可能会报错
ERROR! The server quit without updating PID file (/usr/local/mysql/data/VM_0_15_centos.pid).
查看是否存在mysql和mysqld的服务,如果存在,则结束进程,再重新执行启动命令
#查询服务
ps -ef|grep mysql
ps -ef|grep mysqld
#结束进程
kill -9 PID
回到根目录,再重新执行启动命令
[root@VM_0_15_centos mysql]# cd /
[root@VM_0_15_centos /]# /usr/local/mysql/support-files/mysql.server start
添加软连接,并重启mysql服务
[root@VM_0_15_centos /]#ln -s /usr/local/mysql/support-files/mysql.server /etc/init.d/mysql
[root@VM_0_15_centos /]# ln -s /usr/local/mysql/bin/mysql /usr/bin/mysql
[root@VM_0_15_centos /]# service mysql restart
成功!
Shutting down MySQL.. SUCCESS!
登录MySQL,并重置密码
[root@VM_0_15_centos /]# mysql -u root -p密码
mysql> set password for root@localhost = password('密码');
开放远程连接
mysql> use mysql;
Reading table information for completion of table and column names
You can turn off this feature to get a quicker startup with -A
Database changed
mysql> update user set user.Host='%' where user.User='root';
Query OK, 1 row affected (0.00 sec)
Rows matched: 1 Changed: 1 Warnings: 0
mysql> flush privileges;
Query OK, 0 rows affected (0.00 sec)
设置开机自动启动
mysql> exit
Bye
将服务文件拷贝到init.d下,并重命名为mysql
[root@VM_0_15_centos /]# cp /usr/local/mysql/support-files/mysql.server /etc/init.d/mysqld
赋予可执行权限
[root@VM_0_15_centos /]# chmod +x /etc/init.d/mysqld
添加服务
[root@VM_0_15_centos /]# chkconfig --add mysqld
显示服务列表
[root@VM_0_15_centos /]# chkconfig --list
mysqld 0:off 1:off 2:on 3:on 4:on 5:on 6:off
netconsole 0:off 1:off 2:off 3:off 4:off 5:off 6:off
network 0:off 1:off 2:on 3:on 4:on 5:on 6:off
成功!!
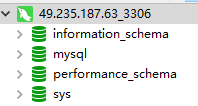
然后我们来测试下navicate来进行连接远程DB
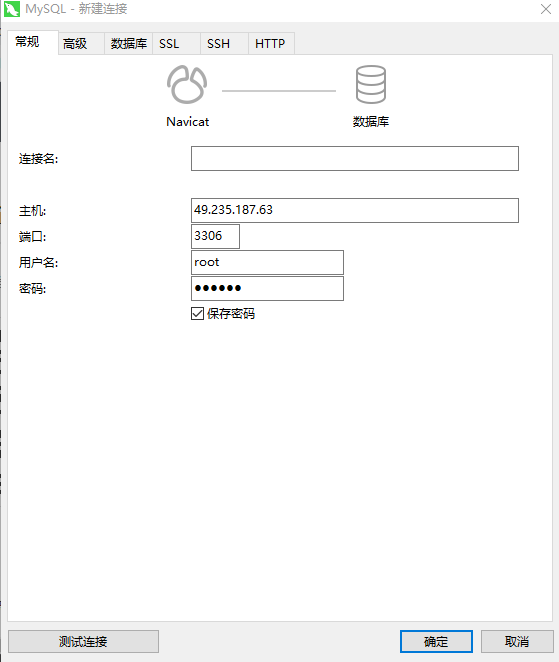
填好云服务器的ip,和你mysql的用户名和密码,点击测试连接,可以看到成功连接
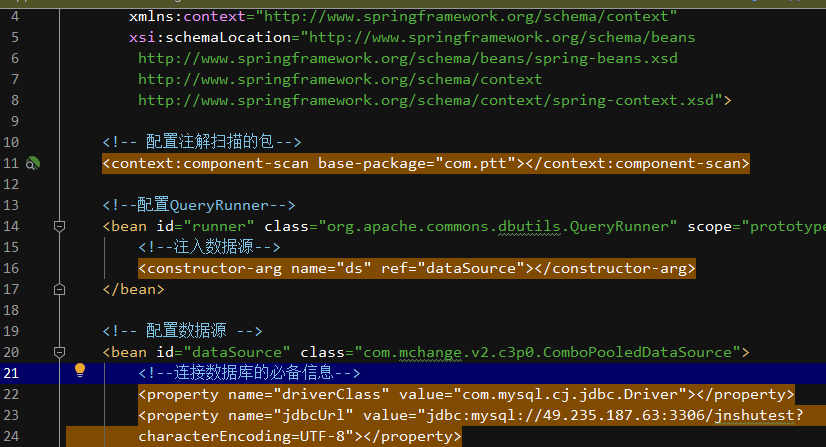
2、用spring来连接远程db进行单元测试
修改本地db的properties文件的IP地址
public class BmbServiceTest {
    private ApplicationContext ac;
    private IBmbService service;

    @Before
    public void init(){
        ac = new ClassPathXmlApplicationContext("bean_anno.xml");
        service = ac.getBean("bmbService",IBmbService.class);
    }

    @Test
    public void testListAllBmbs() {
        List<Bmb> bmbs = service.listAllBmbs();
        for (Bmb bmb : bmbs){
            System.out.println(bmb);
        }
    }

    @Test
    public void testGetBmbById(){
        Bmb bmb = service.getBmbById(13);
        System.out.println(bmb);;
    }

    @Test
    public void testSaveBmb() {
        Bmb bmb = new Bmb();

        bmb.setName("test");
        bmb.setQq("123456");
        bmb.setType("后端工程师");
        bmb.setJointime("1995-5-10");
        bmb.setSchool("9527");
        bmb.setStudy_id("9527");
        bmb.setDaily_link("http://www.jnshu.com/daily/95029?dailyType=others&total=13&page=1&uid=34292&sort=0&orderBy=3");
        bmb.setHope("加油");

        service.saveBmb(bmb);
    }

    @Test
    public void testUpdateBmb(){
        Bmb bmb = service.getBmbById(13);
        bmb.setName("周星星");
        service.updateBmb(bmb);
    }

    @Test
    public void testdeleteBmb(){
        service.deleteBmb(15);
    }
}
本来想今天用for循环来搞下插入100万数据的,但是看到师兄们的日报用连接池的方式,打算还是先学习下mybatis中的连接池的具体知识
明天计划的事:
遇到的困难:云服务器上安装软件太麻烦了,mysql搞了整整一天,生怕把linux系统搞崩,那就玩大了。。。
收获:


评论