发表于: 2020-05-15 22:43:13
1 1257
今天完成的事情:
一.Spring框架学习
1.spring概述
-解耦,简化开发;spring就是个大工厂,可以将所以的对象的创建和依赖管理维护都交给spring管理
-AOP,提供面向切面编程可以方便对程序进行权限拦截,运行监控等。
-声明式事务,能够通过配置完成事务的管理
-方便测试,对junit4支持,可以注解进行测试@
-集成了众多框架(如mybatis,Struts)

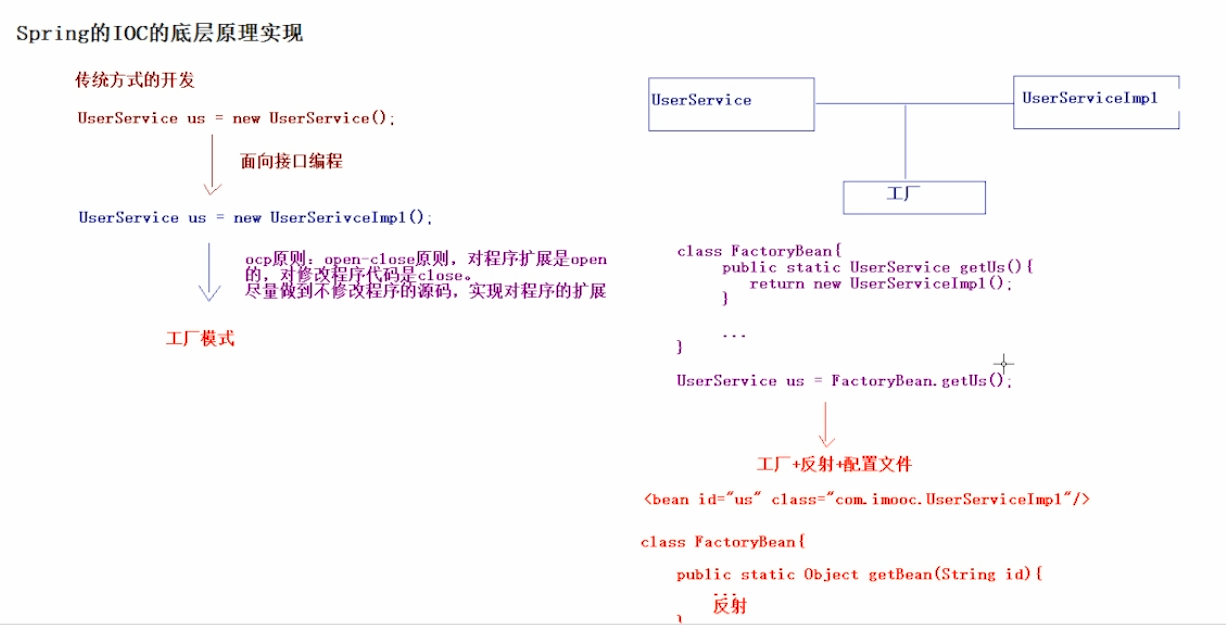
2.spring的ioc底层原理
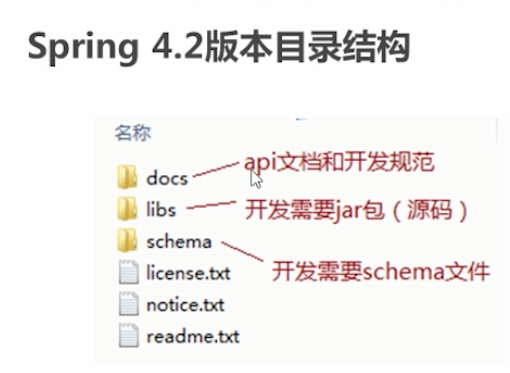
spring开发包下载地址
https://repo.spring.io/libs-release-local/org/springframework/spring/
3.spring IOC的实现
3.1.用maven创建项目,并且导入spring相关,以及测试的依赖包
3.2.创建StudentService接口和实现类
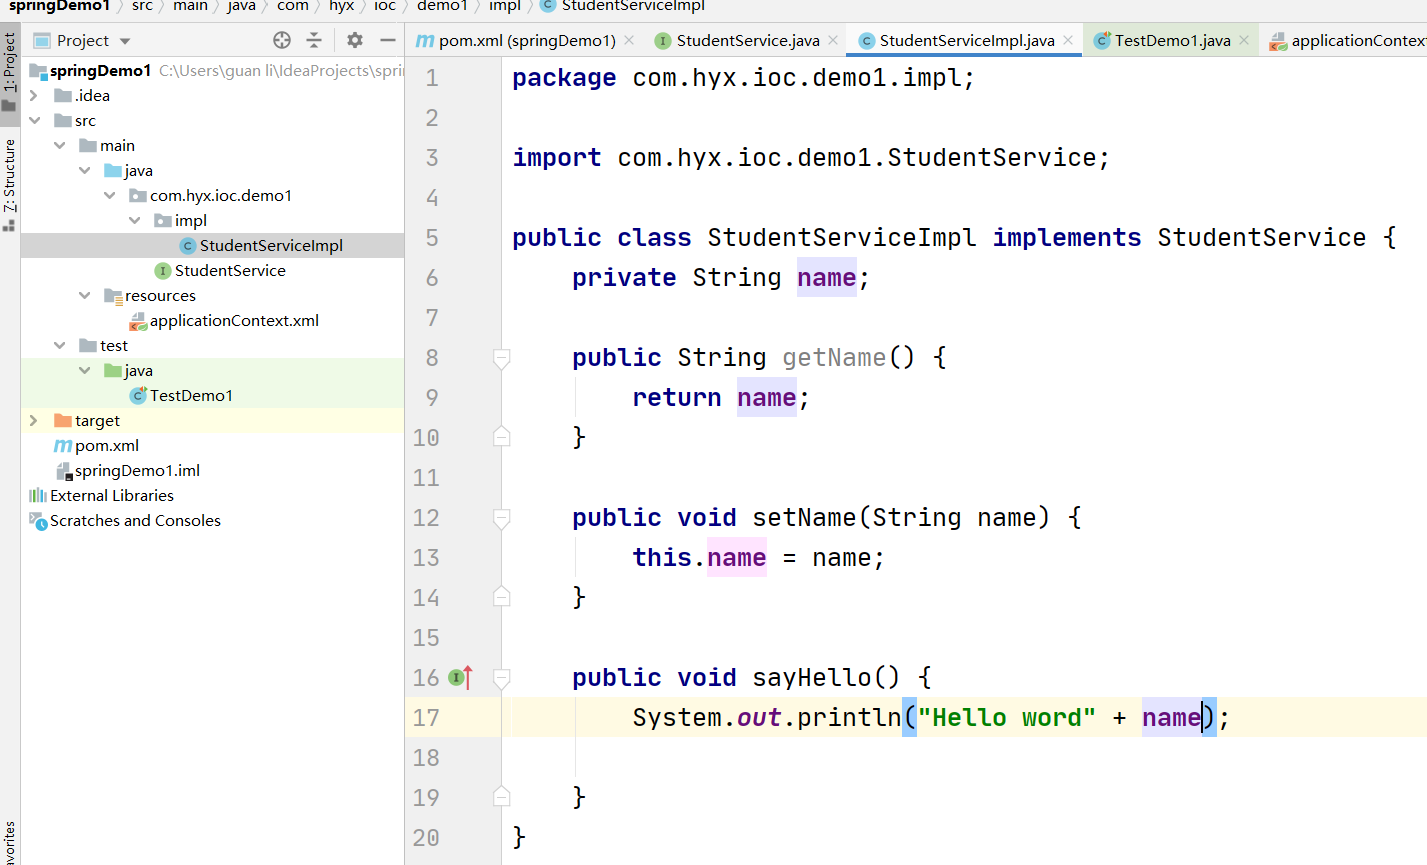
3.3.创建spring的配置文件applicationContext.xml
<?xml version="1.0" encoding="UTF-8"?>
<beans xmlns="http://www.springframework.org/schema/beans"
xmlns:xsi="http://www.w3.org/2001/XMLSchema-instance"
xsi:schemaLocation="http://www.springframework.org/schema/beans http://www.springframework.org/schema/beans/spring-beans.xsd">
<bean id="studentService" class="com.hyx.ioc.demo1.impl.StudentServiceImpl ">
<property name="name" value="李四"></property>
</bean></beans>
public class TestDemo1 {
/*传统方式*/
    @Test
    public void test(){
        //StudentService studentServiceImpl = new StudentServiceImpl();
        StudentServiceImpl studentServiceImpl = new StudentServiceImpl();
        studentServiceImpl.setName("张三");
tudentServiceImpl.sayHello();
    }
    /*spring方式 */
    @Test
    public void test1(){
        ApplicationContext applicationContext = new ClassPathXmlApplicationContext("applicationContext.xml");
        StudentService studentService = (StudentService) applicationContext.getBean("studentService");
        studentService.sayHello();
    }
}

●IOC Inverse of Control反转控制的概念,就是将原本在程序中手动创建UserService对象的控制权,交由Spring框架管理
●简单说,就是创建UserService对象控制权被反转到了Spring框架
● DI Dependency Injection依赖注入的概念,就是在Spring创建这个对象的过程中,将这个对象所依赖的属性注入进去。
4.Spring 的Bean管理
4.1spring工厂类
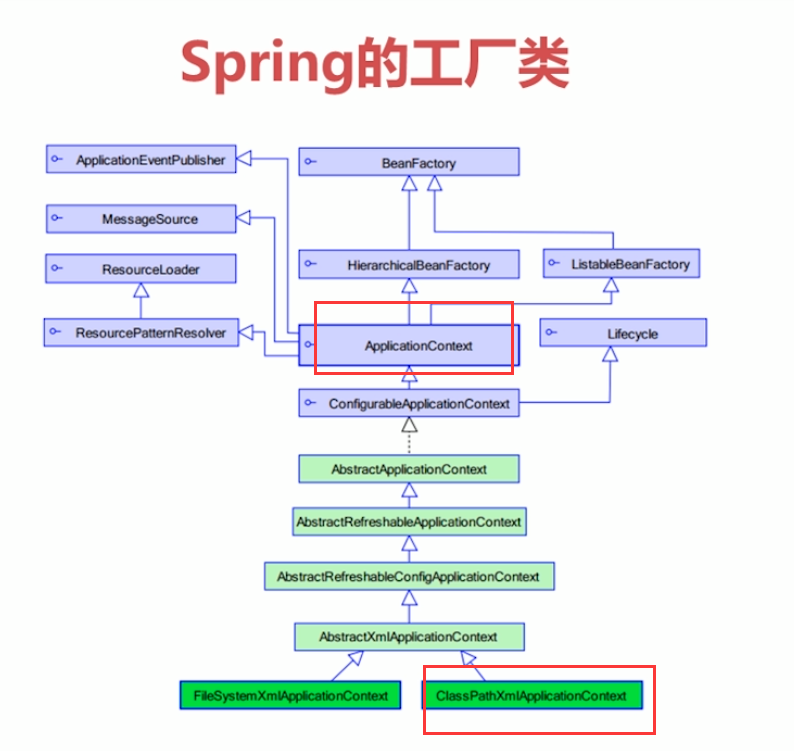
BeanFactory和ApplicationContext创建实例的时机不同:前者是在工厂实例化完以后,在调用getBean的时候,才会来创建类的实例,而后者是一加载配置文件的时候就会将配置文件中所有单例模式生成的类全都实例化。
ClassPathXmlApplicationContext:类路径下的配置文件 FileSystemXmlApplicationContext: 加载文件系统中的配置文件
4.2 Spring bean管理的(xml方式)
4.2.1 bean的三种实例化方式
●使用类构造器实例化(默认无参数)
在类中创建一个无参构造方法,再在spring配置文件中创建一个bean。
●使用静态工厂 方法实例化(简单工厂模式)
创建一个bean类,beanFactory(实例bean用),再在spring配置文件中配置
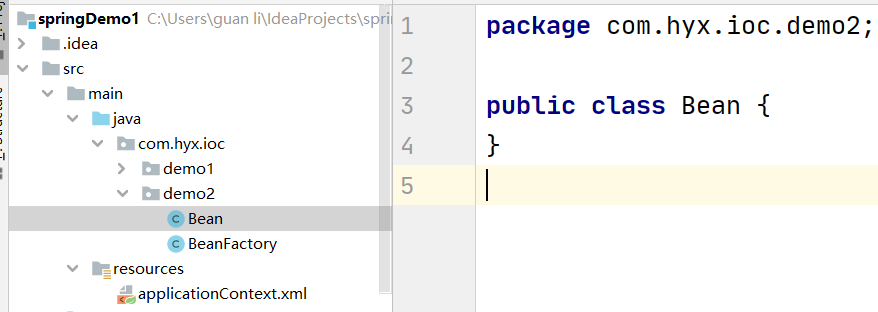
public class BeanFactory {
    public static Bean creatBean2(){
        System.out.println("bean静态实例化");
        return new Bean();
    };
}<?xml version="1.0" encoding="UTF-8"?>
<beans xmlns="http://www.springframework.org/schema/beans"
xmlns:xsi="http://www.w3.org/2001/XMLSchema-instance"
xsi:schemaLocation="http://www.springframework.org/schema/beans http://www.springframework.org/schema/beans/spring-beans.xsd">
<!--静态工厂实例化-->
<bean id="bean" class="com.hyx.ioc.demo2.BeanFactory" factory-method="creatBean2"/>
</beans>●使用实例工厂 方法实例化(工厂方法模式)
创建一个Bean2的类,再创建一个工厂类Bean2Factory,最后spring配置文件中就是相比静态多配置一个工厂类的bean
public class Bean2 {
}
public class bean2Factory {
public Bean2 createBean2(){
System.out.println("实例工厂实例化");
return new Bean2();
}
}
<?xml version="1.0" encoding="UTF-8"?>
<beans xmlns="http://www.springframework.org/schema/beans"
       xmlns:xsi="http://www.w3.org/2001/XMLSchema-instance"
       xsi:schemaLocation="http://www.springframework.org/schema/beans http://www.springframework.org/schema/beans/spring-beans.xsd">
    <!--静态工厂实例化-->
    <bean id="bean" class="com.hyx.ioc.demo2.BeanFactory" factory-method="creatBean2"/>
    <!--实例工厂的实例化-->
    <bean id="bean2Factory" class="com.hyx.ioc.demo2.bean2Factory"/>
    <bean id="bean2" factory-bean="bean2Factory" factory-method="createBean2"/>
</beans>
4.2.2 bean配置的解析
- ●id和name
-般情况下,装配一个Bean时,通过指定一个id属性作为Bean的名称
-id属性在IOC容器中必须是唯一 的
-如果Bean的名称中含有特殊字符,就需要使用name属性
●class
class用于设置一个类的完全路径名称,主要作用是I0C容器生成类的实例
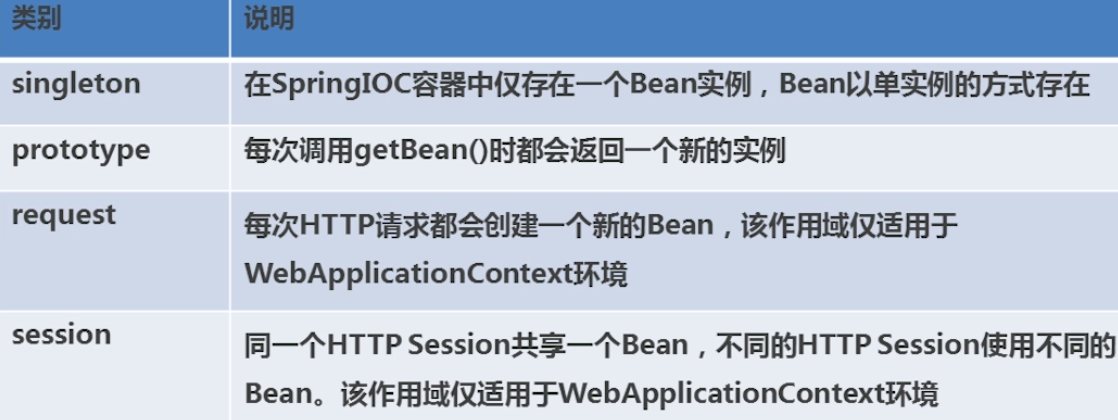
●scope属性 是bean的作用域
4.2.3 Bean生命周期
pring初始化bean或销毁bean时,有时需要做一些处理工作,因此Spring可以在创建和销毁bean的时候调用bean的两个生命周期方法<bean id="abc" class="com.hyx.ioc.demo2.Bean2" init-method="init" destroy-method="destory"/>完整周期:
1. instantiate bean对象实例化
2. populate properties 封装属性,设置属性
3.如果Bean实现BeanNameAware执行setBeanName,设置bean的名称,该类知道自己在spring容器中的名字
4.如果Bean实现BeanFactoryAware或者ApplicationContextAware 设置工厂 setBeanFactory或者上下文对象setApplicationContext ,了解工厂信息
5.如果新建一个类实现BeanPostProcessor (后处理Bean) , 执行postProcessBeforeInitialization,初始化前的方法
6.如果Bean实现InitializingBean执行afterPropertiesSet ,属性设置后执行的方法
7.调用< bean init-method= "init">指定初始化方法init
8.如果存在类实现BeanPostProcessor (处理Bean),执行 postProcessAfterInitialization ,初始化后的方法
9.执行业务处理 ,自己在类中写的业务方法
10.如果Bean实现DisposableBean执行destroy
11.调用< bean destroy-method= "customerDestroy">指定销毁方法 customerDestroy
BeanPostProcessor 第五步和第八步可以对类的方法进行增强,产生代理,返回代理类
4.3 DI依赖注入(xml方式)
依赖就是bean中属性,依赖注入是ioc的具体实现
对于类的成员变量注入有三种方式:
-构造函数注入 -属性setter方法注入 -接口注入 (spring支持前两种方式)
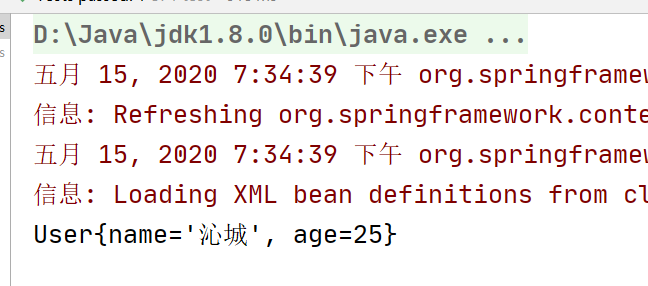
a.构造注入
(通过构造方法注入bean的属性值或依赖的对象,能保证Bean实例在实例化后就能使用)
(构造器注入在<constructor-arg>元素里声明的属性)
<bean id="user" class="com.hyx.ioc.demo3.User">
<constructor-arg name="name" value="沁城"/>
<constructor-arg name="age" value="25"/></bean>
b.setter方法注入
1.)简单类型
<bean id="user" class="com.hyx.ioc.demo3.User">
    <property name="name" value="烟影"/>
    <property name="age" value="23"/>
</bean>
2.)引用类型(就是多配置一个bean,然后再用ref引用该bean)
<bean id="user" class="com.hyx.ioc.demo3.User">
    <property name="name" value="烟影"/>
    <property name="age" value="23"/>
    <property name="sex" ref="sex"/>
</bean>
<bean id="sex" class="com.hyx.ioc.demo3.Sex">
    <property name="sex" value="男"/>
</bean>
3.)运用p命名空间可以简写,需要在头文件中添加
xmlns:p="http://www.springframework.org/schema/p"<bean id="user" class="com.hyx.ioc.demo3.User" p:name="随风" p:age="25" p:sex-ref="sex">
</bean>
<bean id="sex" class="com.hyx.ioc.demo3.Sex" p:sex="男">
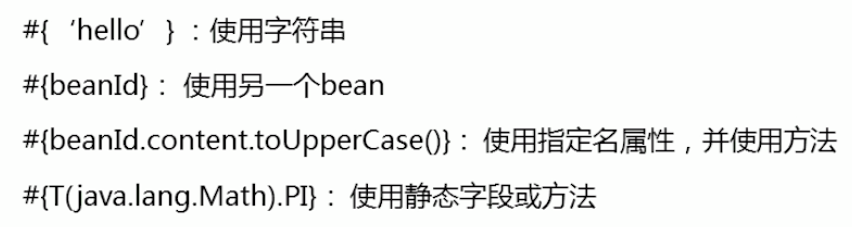
</bean>4.)SpEL注入
●SpEL : (spring expression language ), spring表达式语言,对依赖注入进行简化
●语法: #{表达式}
●<bean id= "" value=" #{表达式}">
3.复杂类型注入(数组,set,list,map,proerties集合)
<!--集合类型的注入-->
<bean name="collection" class="com.hyx.ioc.demo3.CollectionBean">
    <!--数组类型-->
    <property name="arrs">
        <list>
            <value>我是数组</value>
        </list>
    </property>
    <!--list类型-->
    <property name="list">
        <list>
            <value>我是list</value>
        </list>
    </property>
    <!--set类型-->
    <property name="set">
        <set>
            <value>我是set</value>
        </set>
    </property>
    <!--map类型-->
    <property name="map">
        <map>
            <entry key="aaa" value="111"/>
            <entry key="bbb" value="222"/>
        </map>
    </property>
    <!--properties类型-->
    <property name="properties">
        <props>
            <prop key="username">root</prop>
            <prop key="password">root</prop>
        </props>
    </property>
</bean>
4.4使用注解方式配置bean,依赖注入
4.4.1 spring配置的头文件中引入
xmlns="http://www.springframework.org/schema/beans"
       xmlns:xsi="http://www.w3.org/2001/XMLSchema-instance"
       xmlns:context="http://www.springframework.org/schema/context"
       xsi:schemaLocation="
        http://www.springframework.org/schema/beans http://www.springframework.org/schema/beans/spring-beans.xsd
        http://www.springframework.org/schema/context http://www.springframework.org/schema/context/spring-context.xsd">
<!--开起注解扫描-->
<context:component-scan base-package="com.hyx.ioc.demo3"/>
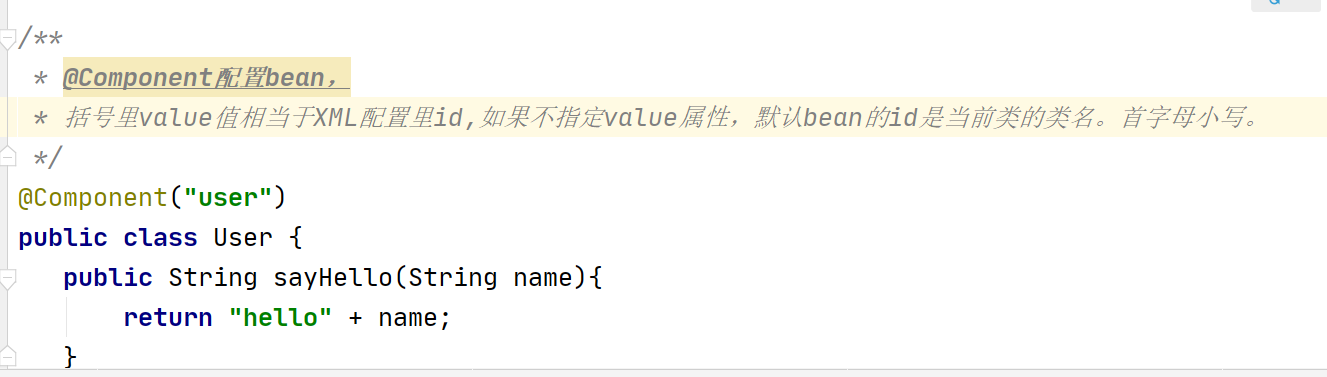
4.4.2 @Component 描述Spring框架中Bean
*除了@Component外,Spring提供了3个基本和@Component等效的注解-@Repository 用于对DAO实现类进行标注-@Service 用于对Service实现类进行标注
-@Controller 用于对Controller实现类进行标注
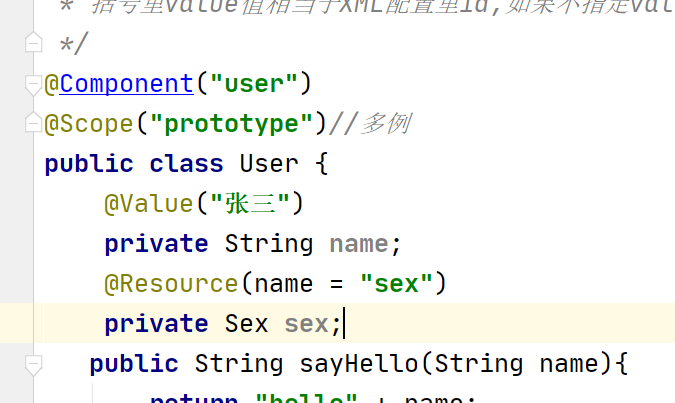
4.4.3 @Value("") 给简单属性的赋值
<context:annotation-config/><!--单独只开启属性注入的注解-->
@Value("张三")
private String name;
4.4.4 @Autowired 属性注入
private String name;
@Autowired //默认是按照类型注入,如果存在两个相同的Bean类型(同一个类),则需要按照名称注入
@Qualifier("sex")     //按照名称注入,再加上@Qualifier指定Bean的名称
private Sex sex;
@Resource和@Autowired注解功能相似,默认按照名称注入
@Resource(name = "sex")
private Sex sex;
4.4.5 @PostConstruct和@PreDestroy(单例有用)
Spring的其他注解:
Spring初始化bean或者销毁bean时,有时需要做一些处理,因此spring可以在创建和拆卸bean的时候调用bean的两个生命周期方法。
4.4.6 @Scope注解用于指定Bean的作用范围
明天计划的事情:学习Spring aop
遇到的问题:今天就创建数据库的表的时候出错,一直打脑壳,结果是在创建表时候没有指定表的编码,导致我插入中文时候报错收获:了解了Spring的结构,以及学习了spring 的Ioc 和DI


评论