一,完成的任务
最近完成了任务11,12和13,对登入页,
护工页,还有桌游精灵页的重构,用到了
css预处理语言sass,之所以选择sass是因为
相对于less来说sass的功能相对完善一些,
它提供了 变量(variables)、
嵌套(nested rules)、 混合(mixins)、
函数(functions)等功能,并且完全兼容
CSS 语法。
在任务中一些基础变量比如设置宽高,字体,
颜色,方位等可以使用混合器来写,灵活方便
@mixin font($font,$black) {
font-size: $font;
color: $black;
}
@mixin wh($width,$weight) {
width: $width;
height: $weight;
}
@mixin pdg($top,$right,$bottom,$left) {
padding-top: $top;
padding-bottom: $bottom;
padding-right: $right;
padding-left: $left;
}
@mixin mg($top,$right,$bottom,$left) {
margin-top: $top;
margin-left: $left;
margin-bottom: $bottom;
margin-right: $right;
}
并且在一些常用样式的重写方面减少了代码量
class2要继承class1,就要使用@extend命令,
在写多个页面样式的时候我用到了
@import命令,用来插入外部文件,其思路是
可以先做一个基础变量的sass文件例如mixin.sass
$s-r: red;
$s-black: black;
$s-f: #fff;
$s-e: #e0bb02;
$s-d: #dadada;
$s-blue: #01bad8;
$s-bl: rgba(1,186,216,0.4);
$s-bl2:rgb(12, 88, 100);
$s-a: #a0a0a0;
$rgb: rgba(255,255,255,0.3);
$bord: 0.1rem solid;
@mixin none {
border: none;
outline: none;
text-decoration: none;
list-style: none;
}
@mixin fixed($top,$bottom) {
position: fixed;
top: $top;
bottom: $bottom;
}
@mixin abs($top,$right,$bottom,$left) {
position: absolute;
top: $top;
right: $right;
bottom: $bottom;
left: $left;
}
@mixin rds($rds) {
border-radius: $rds;
}
然后在子文件中分别调用
@import "mixin.scss";
在做任务13的时候在css架构方面
设置了一个初始化样式reset.css文件
然后还是用到了sass预处理语言同任务12的
方式。
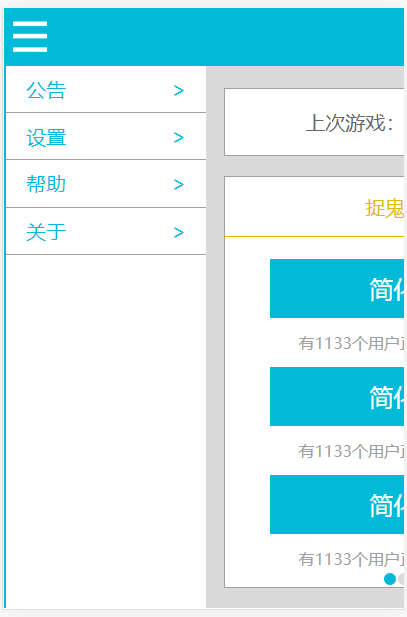
在做首页的时候用纯css做了一个侧边栏模块
用到了
<!-- 导航条 -->
<nav class="m-nav">
<label for="sidemenu">
</label>
</nav>
<!-- 左侧边栏 -->
<input type="checkbox" id="sidemenu">
<aside>
<a href="#"><span>公告</span>></a>
<a href="#"><span>设置</span>></a>
<a href="#"><span>帮助</span>></a>
<a href="#"><span>关于</span>></a>
</aside>
#sidemenu{
display:none;
}
#sidemenu:checked+aside{
left:0;
}
#sidemenu:checked~main{
margin-right:-10rem;
padding-left:10rem;
}
手动渐变轮播模块用到了
<!-- 点击圆点 -->
<div class="container">
<input type="radio" id="pic1" name="pic" checked />
<label for="pic1"></label>
<input type="radio" id="pic2" name="pic" />
<label for="pic2"></label>
<input type="radio" id="pic3" name="pic" />
<label for="pic3"></label>
<input type="radio" id="pic4" name="pic" />
<label for="pic4"></label>
/* 默认选中第一张,根据选中的input,展示对应的图片 */
#pic1:checked ~ .wrap li:nth-of-type(1),
#pic2:checked ~ .wrap li:nth-of-type(2),
#pic3:checked ~ .wrap li:nth-of-type(3),
#pic4:checked ~ .wrap li:nth-of-type(4) {
opacity: 1;
animation: showImg linear 1s 1 0s normal;
}
/* 设置图片展示出来时候的动画 */
@keyframes showImg {
0% {
opacity: 0.2;
}
50% {
opacity: 0.5;
}
100% {
opacity: 1;
}
}
<!-- 箭头切换 -->
<div class="arrow">
<label for="pic1"><div class="u-ico"></div></label>
<label for="pic2"><div class="u-ico"></div></label>
<label for="pic3"><div class="u-ico"></div></label>
<label for="pic4"><div class="u-ico"></div></label>
</div>
/* 根据选中的input设置需要展示哪个右边箭头 */
#pic1:checked ~ .arrow label:nth-of-type(2),
#pic2:checked ~ .arrow label:nth-of-type(3),
#pic3:checked ~ .arrow label:nth-of-type(4),
#pic4:checked ~ .arrow label:nth-of-type(1) {
display: block;
}

二,领取任务14,拆分任务9的样式然后组件化,建组件库。
三,在布局样式grid组件时,有什么好的方法?


评论