发表于: 2019-12-31 18:20:38
2 1070
今天完成的事情:
建立了一个简单的SpringMVC的项目,以后再也不看eclipse的视频做idea的项目了,错误太多,还比较浪费时间,不过看视频也有好处,能跟着他的思路理解每部分代码的作用,比照搬例子的理解效果好一点。
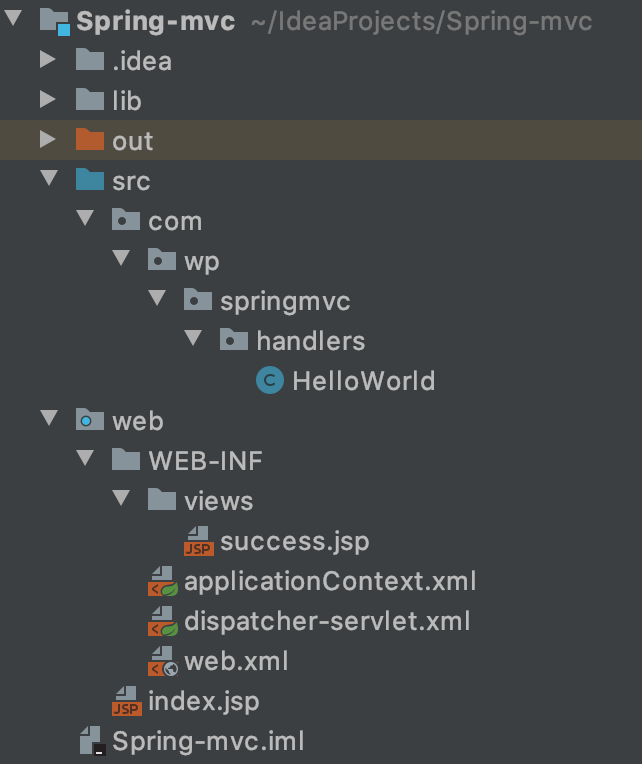
1.项目目录如下
2.代码
1)HelloWorld
package com.wp.springmvc.handlers;

import org.springframework.stereotype.Controller;
import org.springframework.web.bind.annotation.RequestMapping;

@Controller
public class HelloWorld {
    @RequestMapping("/helloworld")
    public String hello(){
        System.out.println("Hello World !");
        return "success";
    }
}
2)web.xml
<?xml version="1.0" encoding="UTF-8"?>
<web-app xmlns="http://xmlns.jcp.org/xml/ns/javaee"
         xmlns:xsi="http://www.w3.org/2001/XMLSchema-instance"
         xsi:schemaLocation="http://xmlns.jcp.org/xml/ns/javaee http://xmlns.jcp.org/xml/ns/javaee/web-app_4_0.xsd"
         version="4.0">
    <listener>
        <listener-class>org.springframework.web.context.ContextLoaderListener</listener-class>
    </listener>
    <servlet>
        <servlet-name>dispatcher</servlet-name>
        <servlet-class>org.springframework.web.servlet.DispatcherServlet</servlet-class>
        <load-on-startup>1</load-on-startup>

    </servlet>
    <servlet-mapping>
        <servlet-name>dispatcher</servlet-name>
        <url-pattern>/</url-pattern>
    </servlet-mapping>
</web-app>
3)dispatcher-servlet.xml
<?xml version="1.0" encoding="UTF-8"?>
<beans xmlns="http://www.springframework.org/schema/beans"
       xmlns:xsi="http://www.w3.org/2001/XMLSchema-instance"
       xmlns:context="http://www.springframework.org/schema/context"
       xsi:schemaLocation="http://www.springframework.org/schema/beans http://www.springframework.org/schema/beans/spring-beans.xsd http://www.springframework.org/schema/context http://www.springframework.org/schema/context/spring-context.xsd">

    <context:component-scan base-package="com.wp.springmvc"></context:component-scan>
    <bean class="org.springframework.web.servlet.view.InternalResourceViewResolver">
        <property name="prefix" value="/WEB-INF/views/"></property>
        <property name="suffix" value=".jsp"></property>
    </bean>
</beans>
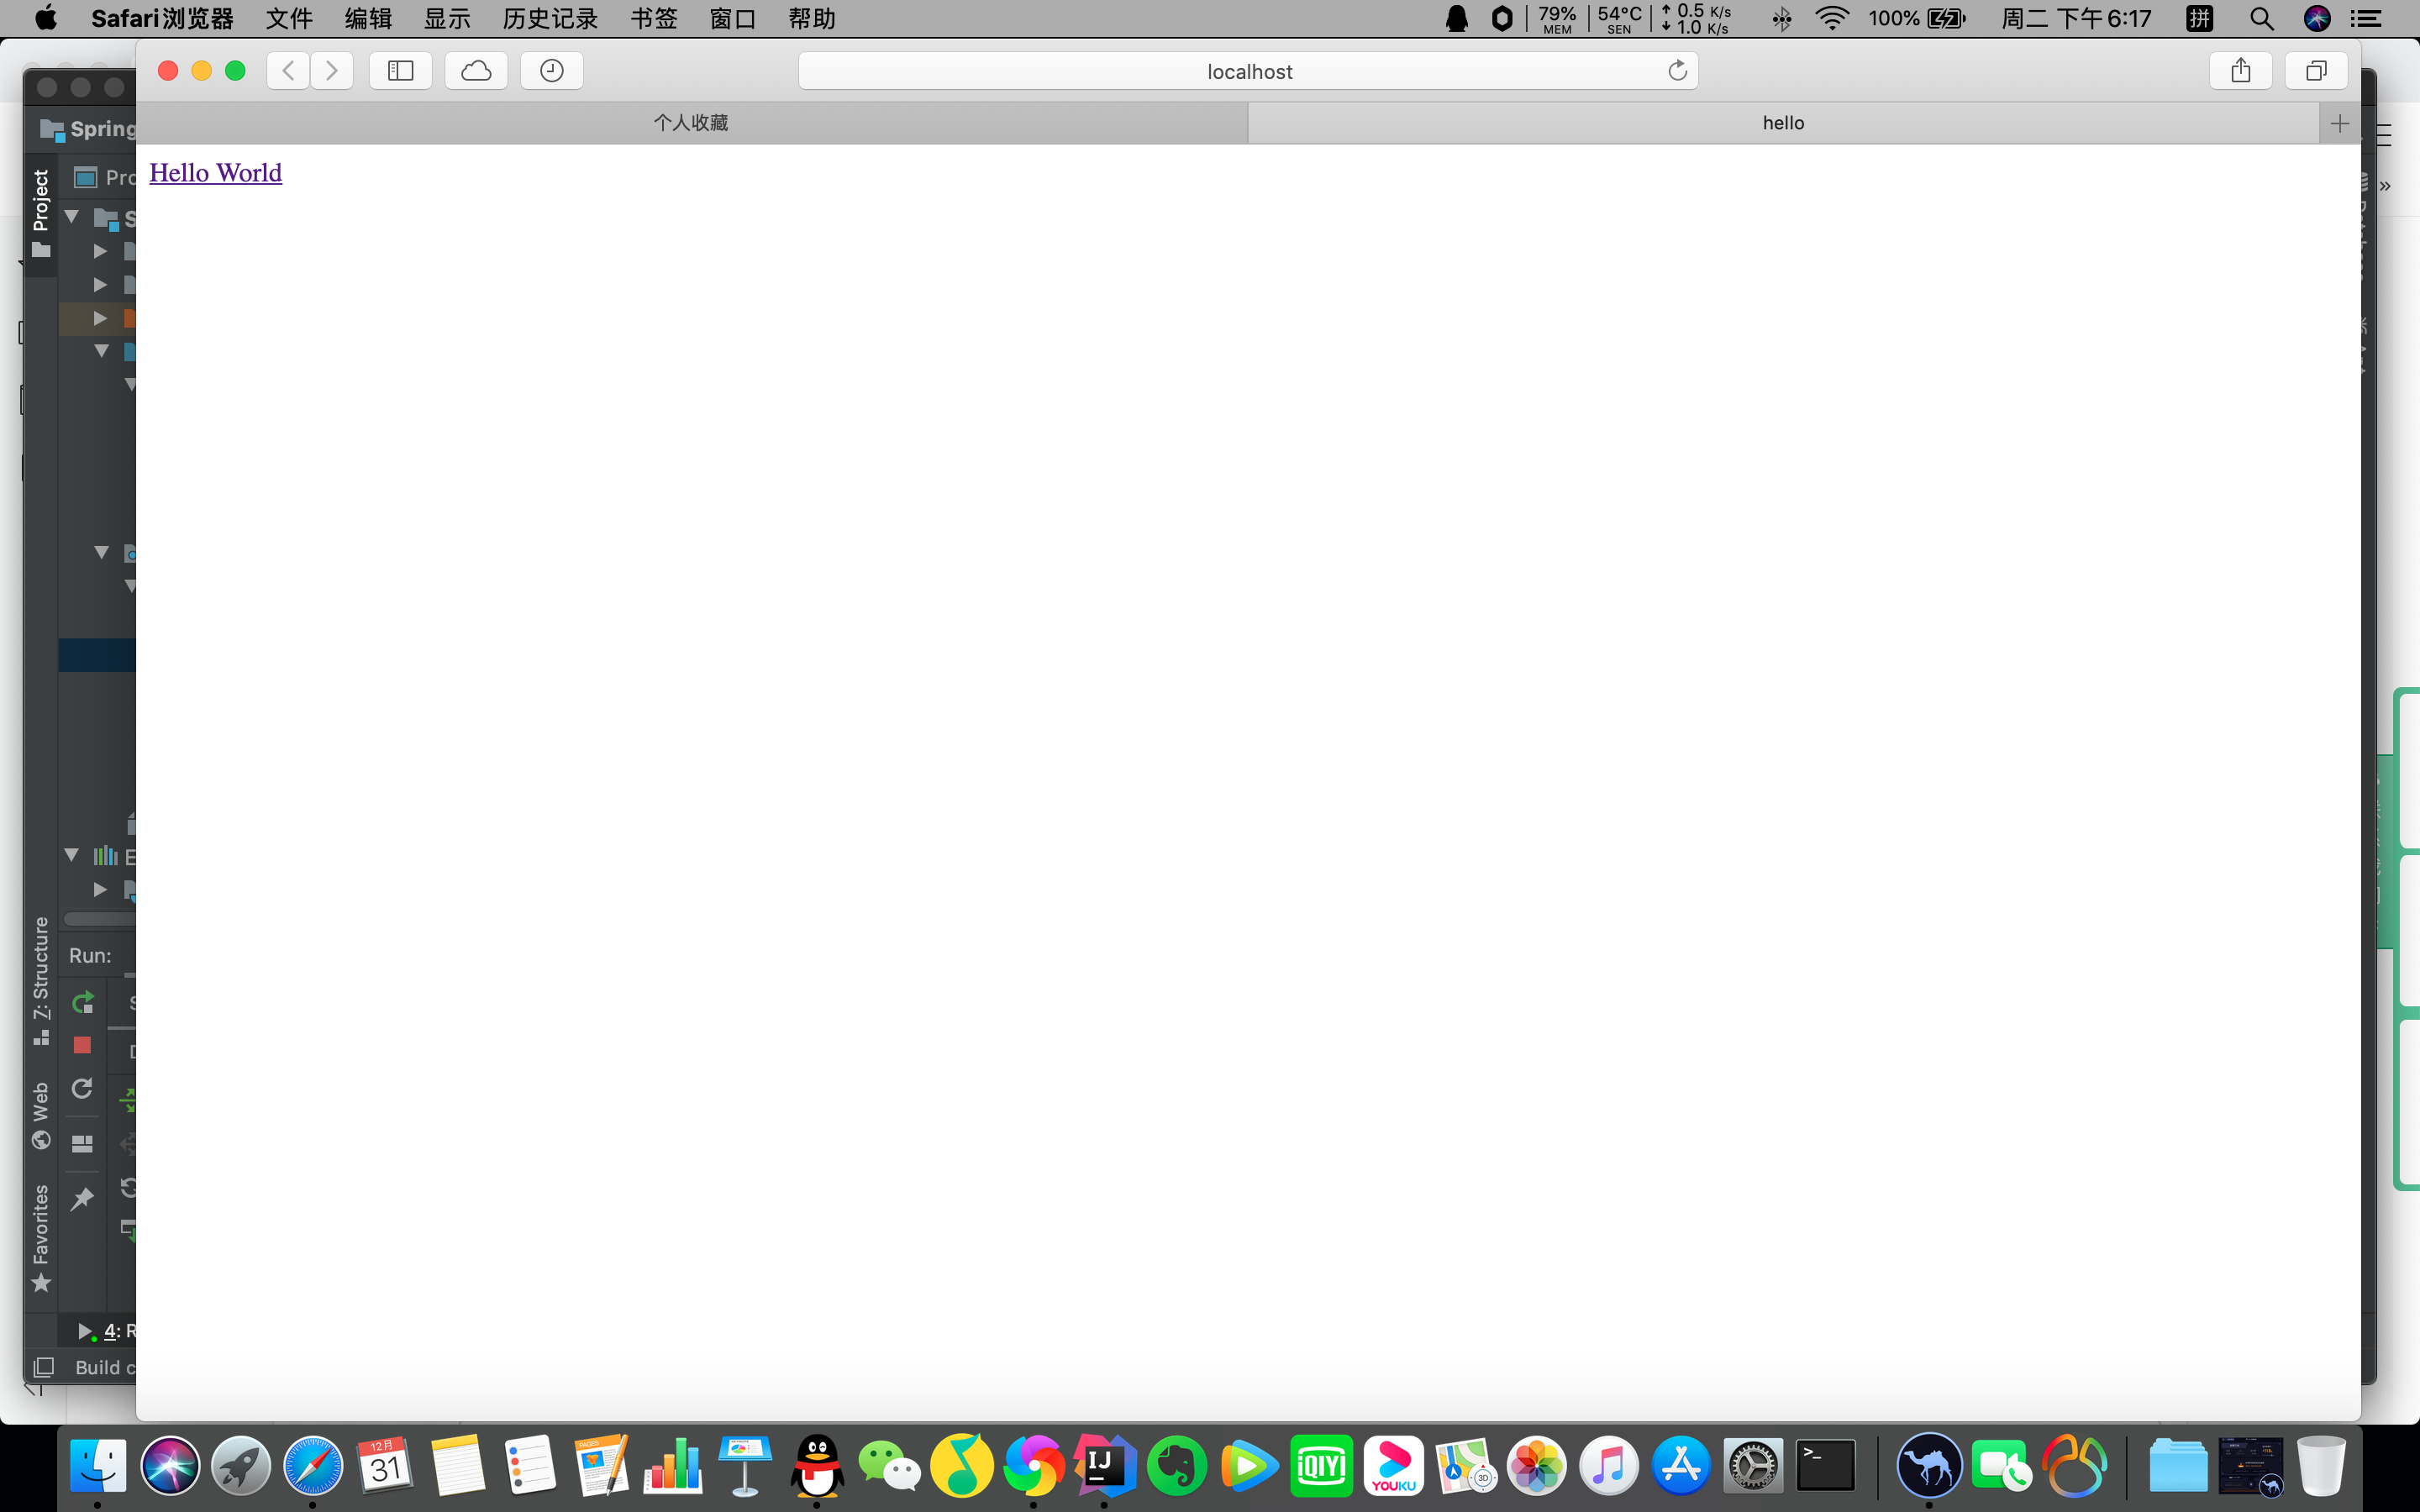
4)index.jsp
<%--
  Created by IntelliJ IDEA.
  User: wangpeng
  Date: 2019/12/30
  Time: 8:41 下午
  To change this template use File | Settings | File Templates.
--%>
<%@ page contentType="text/html;charset=UTF-8" language="java" %>
<html>
<head>
    <title>hello</title>
</head>
<body>
<a href="helloworld">Hello World</a>
</body>
</html>
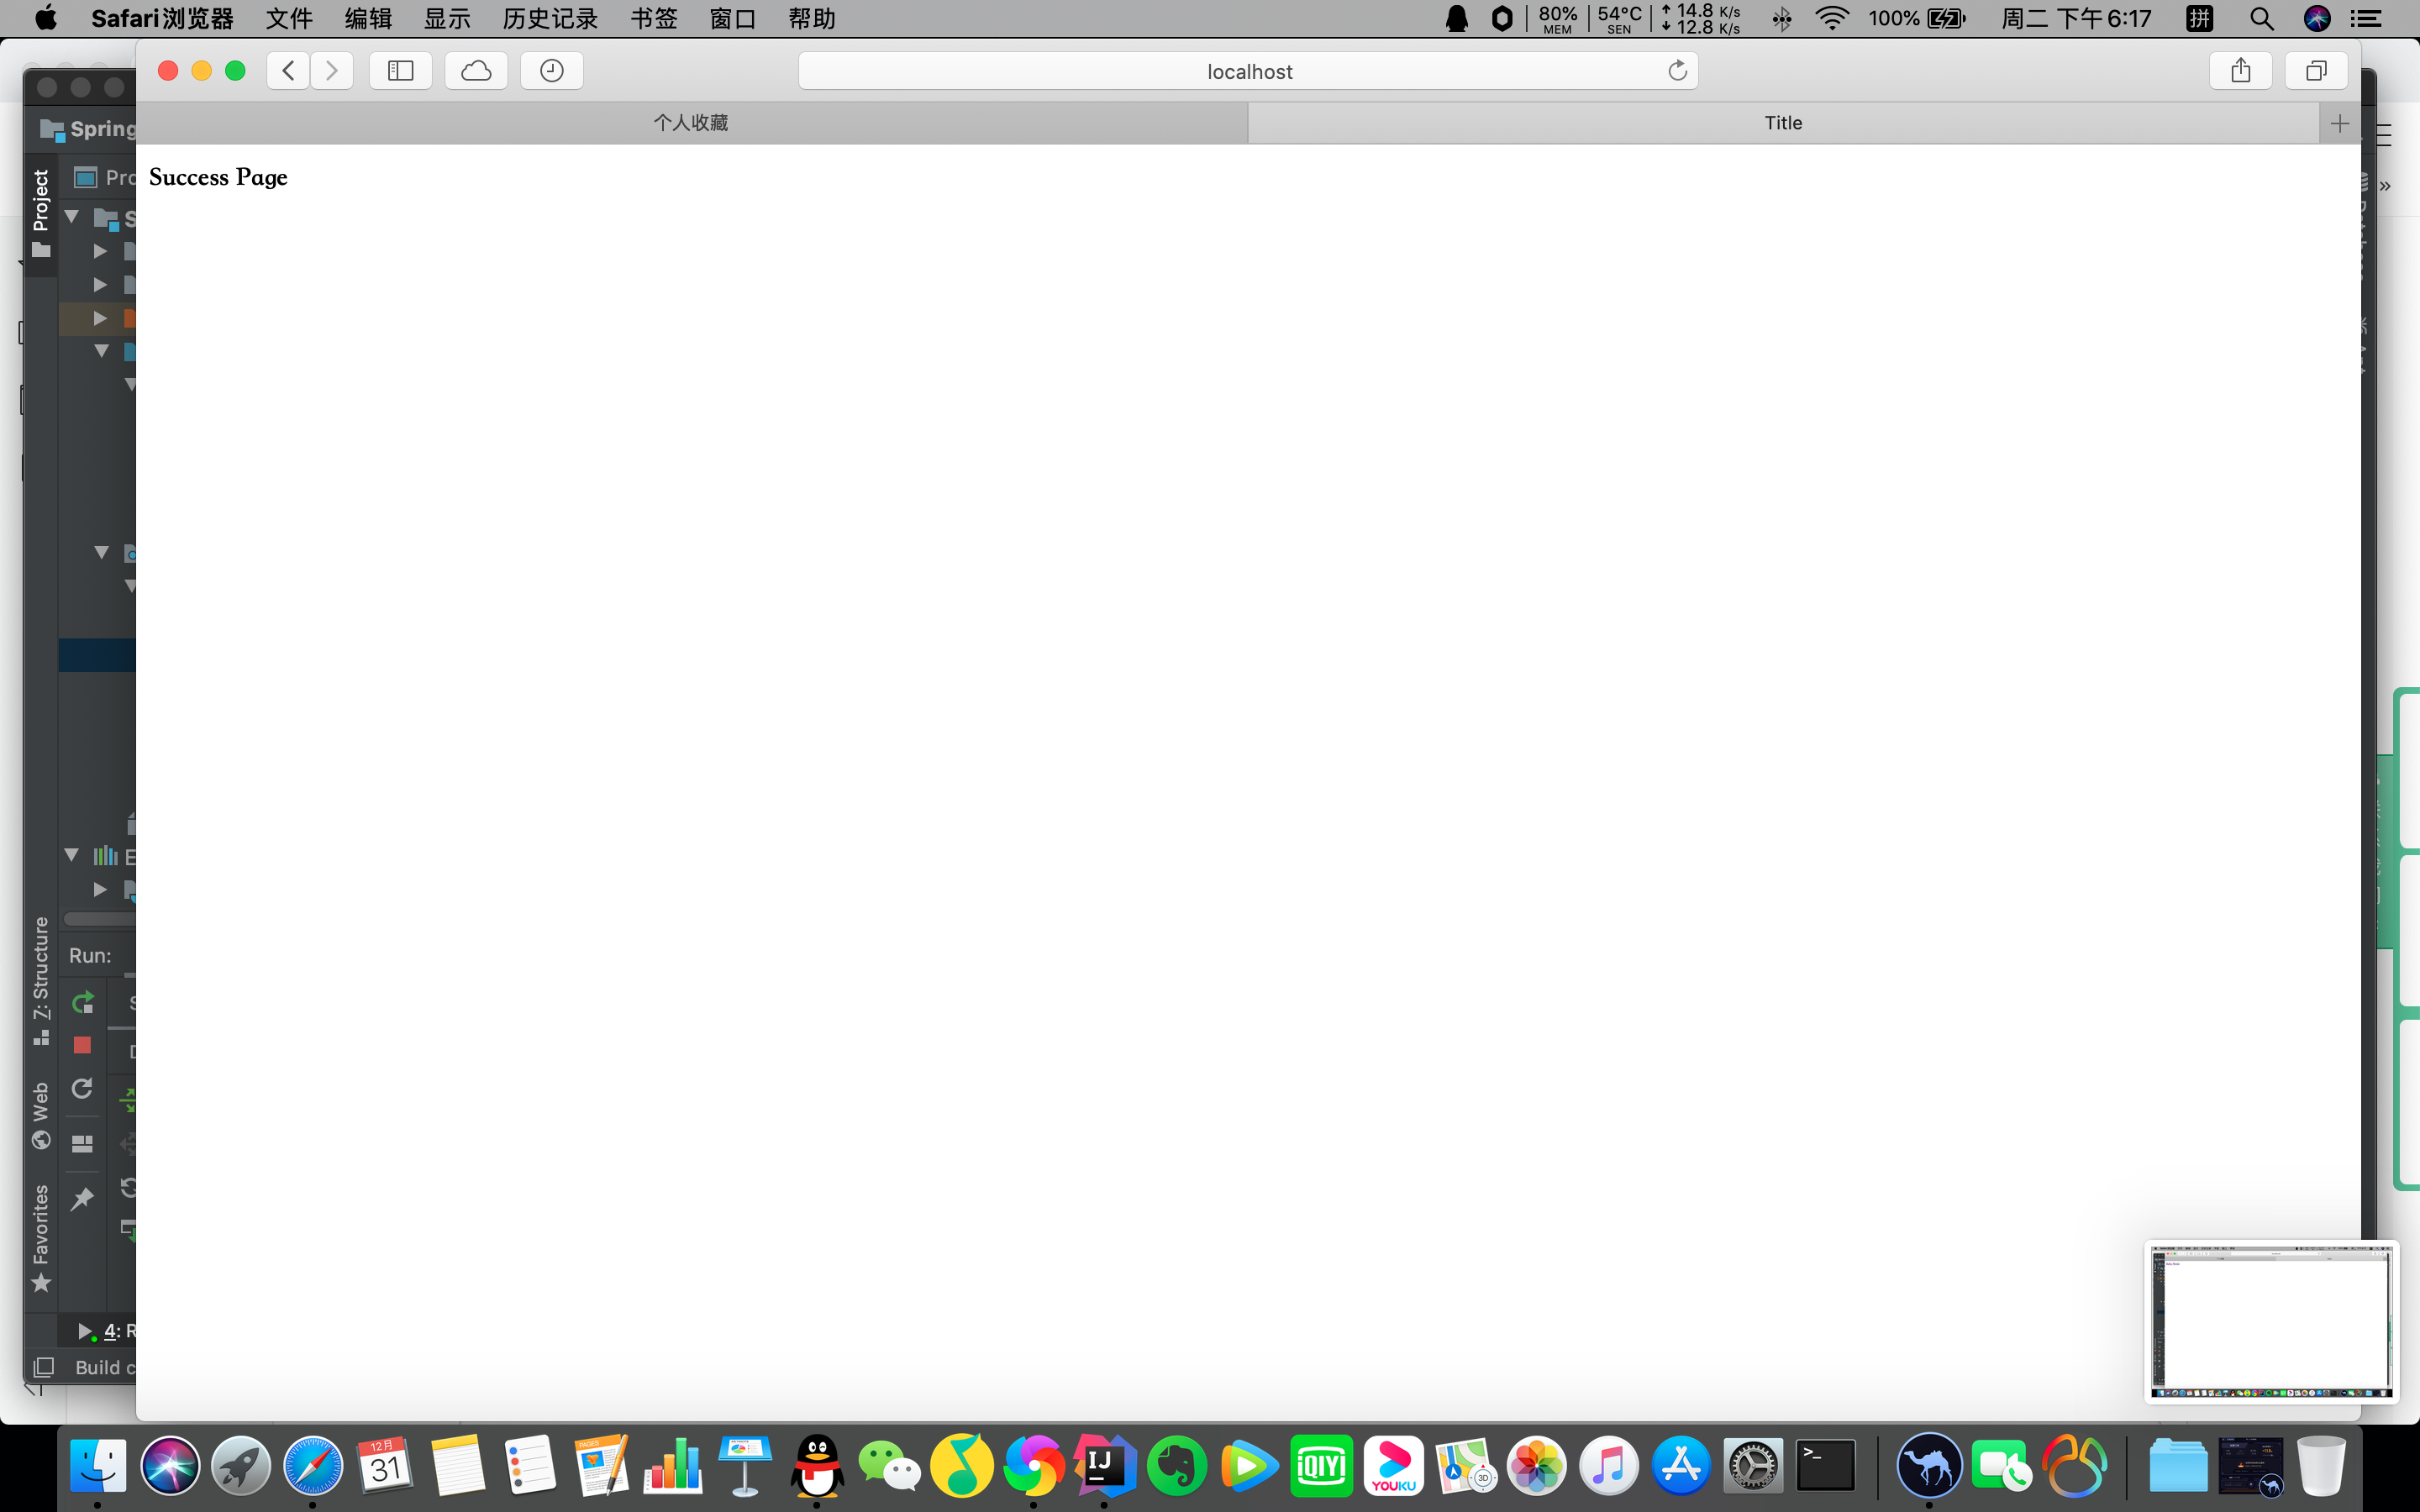
5)success.jsp
<%--
  Created by IntelliJ IDEA.
  User: wangpeng
  Date: 2019/12/31
  Time: 11:07 上午
  To change this template use File | Settings | File Templates.
--%>
<%@ page contentType="text/html;charset=UTF-8" language="java" %>
<html>
<head>
    <title>Title</title>
</head>
<body>
<h4>Success Page</h4>
</body>
</html>
6)运行结果
明天计划的事情:
后天学习servlet,学习写简单的jsp页面。
遇到的问题:
1.第一个问题困扰了我好久,就是运行的时候tomcat不好使,我本以为是没启动,就启动了一下,就好了。
2.好是好了,能运行出tomcat默认界面了,结果别的页面咋整也出不来了。找了一下午的解决办法也没找到,求助了师兄,成功解决,师兄还是厉害哦!
以下是解决办法
1)关闭tomcat
直接就能出来index.jsp页面了,具体原因是什么不知,或许是本来tomcat已经是启动的了,我又启动了一次,可能是两个起了冲突吧。
2)index.jsp页面出来了,可是点击超链接跳转到success.jsp报404异常。
java.lang.ClassNotFoundException: org.springframework.web.context.ContextLoaderListener
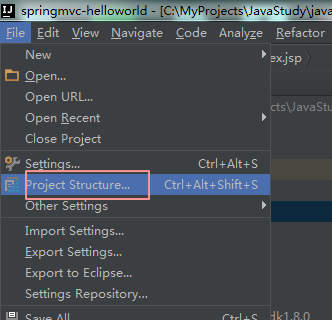
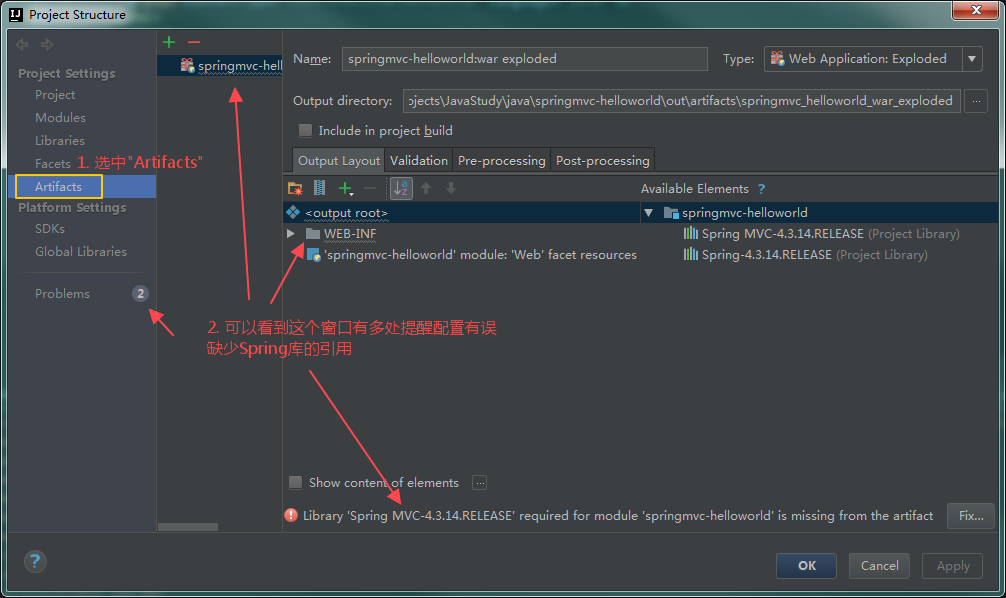
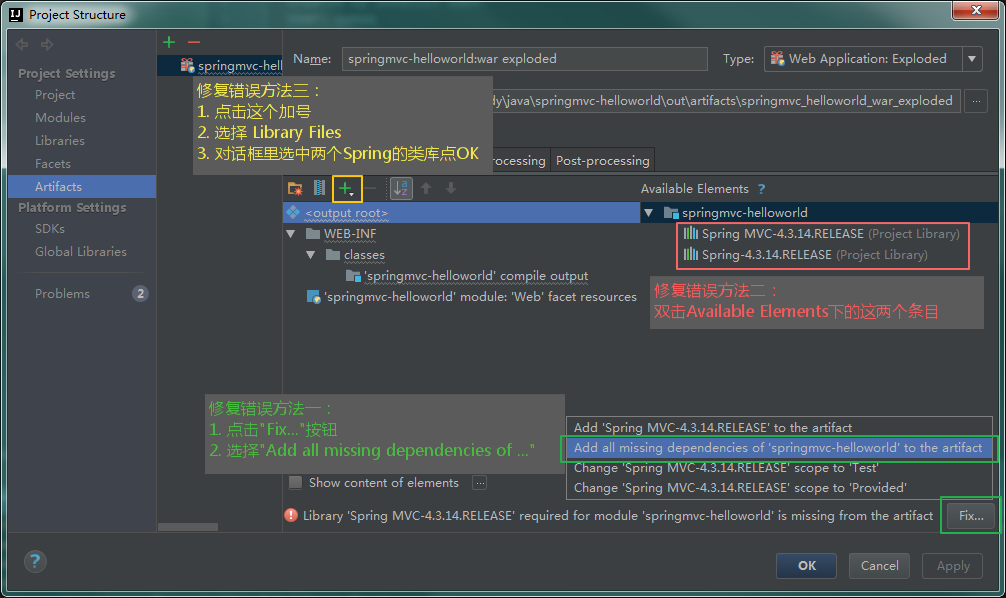
原因是:缺失Spring MVC相关类库的引用
又改了如下的地方:
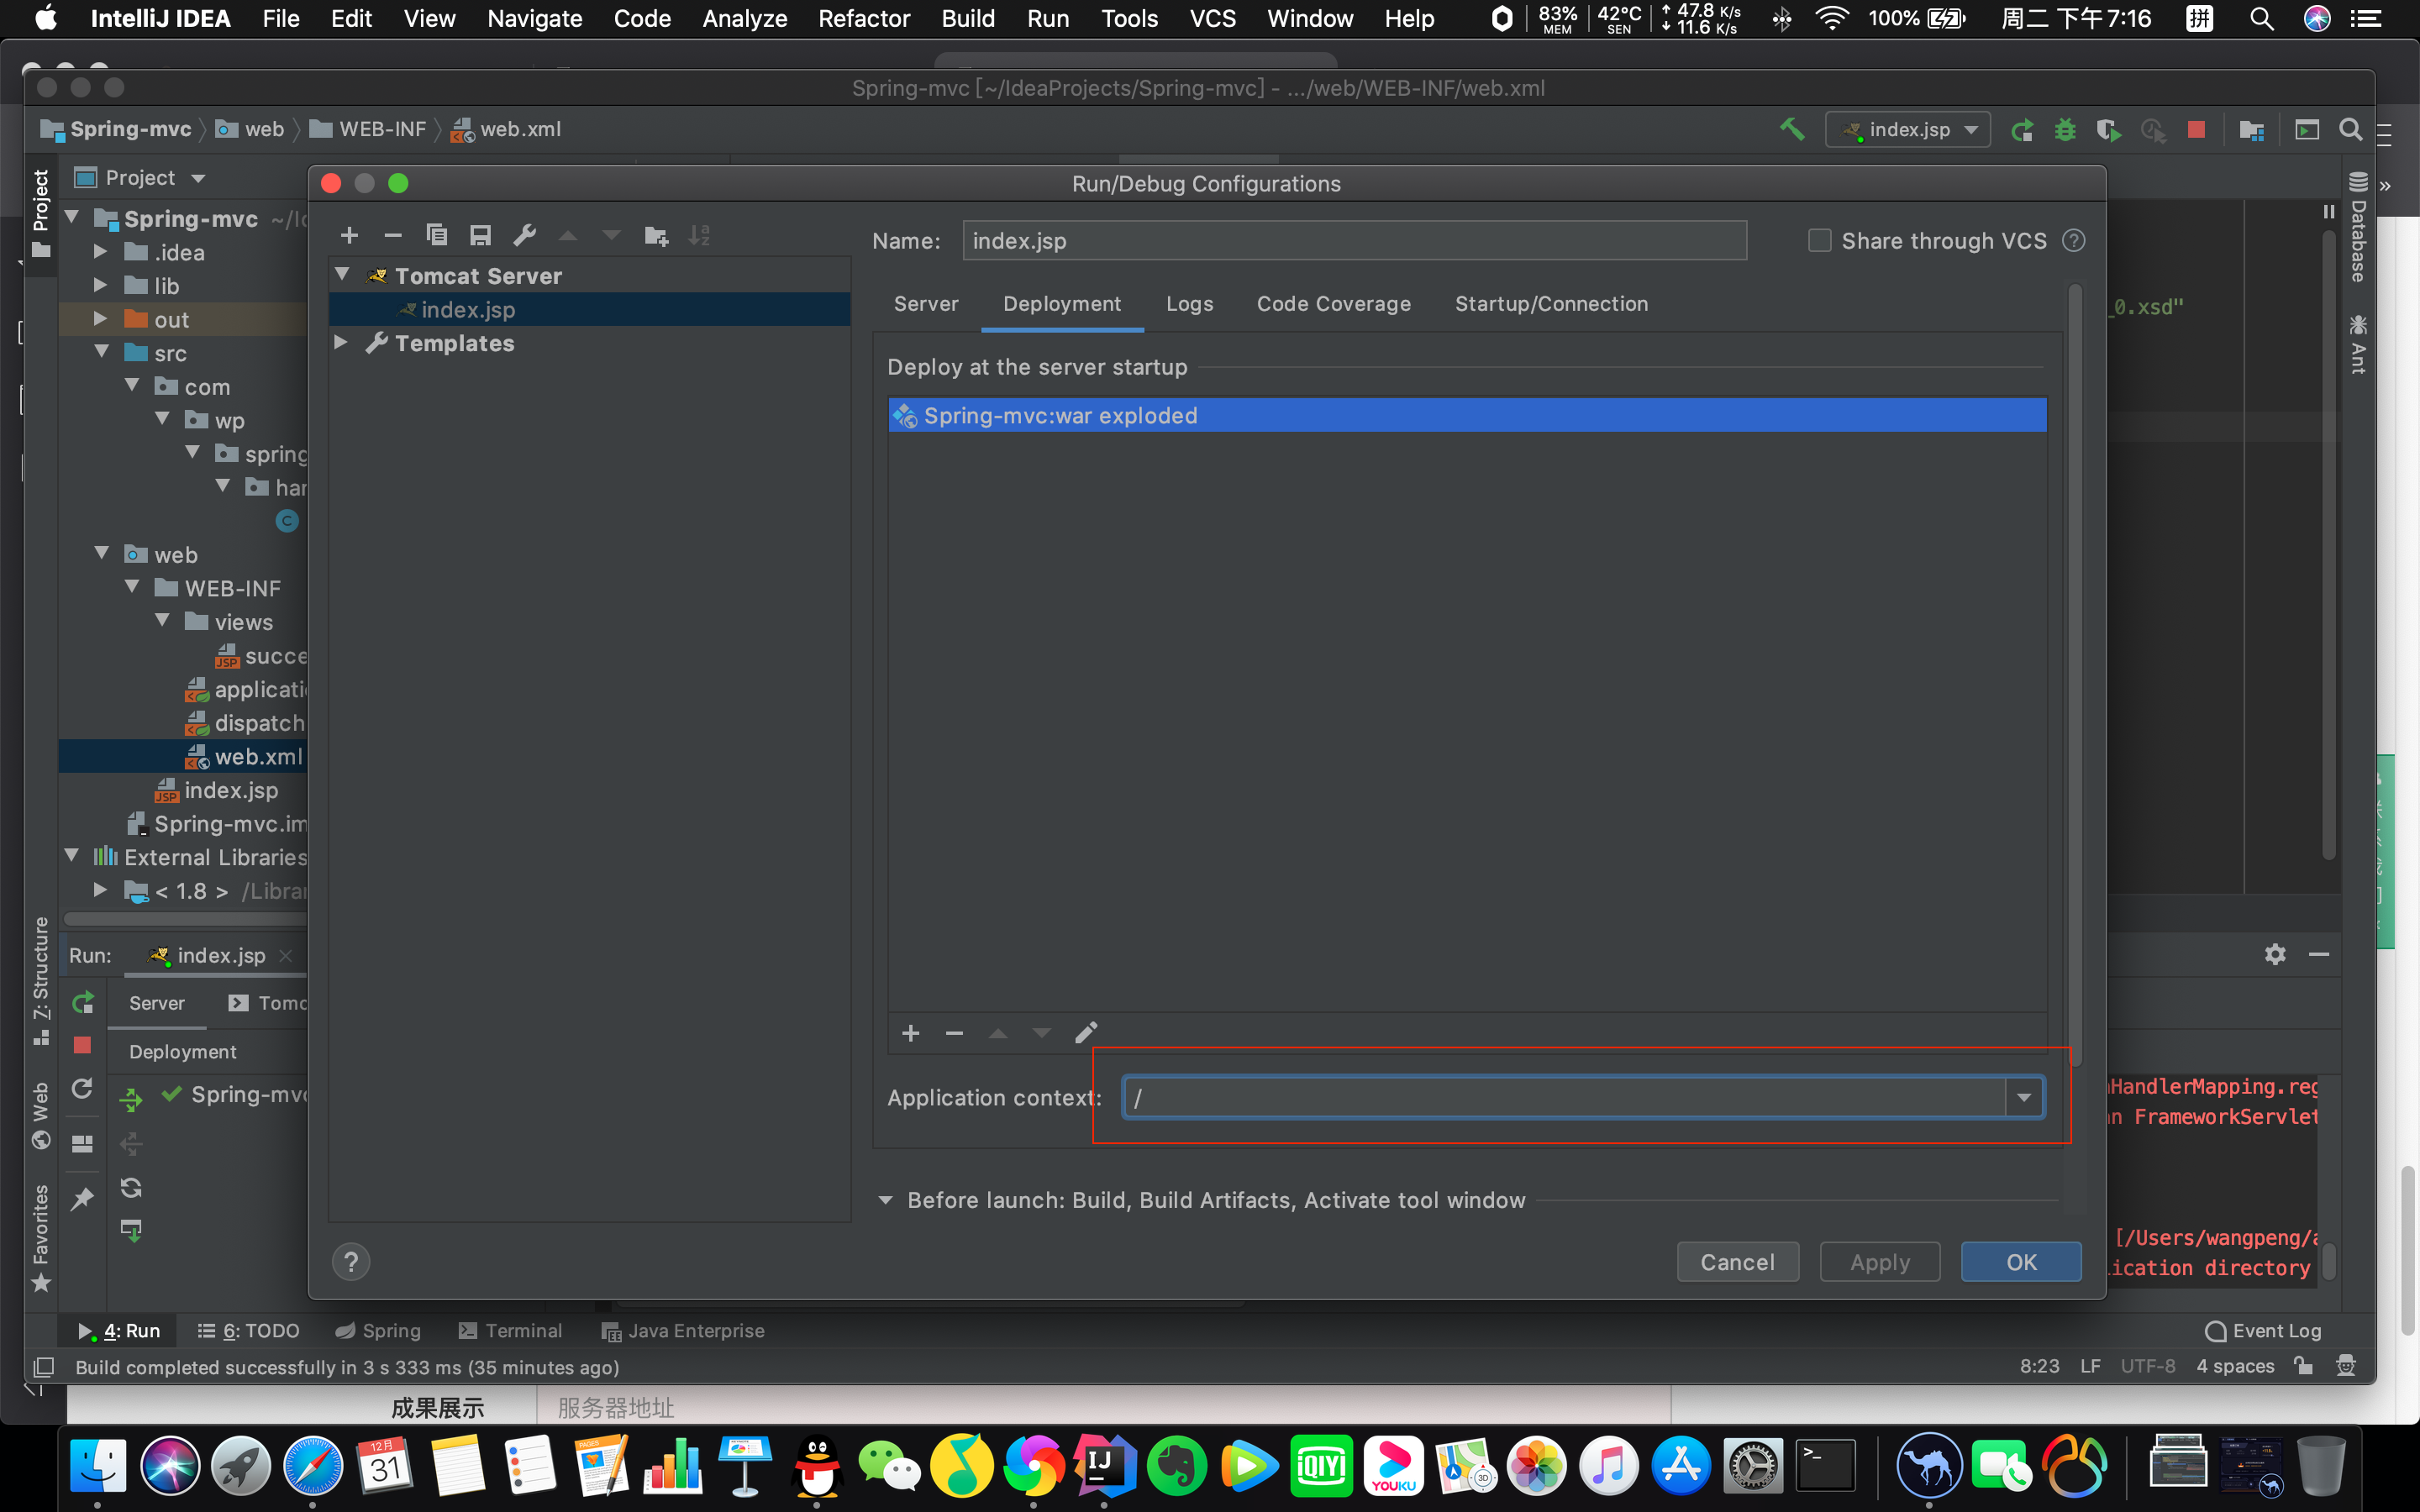
先改了这两个地方:在tomcat的设置中,把图中圈出的地方改成如下这个样子

又在web.xml中加了这个代码
<listener>
       <listener-class>org.springframework.web.context.ContextLoaderListener</listener-class>
   </listener>
不过这行代码对我这个例子来说没什么用,改好之后把这里注释掉一样能运行
最重要的地方来了,这里改好之后就能正常跳转了
收获:
理解了SpringMVC一些代码的功能和配置流程
1.先配置web.xml
配置dispatcherservlet
这里设置/可以应答所有请求
<url-pattern>/</url-pattern>
2.配置请求处理器
标识为@Controller控制器
里面的hello方法需要应答一个请求
使用@RequestMapping ("/helloworld")来映射请求的URL---4
返回一个success,所以要定义一个success.jsp的页面---5
3.配置dispatcher-servlet.xml
1)配置自动扫描的包
<context:component-scan base-package="com.wp.springmvc"></context:component-scan>
2)配置视图解析器:把handler方法的返回值解析为实际的物理视图
<bean class="org.springframework.web.servlet.view.InternalResourceViewResolver">
       <property name="prefix" value="/WEB-INF/views/"></property>
       <property name="suffix" value=".jsp"></property>
   </bean>
会做如下解析:
通过prefix +返回值+ suffix这样的方式得到实际的物理视图,然后做转发操作
/WEB-INF/views/success.jsp
4.在index.jsp创建一个helloword超链接
5.在/WEB-INF/views/目录下建立success.jsp
看视频虽然比较浪费时间,但是会帮你理清整个代码的创建流程,理解代码的作用。


评论