发表于: 2019-10-29 22:07:50
2 1052
啥也不说,就是干!!!
今天完成的事情:
1、Spring 整合Junit
添加相应的依赖:junit、spring-test
<!--Junit Test -->
<dependency>
  <groupId>junit</groupId>
  <artifactId>junit</artifactId>
  <version>4.12</version>
  <scope>test</scope>
  <exclusions>
    <exclusion>
      <groupId>org.hamcrest</groupId>
      <artifactId>hamcrest-core</artifactId>
    </exclusion>
  </exclusions>
</dependency>
<dependency>
  <groupId>org.hamcrest</groupId>
  <artifactId>hamcrest-library</artifactId>
  <version>1.3</version>
  <scope>test</scope>
</dependency>
<dependency>
  <groupId>org.springframework</groupId>
  <artifactId>spring-test</artifactId>
  <version>4.2.6.RELEASE</version>
  <scope>test</scope>
</dependency>
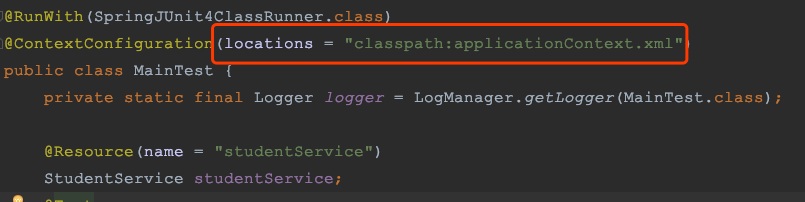
通过 @RunWith 注解,指定 Spring 的运行器:SpringJunit4ClassRunner,此外还需要 @ContextConfiguration 指定 Spring 运行器需要的配置文件路径

在 Test 测试类中获取 ApplicationContext 实例,将 bean 自动装配到其中:
然后就可以使用 StudentService 对象,编写相应的测试方法
2、Spring 之 Spring JDBC 实现
加入相应的依赖包:C3P0、Spring JDBC
<dependency>
  <groupId>com.mchange</groupId>
  <artifactId>c3p0</artifactId>
  <version>0.9.5.1</version>
</dependency>
<dependency>
  <groupId>org.springframework</groupId>
  <artifactId>spring-jdbc</artifactId>
  <version>4.2.6.RELEASE</version>
</dependency>
配置数据源、JDBCTemplate
<context:property-placeholder location="classpath:db.properties"/>
<bean id="dataSource" class="com.mchange.v2.c3p0.ComboPooledDataSource">
    <property name="user" value="${username}"></property>
    <property name="password" value="${password}"></property>
    <property name="jdbcUrl" value="${url}"></property>
    <property name="driverClass" value="${driver}"></property>
</bean>
<bean id="jdbcTemplate" class="org.springframework.jdbc.core.JdbcTemplate">
    <property name="dataSource" ref="dataSource"></property>
</bean>
将 JDBCTemplate 注入到 StudentServiceImpl 中
@Service
public class StudentServiceImpl implements StudentService {
    private Logger logger = LogManager.getLogger(StudentServiceImpl.class.getSimpleName());

    @Resource
    private JdbcTemplate jdbcTemplate;
编写相应的测试用例
@RunWith(SpringJUnit4ClassRunner.class)
@ContextConfiguration(locations = "classpath:applicationContext.xml")
public class MainTest {
private static final Logger logger = LogManager.getLogger(MainTest.class);
@Resource(name = "studentService")
StudentService studentService;
@Test
public void queryStudent() throws PropertyVetoException {
List<Student> students =studentService.queryById(6);
logger.info(students.get(0));}
}
执行测试用例:

由于项目中经常使用 Mybatis,JDBC 其他的方法就不一一实现了
3、Spring 之 Mybatis 实现增、删、改、查
配置 Mybatis-Spring 整合依赖
<dependency>
  <groupId>org.mybatis</groupId>
  <artifactId>mybatis-spring</artifactId>
  <version>1.3.2</version>
  <scope>compile</scope>
</dependency>
将 mybatisConfig.xml 配置的管理交给 Spring IoC 容器,dataSource及 sqlSessionFactory
<bean id="dataSource" class="com.mchange.v2.c3p0.ComboPooledDataSource">
<property name="user" value="${username}"></property>
<property name="password" value="${password}"></property>
<property name="jdbcUrl" value="${url}"></property>
<property name="driverClass" value="${driver}"></property>
</bean>
<!--<!– 配置sqlSessionFactory,SqlSessionFactoryBean是用来产生sqlSessionFactory的 –>-->
<bean id="sqlSessionFactory" class="org.mybatis.spring.SqlSessionFactoryBean">
<!-- 加载mybatis的全局配置文件,放在classpath下的mybatis文件夹中了 -->
<property name="configLocation" value="classpath:mybatis/MybatisConfig.xml"/>
<!-- 加载数据源,使用上面配置好的数据源 -->
<property name="dataSource" ref="dataSource"/>
<!--<property name="mapperLocations" value="classpath*:com/gary/maventutorial/mappers/**/*.xml" />-->
<property name="mapperLocations" value="classpath:mappers/*.xml"/>
</bean>
这样之前的 mybatisConfig.xml 配置文件中就可以简化为:
<?xml version="1.0" encoding="UTF-8" ?>
<!DOCTYPE configuration
        PUBLIC "-//mybatis.org//DTD Config 3.0//EN"
        "http://mybatis.org/dtd/mybatis-3-config.dtd">
<configuration>
    <!-- 开启驼峰映射 ,为自定义的SQL语句服务-->
    <!--设置启用数据库字段下划线映射到java对象的驼峰式命名属性,默认为false-->
    <settings>
        <setting name="mapUnderscoreToCamelCase" value="true"/>
    </settings>

</configuration>
这里采用 Mapper 代理的方式进行实现,因此还需要配置 Mapper 扫描器:
<bean class="org.mybatis.spring.mapper.MapperScannerConfigurer">
    <property name="basePackage" value="com.gerry.jnshu.mapper"/>
    <property name="sqlSessionFactoryBeanName" value="sqlSessionFactory"/>
</bean>
接下来编写代码,首先定义 StudentMapper 类中,增删改查的方法:
@Repository
public interface StudentMapper {

     List<Student> queryStudentById(long id);
     long insertStudentInfo(Student student);
     boolean deleteStudentById(long id);
     boolean updateSloganById(String slogan, long id);

 }
加上 @Repository 交给 Spring IoC 容器进行管理,编写 对应的Mapper.xml 配置文件:
<mapper namespace="com.gerry.jnshu.mapper.StudentMapper">

    <!--<resultMap id="studentRM" type="com.gary.mavenmybatis.entity.Student">-->
        <!--<id property="id" column="id"/>-->
        <!--<result property="name" column="name"/>-->
        <!--<result property="qq" column="qq"/>-->
    <!--</resultMap>-->
    <select id="queryStudentById" parameterType="long" resultType="com.gerry.jnshu.bean.Student">
        SELECT * FROM student WHERE id = #{id}
       </select>
    <insert id="insertStudentInfo" useGeneratedKeys="true" keyProperty="id" parameterType="com.gerry.jnshu.bean. Student">
      INSERT INTO student(name,qq,jnshu_type,join_time,school,online_num,daily_url,slogan,counsellor,known_path)
      VALUES (#{name},#{qq},#{jnshuType},#{joinTime},#{school},#{onlineNum},#{dailyUrl},#{slogan},#{counsello        r},#{knownPath})
       </insert>
    <update id="updateSloganById">
       UPDATE student SET slogan = #{param1} WHERE ID = #{param2}

      </update>
    <delete id="deleteStudentById" parameterType="long">
        DELETE FROM student WHERE  id = #{id}
       </delete>
</mapper>
由于这里 新增方法需要返回主键,用到 Mybatis <select> 标签中 useGeneratedKeys 属性,keyProperty 指定为数据库中主键列 id。
编写相应的 接口及实现类:
StudentService
public interface StudentService {
    List<Student> queryById(long id);
    long insertInfo(Student student) throws Exception;
    boolean deleteById(long id);
    boolean updateSloganById(String slogan, long id);
}
StudentServiceImpl
@Service("studentService")
public class StudentServiceImpl implements StudentService {

   Logger logger = LogManager.getLogger(StudentServiceImpl.class.getSimpleName());
    @Resource
    private StudentMapper studentMapper;
    public StudentServiceImpl() {
   }
       public List<Student> queryById(long id) {
               logger.info("-------->"+id);
        return studentMapper.queryStudentById(id);
    }
       public long insertInfo(Student student) throws Exception{
               return studentMapper.insertStudentInfo(student);
    }
       public boolean deleteById(long id) {
               return studentMapper.deleteStudentById(id);
    }
       public boolean updateSloganById(String slogan, long id) {
               return studentMapper.updateSloganById(slogan,id);
    }
}
加上 @Service 注解,交给 Spring IoC 容器,编写测试类:
@RunWith(SpringJUnit4ClassRunner.class)
@ContextConfiguration(locations = "classpath:applicationContext.xml")
public class MainTest {
    private static final Logger logger = LogManager.getLogger(MainTest.class);

    @Resource(name = "studentService")
   StudentService studentService;
    @Test
    public void queryStudent() throws PropertyVetoException {
       List<Student> students =studentService.queryById(1);
        if(students.size()>0){
                      logger.info("查询结果----->"+students.get(0));
        }
              else{
                      logger.info("查询结果为空");
        }
   }
       @Test
    public void insertStudent(){
       Student student = new Student();
        student.setName("高世豪2");
        student.setJnshuType("JavaWeb");
        student.setOnlineNum("007");
        student.setDailyUrl("http://www/test.com");
        student.setCounsellor("令狐冲");
        try {
                       studentService.insertInfo(student);
        } catch (Exception e) {
                       logger.error(e.getMessage());
        }
   }
       @Test
    public void deleteStudentById(){
               boolean flag =  studentService.deleteById(2);
        logger.info("删除结果---->"+flag);
    }
       @Test
    public void updateStudentById(){
               boolean flag = studentService.updateSloganById("加油学习!!!",1);
        logger.info("更新结果---->"+flag);
    }
}
到这里,Spring 实现 JDBC、Mybatis 两种方式的增删改查完结了,剩下的就是远程部署的部分。
明天计划的事情:
任务一剩下的部分
遇到的问题:
暂无
收获:
学习了 Spring 与Junit,JDBC,Mybatis 的整合,以及Mybatis 常用标签的简单使用。代码已上传至coding.net 仓库


评论